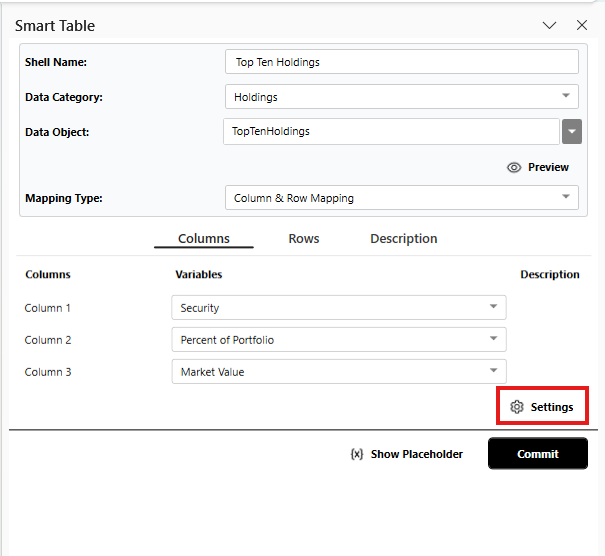
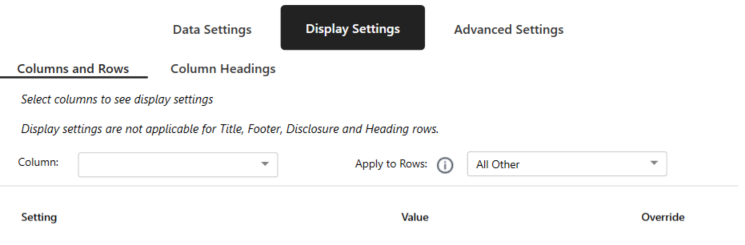
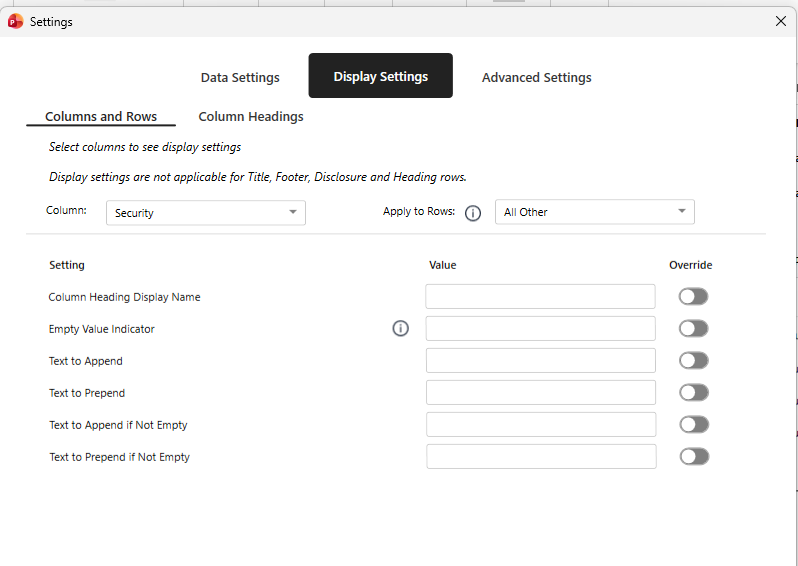
The Display Settings tab in the Settings screen provides users with configuration options that control how fabricated data is displayed within a Smart Shell. These settings allow users to adjust both column- and row-level display behavior, as well as modify how column headings are shown. The Display Settings tab contains two sub-sections: Columns and Rows and Column Headings.
Columns and Rows #
The Columns and Rows section allows users to configure how data values appear in individual cells and columns. These options apply to data tables and other structured outputs where users need precise control over how content is formatted or presented.
If the output type is a string value for the column, the below settings are made available.
From this section, users can:
- Column Heading Display Name Lets you override the default column title. Use this when you want a more user-friendly or context-specific label to appear in the output.
- Empty Value Indicator Defines what should be shown when there is no data (e.g., “N/A”, “–”). Helps avoid blank spaces and keeps the output consistent.
- Text to Append Adds text at the end of the value. Useful for units or labels (e.g., “%”, “USD”, “years”).
- Text to Prepend Adds text at the beginning of the value. Commonly used for symbols or prefixes (e.g., “$”, “≈”).
- Text to Append if Not Empty Appends text only when a value exists. Prevents unnecessary text from appearing when the field is empty.
- Text to Prepend if Not Empty Prepends text only when a value exists. Ensures clean formatting without extra characters for empty fields.
If the output type is a decimal or a numerical value for the column, the below settings are made available.
- Column Heading Display Name Overrides the default column title with a custom label.
- Empty Value Indicator Defines what to display when there is no value (e.g., “N/A”, “–”).
- Number of Decimal Places Controls how many digits appear after the decimal point.
- Magnitude to Display Adjusts how values are scaled (e.g., thousands, millions) for easier readability.
- Show Thousands Separator Adds separators (e.g., commas) to large numbers for better clarity.
- Show Absolute Values Displays values without their sign (removes positive/negative signs).
- Show “%” Symbol Adds a percentage symbol to the value.
- Show Space Between Percentage Symbol and Number Controls whether there is a space between the number and the “%” symbol.
- Format as Percent Converts the value into percentage format (e.g., 0.25 → 25%).
- Show Negative Numbers in “()” Displays negative values within brackets instead of using a minus sign.
- Show Percentage Symbol inside Brackets When using brackets for negatives, controls whether the “%” appears inside the brackets.
- Show Space Between Number and Sign Symbol Adds spacing between the number and its sign (e.g., + / –).
- Use “-” to Indicate Negative Numbers Uses a minus sign to represent negative values.
- Use “+” to Indicate Positive Numbers Adds a plus sign for positive values.
- Font Color for Negative Numbers Allows setting a specific color (e.g., red) for negative values.
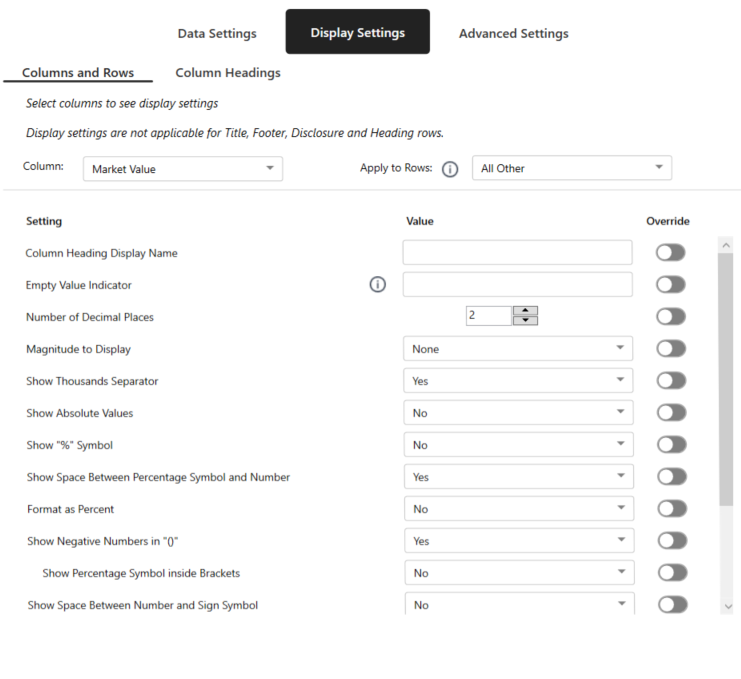
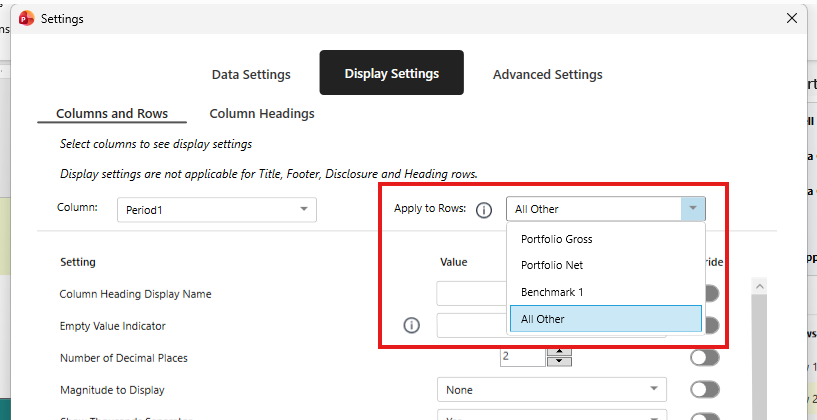
Apply to Rows allows you to control how display settings are applied across different rows within a column. You can either apply the same formatting to all rows, or selectively target specific rows (such as Portfolio Gross, Portfolio Net, or Benchmark) when different formatting is required. This is useful in cases where certain rows need to be displayed differently, like percentages for one row and absolute values for another, without affecting the rest.
Column Headings #
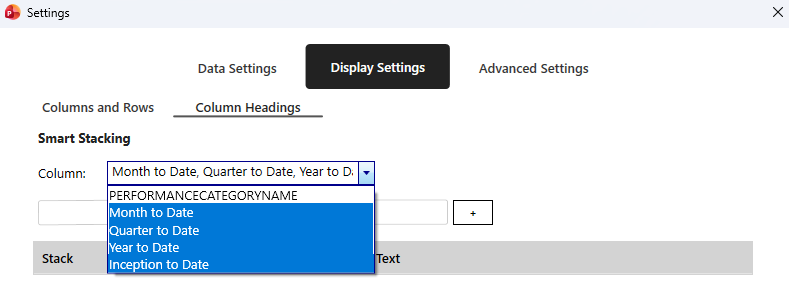
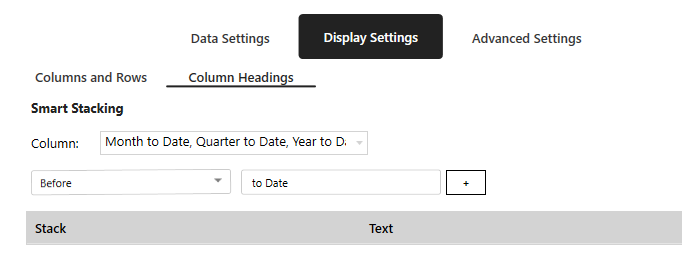
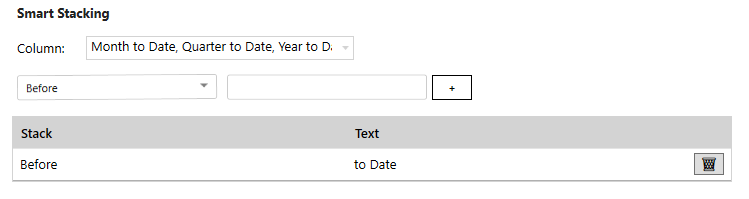
The Column Headings section allows users to control how column header text is organized. This includes customization of column naming conventions and the application of Smart Stacking, a feature that determines how column headings are split or wrapped for improved readability.
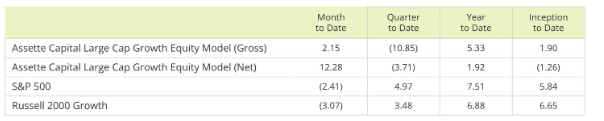
Smart Stacking enables users to define how multi-word column headers are displayed. For example, a column titled “Since Inception” can be formatted as “to Date” by using Smart Stacking to insert a line break or separator between the two words.
To configure Smart Stacking:
- Select a column from the dropdown list.
- Choose a stack position (like Before or After).
- Enter the text that should appear in the designated position.
- Use the Add (+) button to apply the change or the Delete (🗑️) icon to remove it.
Example for Smart Stacking
before smart stacking, the output;
Smart stacking setup;
Selecting the applicable columns.
Appying the rule by saying break before a particular text.
Selecting plus icon to confirm the settings.
after smart stacking, the output;