1 Introduction #
This guide describes how to configure Single Sign-On (SSO) between Assette and Microsoft Entra ID (formerly Azure Active Directory) using the SAML 2.0 protocol. It covers three main configuration areas:
- Creating an Enterprise Application in Microsoft Entra ID
- Creating Application Roles to map Assette permissions
- Assigning Users and Groups to Assette from Microsoft Entra ID
| 📘 Note: Microsoft has rebranded Azure Active Directory (Azure AD) to Microsoft Entra ID. The Microsoft Entra admin center is available at https://entra.microsoft.com. References to “Azure AD” in older documentation are equivalent to “Microsoft Entra ID”. When SSO is enabled, users are not required to enter a username or password to access the system. However, please note that third-party users – such as members of the Assette team, will be unable to access the tenant via SSO unless they have been provisioned with a guest account. If your organization’s security policy does not permit guest access, it is recommended that SSO be enabled following the implementation stage. This approach helps facilitate troubleshooting and contributes to a smoother, more efficient implementation process. |
📎 Microsoft KB Reference: Enable SAML single sign-on for an enterprise application – Microsoft Learn
2 Creating Enterprise Application in Microsoft Entra ID #
Step I – Open Enterprise Applications #
Sign in to the Microsoft Azure portal and open Microsoft Entra ID service. In the left navigation, browse to Manage > Enterprise applications, or use the top search bar and search for Enterprise Applications.

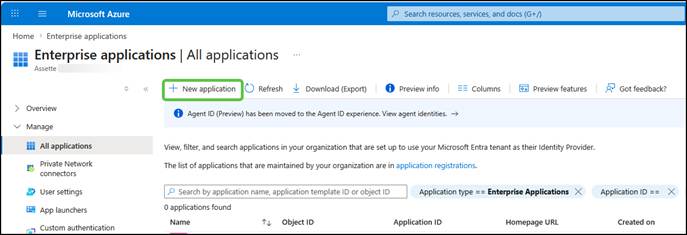
Step II – Create a New Application #
In the Enterprise Applications page, click + New Application.
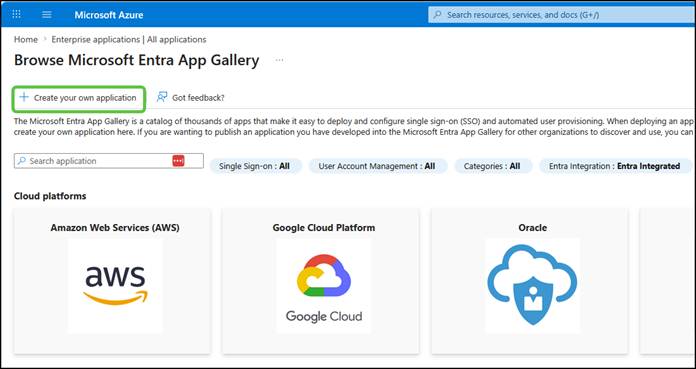
Step III – Browse the Entra ID Gallery #
In the Browse Microsoft Entra Gallery page, click + Create your own application.
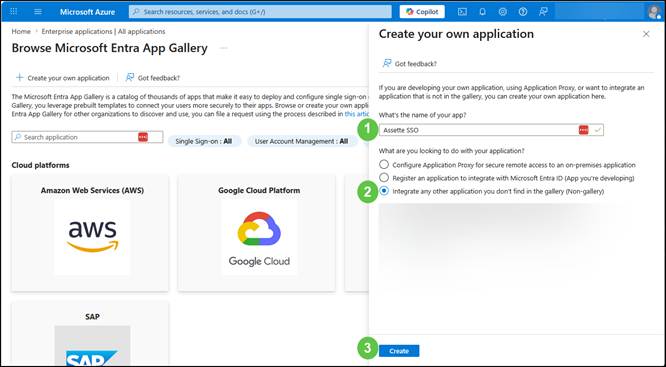
Step IV – Configure the New Application #
In the Create your own application panel:
- Name: Enter a name for the application (e.g., Assette SSO)
- For “What are you looking to do with your application?”, select Integrate any other application you don’t find in the gallery (Non-gallery)
- Click Create. The application will be created, and you will be redirected to its overview page.
| 📘 Note: It may take a few seconds for the new application to be created. Once created, you will be automatically redirected to the application overview page. |
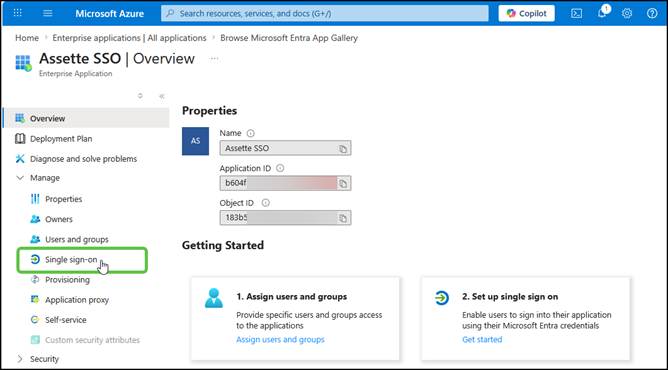
Step V – Open Single Sign-On Settings #
In the newly created application overview page, under Manage in the left navigation, click Single sign-on.
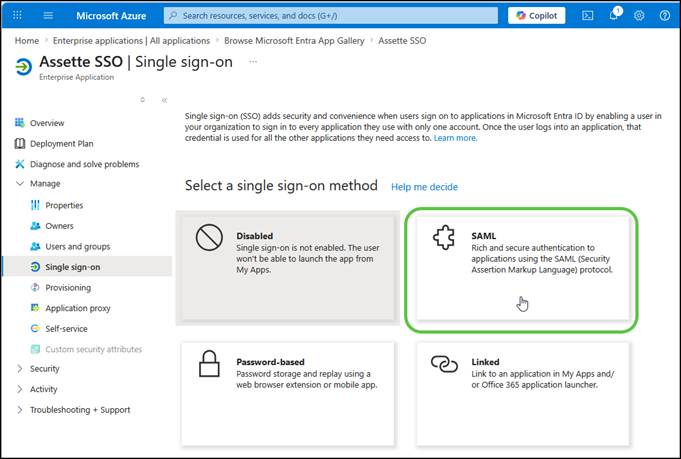
Step VI – Select SAML as the Sign-On Method #
On the Single sign-on method selection page, click SAML. This will load the Set up Single Sign-On with SAML page.
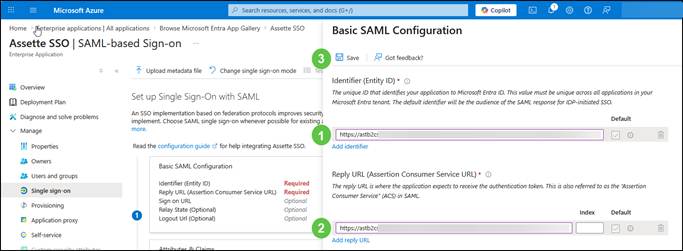
Step VII – Begin Basic SAML Configuration #
On the Set up Single Sign-On with SAML page, locate Step 1 – Basic SAML Configuration and click Edit.

Step VIII – Enter Entity ID and Reply URL #
Provide the Identifier (Entity ID) and Reply URL (Assertion Consumer Service URL) values supplied by Assette, using the Add buttons. Then click Save.
| 📘 Note: The Identifier (Entity ID) and Reply URL values are provided by Assette during the SSO onboarding process. Contact Assette support if you do not have these values. |
📎 Reference: Basic SAML Configuration – Microsoft Learn
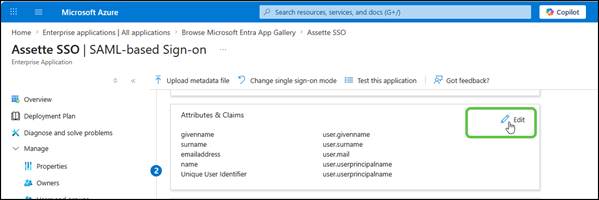
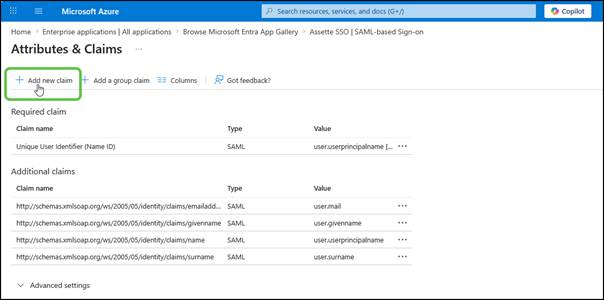
Step IX – Edit Attributes & Claims #
Go back to the Set up Single Sign-On with SAML page. Under Step 2 – Attributes & Claims, click Edit, then click + Add new claim.
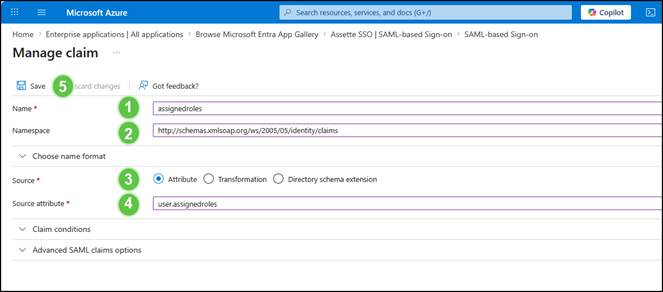
Step X – Add the assigned roles Claim #
In the Manage claim panel, enter the following values and click Save:
| Field | Value |
| Name | assignedroles |
| Namespace | http://schemas.xmlsoap.org/ws/2005/05/identity/claims |
| Source | Attribute |
| Source attribute | user.assignedroles (select from dropdown) |
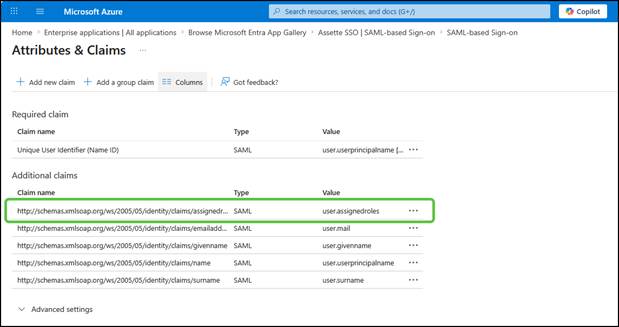
After saving, the claim will appear in the Additional claims list as shown below:
📎 Reference: Add app roles and get them from a token – Microsoft Learn
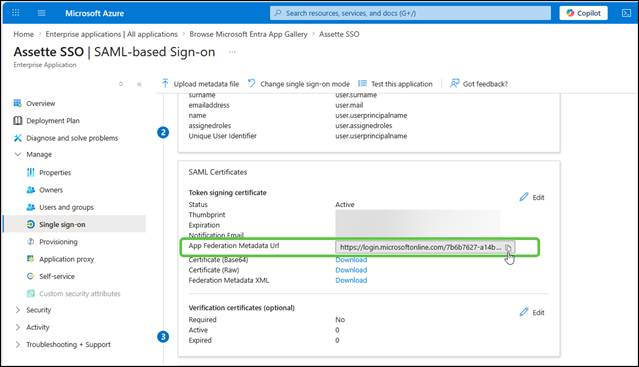
Step XI – Copy the App Federation Metadata URL #
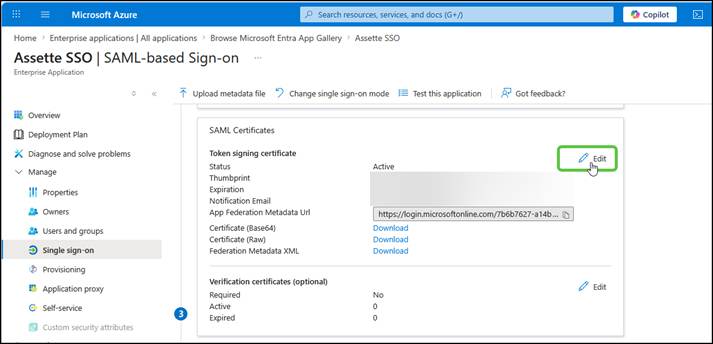
Return to the Single Sign-On Set with SAML page. Under Step 3 – SAML Certificates, locate the Token signing certificate section and copy the App Federation Metadata Url. Share this URL with Assette.
Step XII – Configure Token Signing Certificate #
Click Edit under the Token signing certificate section. Set the following values and click Save:
| Setting | Value |
| Signing Option | Sign SAML response and assertion |
| Signing Algorithm | SHA-256 |
| 📘 Note: SHA-256 is the recommended signing algorithm. Using SHA-1 is considered weak and should be avoided for new configurations. |
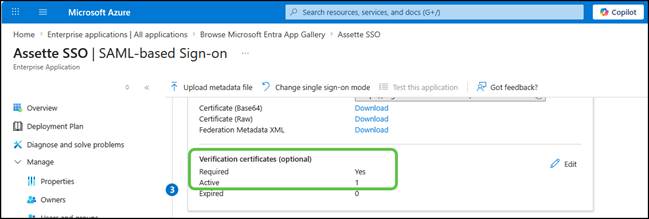
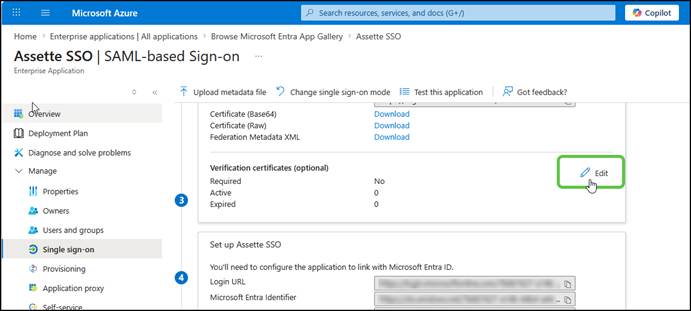
Step XIII – Open Verification Certificates #
Still in Step 3 – SAML Certificates, click Edit under Verification certificates (optional).
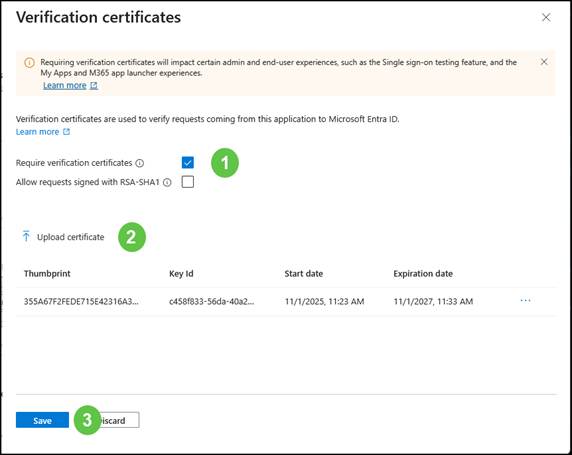
Step XIV – Upload the Assette Verification Certificate #
Enable the Require verification certificates checkbox. Click Upload certificate and upload the Assette verification certificate provided by Assette in .cer format. Click Save.
Step XV – Share App Federation Metadata URL with Assette #
Share the App Federation Metadata Url (copied in Step XI) with Assette. Assette will use this URL to complete the SSO configuration on their end.
| 📘 Note: Keep a record of the App Federation Metadata URL. This URL will be required by Assette to complete the IdP-side configuration. |
3 Creating Application Roles #
Application roles define the permission levels available to users in Assette. Roles are configured in Microsoft Entra ID App registrations and mapped to Assette permission levels during SSO.
📎 Reference: Add app roles and get them from a token – Microsoft Learn
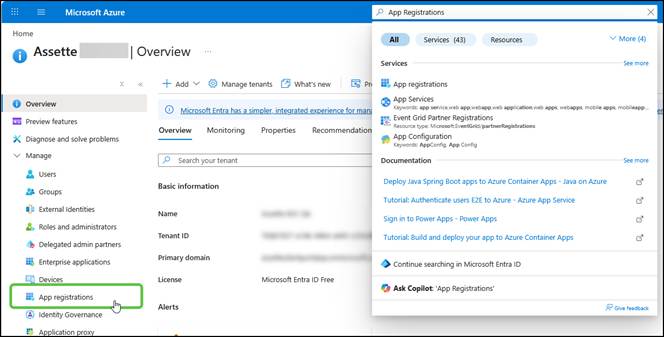
Step I – Open App Registrations #
Sign in to the Microsoft Azure portal and open Microsoft Entra ID service, browse to Manage > App registrations. Alternatively, search for App registrations in the top search bar.
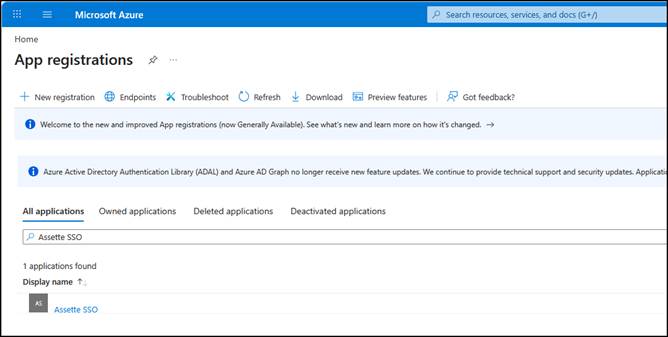
Step II – Find the Assette SSO Application #
In the App registrations page, select All applications. Search for and select the application created in Section 2 (e.g., Assette SSO).
Step III – Open App Roles #
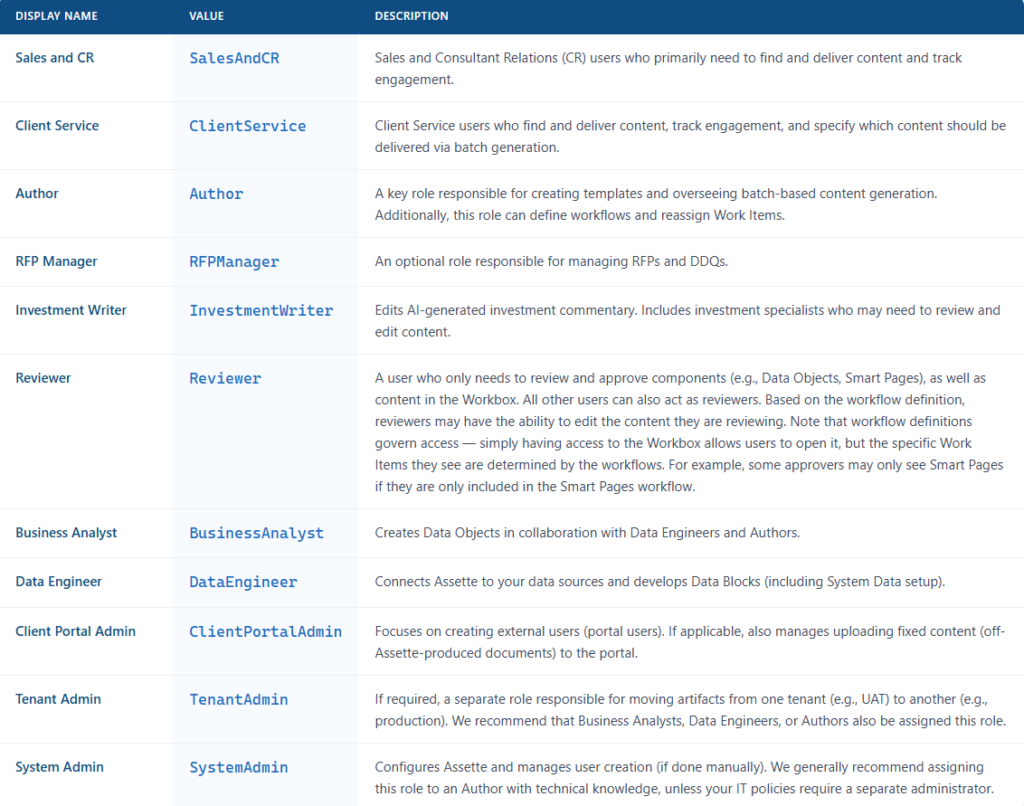
- If you are creating new App Roles for Assette, please follow the recommended values for “Display Name” and “Value” in the table below.
- If you want to map existing groups (or create new ones with different names), please contact your Client Consultant or Assette Client Service.
- If you want to add other app roles that are not covered below or modify existing roles to have different permissions (such as access to tasks), please contact your Client Consultant or Assette Client Service.
- If you require different access for non-production tenants (e.g., UAT, DEV), you may create separate sets of AD roles and prefix them with “UAT_” and/or “DEV_”.
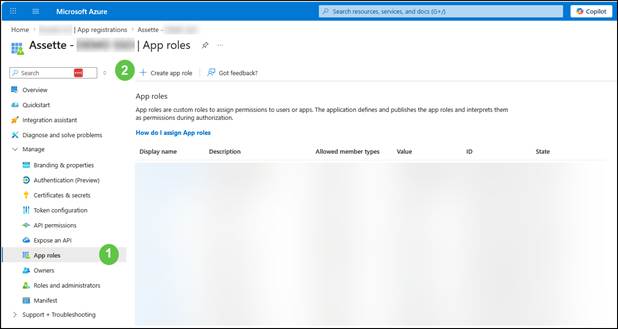
In the application page, under Manage in the left navigation, select App roles. Then click + Create app role.
Step IV – Create a new App Role #
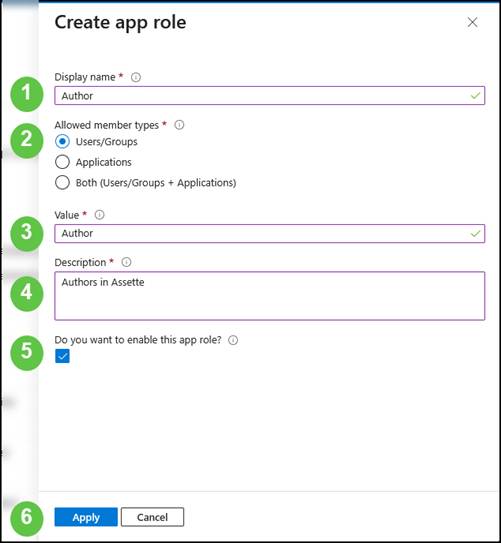
In the Create app role panel, enter the following values and click Apply.
| Field | Value |
| Display name | Author |
| Allowed member types | Users/Groups |
| Value | Author |
| Description | Authors in Assette |
| Enable this app role? | ✔ Checked (enabled) |
| 📘 Note: Based on your business requirements, additional roles can be created by repeating Step IV. Each role should correspond to a permission level defined in Assette (e.g., Business Analyst, Data Engineer). |
4 Assigning Users to Assette from Microsoft Entra ID #
After creating the enterprise application and app roles, you can assign access to individual users or Azure AD Security Groups. Group-based assignments are recommended for organizations managing large numbers of users, as they simplify ongoing access management.
| 📘 Note: Group-based assignment requires Microsoft Entra ID P1 or P2 license. Nested group memberships are not supported — only direct group members receive access. |
📎 Reference: Manage users and groups assignment to an application – Microsoft Learn
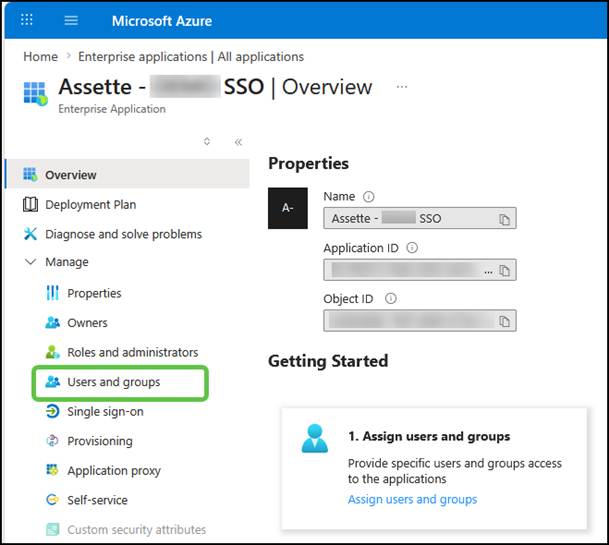
Step I – Open Users and Groups #
Go to the Enterprise Application created in Section 2 (e.g., Assette SSO). Under Manage in the left navigation, click Users and groups.
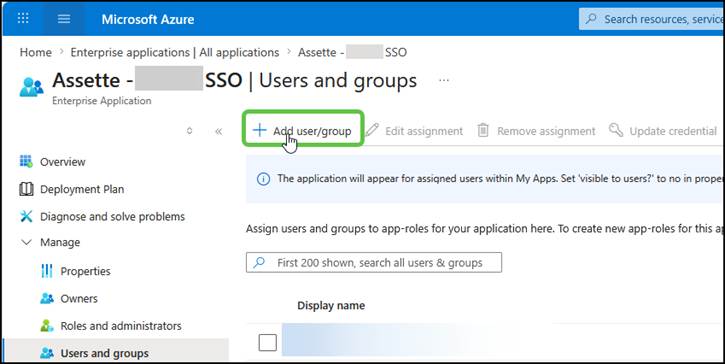
Step II – Add a User or Group #
In the Users and groups page, click + Add user/group.
Step III – Select Users or Groups in the Add Assignment Panel #
In the Add Assignment pane, click None Selected under Users and groups. A search panel will appear.
4.1 Assigning a Role to an Individual User #
To assign a role to a specific user:
- In the search panel, select the Users tab
- Search for and select the user (e.g., user@domain.com)
- Click Select. The user will appear in the Selected items column on the right
- Under Select a role, choose the appropriate Assette role (e.g., Author)
- Click Assign

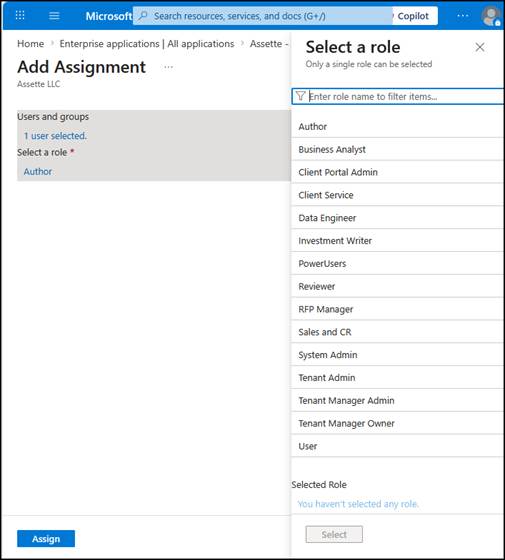
| 📘 Note: Only a single role can be assigned per assignment. If a user requires multiple roles, create separate assignments, or use group-based assignment with dedicated role groups. |
4.2 Assigning a Role to an Azure Entra ID Security Group #
Assigning roles to Security Groups allows all group members to inherit the Assette permission automatically. This is the recommended approach for larger organizations.
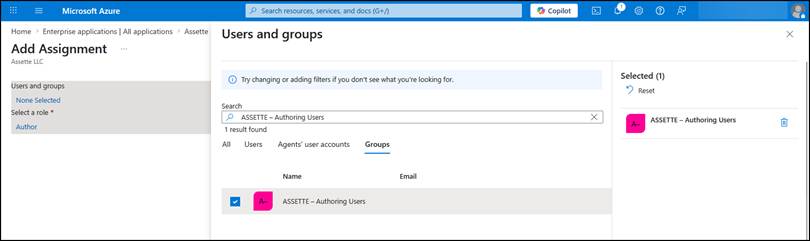
To assign a role to a security group:
- In the Add Assignment pane, click None Selected under Users and groups
- In the search panel, select the Groups tab
- Search for and select the security group (e.g., ASSETTE – Authoring Users)
- Click Select. The group will appear in the Selected items column
- Under Select a role, choose the appropriate Assette role (e.g., Author)
- Click Assign

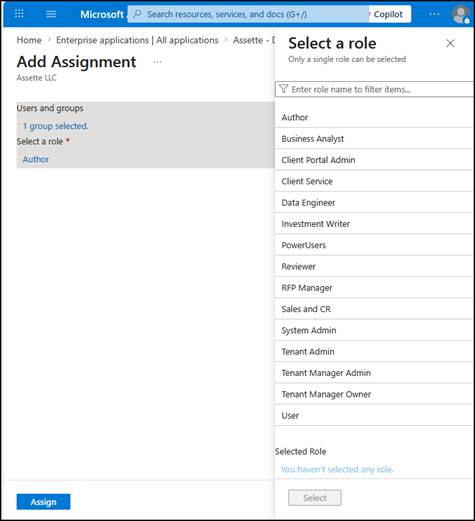
| 📘 Note: When you assign a group, all current and future members of that group will have access to Assette with the assigned role. When a user is removed from the group in Microsoft Entra ID, their access to Assette is automatically revoked at next sign-in. |
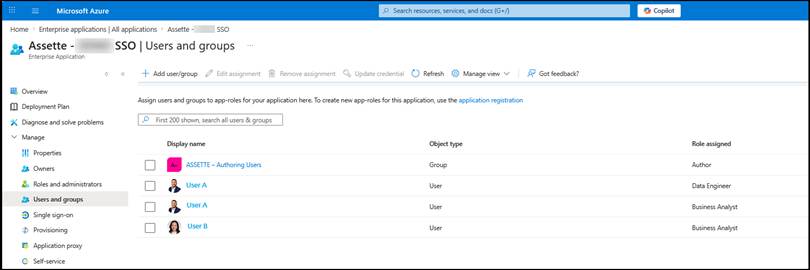
Step IV – Confirm the Assignment #
After completing the assignment, the user or group will appear in the Users and groups list with the assigned role. The selected user or group member/s will now have the corresponding permission level in Assette.
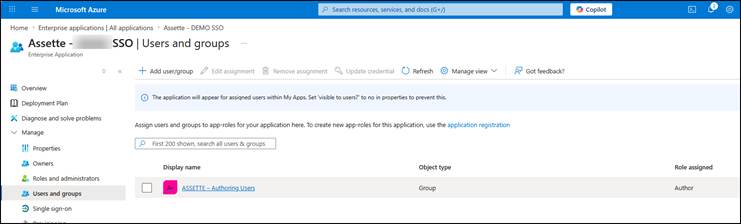
| ⚠️ Important: Based on business requirements, more roles can be added by following Section 3 – Creating Application Roles. User and group assignments are subject to the client’s business requirements and must be performed by a Microsoft Entra ID administrator with the necessary privileges. |
Role assignment example:
User A has role “Business Analyst” and role “Data Engineer”.
User B has role “Business Analyst”.
Members of “ASSETTE – Authoring Users” Entra ID security group has role “Author”.