This article discusses the Generation Screen as seen in the Output Center. For information on the Preview Screen, please see The Preview with Data Screen. For information on creating Generation Screen options, see Generation Time Data Settings.
The Generation Screen in Assette is an essential tool for creating customized reports based on specific parameters. It allows users to tailor content and purpose to suit various stakeholders, such as clients or sales teams. This article outlines the key fields on the Generation Screen and how to use them effectively.
Depending on roles and permissions, users can either generate reports or preview content. This functionality is vital for reviewing artifacts before finalizing and publishing Smart Pages, Smart Docs, or Smart Shells. By setting precise parameters, users can ensure that reports are relevant and properly formatted for different purposes, such as client updates or sales presentations.
Key Fields on the Generation Screen #
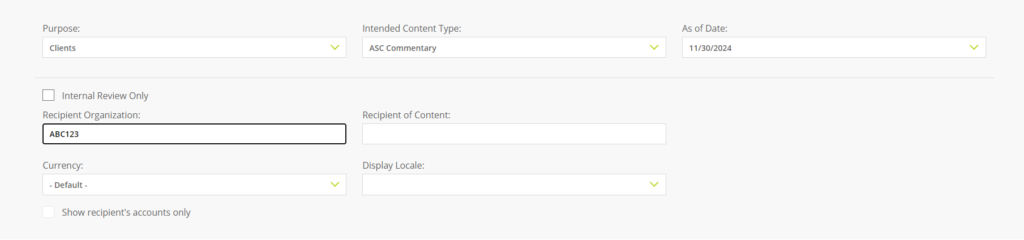
Purpose #
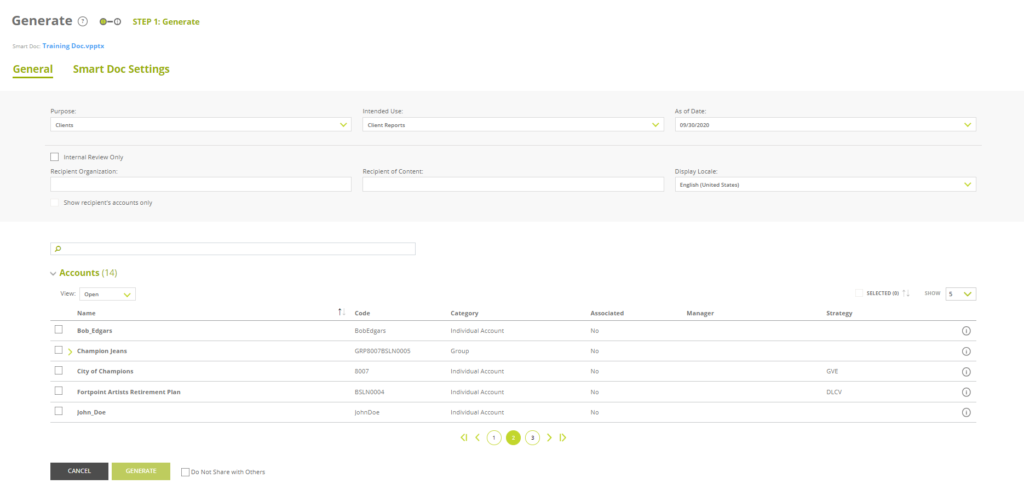
The Purpose field is available by default and determines the context in which the report will be used and affects the selection of items available for inclusion in the report.
- Options:
- Clients: When selected, this option allows users to pick from individual accounts, composites, and representative accounts. This is typically used when generating reports intended for client communication.
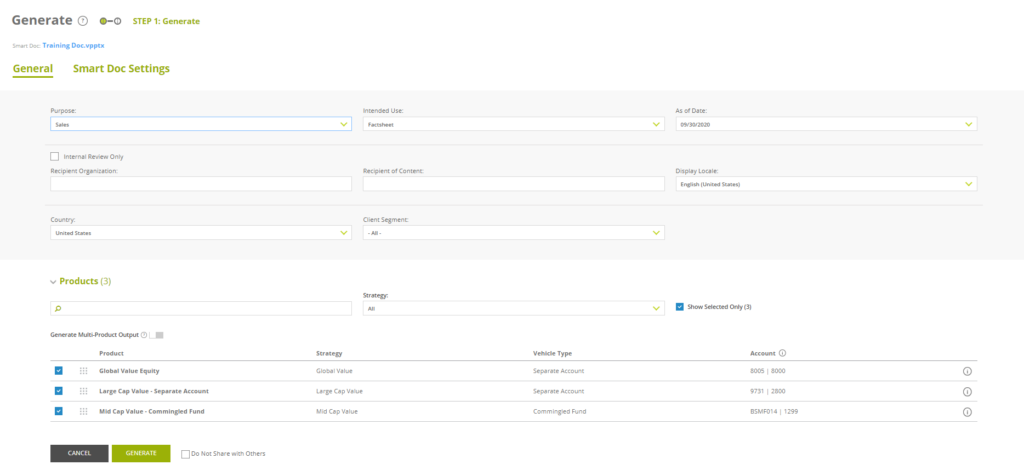
- Sales: This option limits the selection to products that have been set up in the Product Master. It’s used for generating materials for sales purposes, such as product overviews or marketing brochures.
How to Use:
- Select Clients if you are preparing reports for existing clients, focusing on their specific accounts or performance.
- Choose Sales when creating materials to support the sales team in pitching products to prospective clients.
- If Sales has been selected, select a country from the Country drop down as well
Impact on Report Generation:
- The Purpose selection influences which data and content are available for inclusion in the report, ensuring that the generated document is relevant to the intended audience.
Intended Use #
The Intended Use field is available by default and allows users to specify the purpose or application of the report, based on predefined options from the Attribute Master.
- Options:
- Selected from the Intended Use attribute values configured in the Attribute Master.
- Examples might include “Regulatory Reporting,” “Marketing Materials,” or “Internal Review.”

How to Use:
- Select the appropriate Intended Use that matches the purpose of your report.
- This setting is primarily used to switch Smart Pages in or out of the document if they have been configured for conditional inclusion based on the intended use.
Note:
- In many cases, this setting may be ignored if no conditional configurations have been set up. However, it is good practice to select the correct intended use to ensure compliance and relevance.
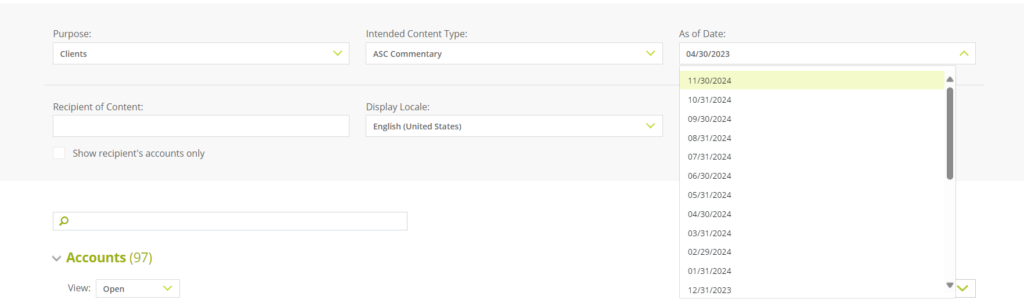
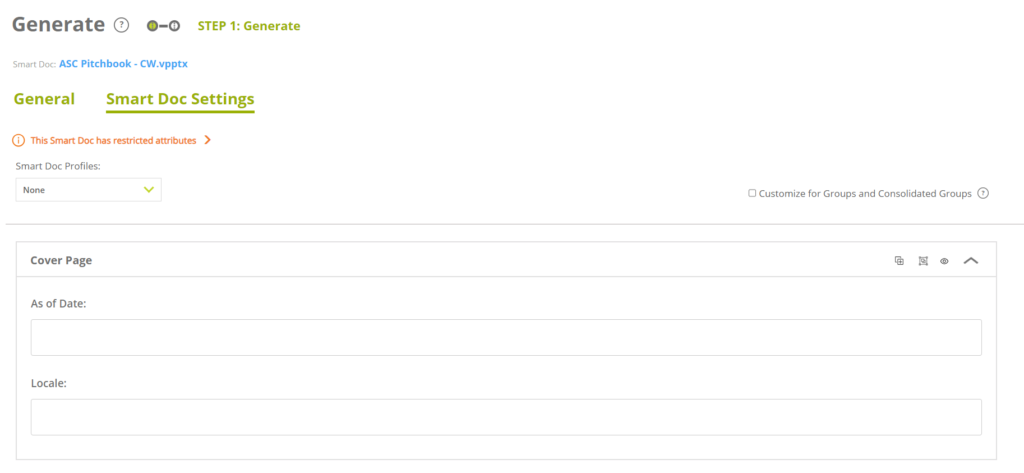
As of Date #
The As of Date field is available by default and specifies the effective date for the data included in the report. The values of the As of Date field are determined by the data available from the As of Dates Data Block. From the Generation screen, users can select from available dates, such as month-end or quarter-end dates, depending on the data available.
How to Use:
- Choose the As of Date that corresponds to the reporting period you wish to cover.
- This allows the report to reflect the most current data or a specific historical date as required.
Impact on Report Generation:
- The selected date ensures that all data presented in the report is accurate and corresponds to the specified reporting period.
- Essential for performance reports, account statements, and any time-sensitive analyses.
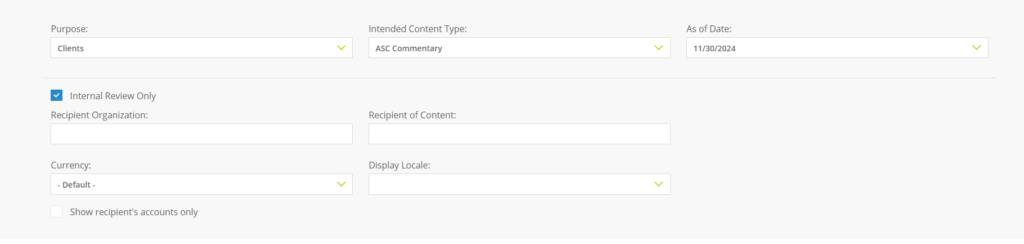
Internal Use Only #
The Internal Use Only checkbox indicates that the generated report is intended for internal purposes and should not be distributed externally.
How to Use:
- Check the Internal Use Only box if the report is for internal consumption, such as internal reviews, audits, or team meetings.
- When selected, the report will only be available for download within Assette and will not be sent to any external recipients.
Implications:
- Ensures compliance with confidentiality policies by preventing unintended external distribution.
- Simplifies the generation process when recipient information is not required.
Recipient of Content #
The Recipient field is available by default and allows users to specify the intended recipient of the report. This is particularly important when generating reports for external clients or stakeholders.
- How to Use:
- Enter the recipient’s code, such as “ABC123,” which can be found in the Input Center or sourced from a Customer Relationship Management (CRM) system.
- If the Internal Use Only checkbox is selected, this field can be left blank.
Purpose:
- By specifying the recipient, Assette can personalize the report, include recipient-specific information, and manage the distribution process accordingly.
- Ensures that the report reaches the correct individual or entity with all relevant customizations.
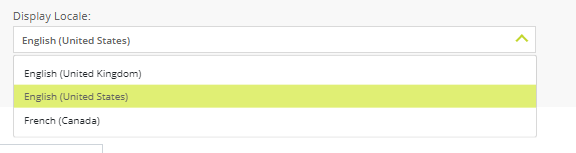
Display Locale #
Display Locale: Determines the document’s formatting and writing style (e.g., date formats, language specifics) based on the selected locale.
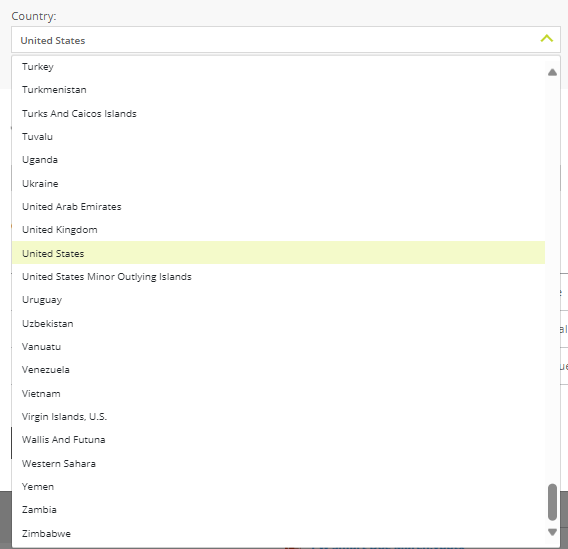
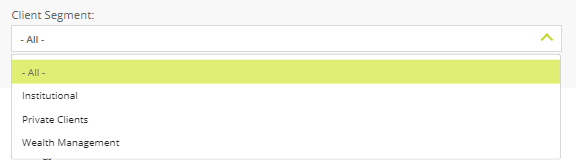
Country and Client Segment #
Country: Displays available accounts and products specific to the selected country.
Client Segment: Enables users to filter by client type, such as Institutional Clients, Private Clients, or Wealth Management.
Search and Filtering #
Users can search for accounts by name using the search bar.
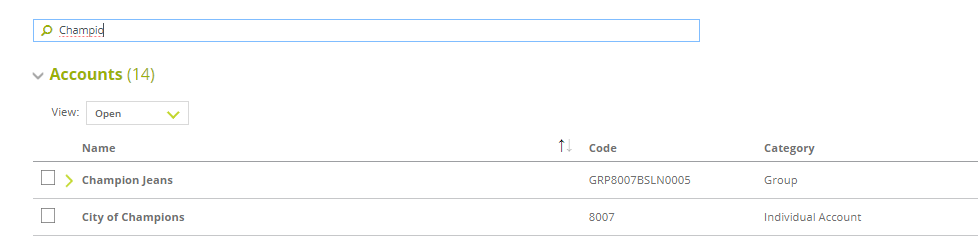
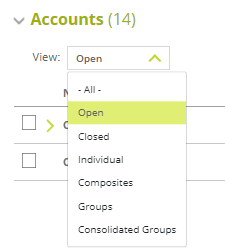
For Clients, a dropdown under “View” allows filtering by account type, including Open Accounts, Composite Accounts, Individual Accounts, and Group Accounts.
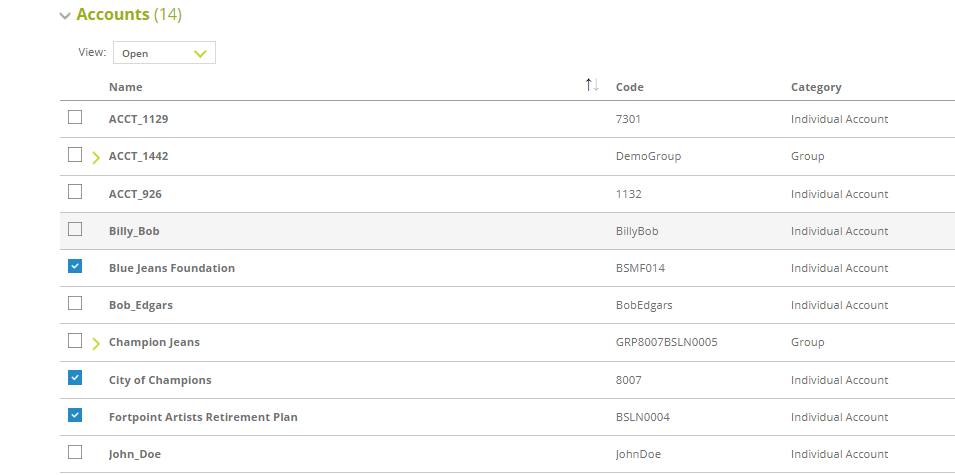
Users must select one or more accounts before proceeding. Once selected, users can either generate or preview the output.
Differences Between Clients and Sales Generation #
Client Output – For clients, users can select multiple accounts to generate tailored reports. Each account generates multiple separate outputs. This approach ensures detailed, individualized reporting.

Sales Output – Sales generation allows for a unique multi-product option:
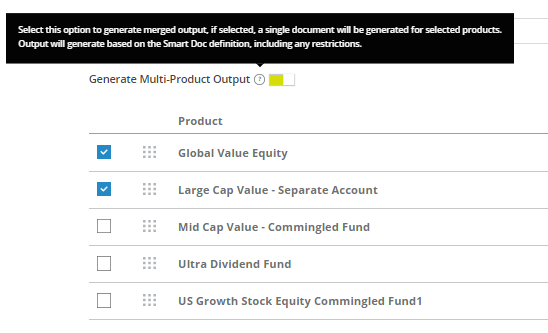
- If Generate Multi-Product Output is selected, the system creates a single document combining the selected products. Slides or content sections are repeated in the order defined during Smart Doc creation.

- If the multi-product option is not selected, the system generates separate outputs for each product, similar to client generation.

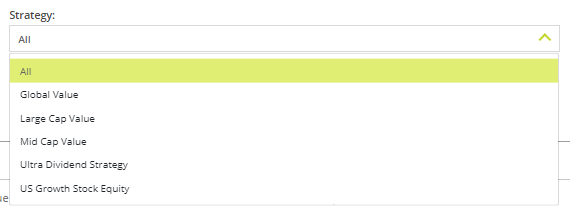
Additionally, sales users can filter products by Strategy, ensuring reports align with specific investment approaches or marketing needs.
Do Not Share with Others: Ensures the generated output remains private and is not accessible in the library for other users.

Smart Doc Settings Tab #
The Smart Doc Settings tab offers advanced options for customizing the generation of Smart Docs. Users can select a pre-created Smart Doc profile, which simplifies the process by applying pre-defined configurations to each section of the document. This feature allows for greater flexibility and precision when generating complex reports.
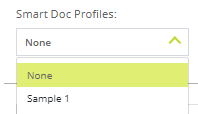
Smart Doc Profiles #
A Smart Doc profile defines how each section of the document will behave. Users can assign specific settings for individual sections.
As of Date field enables users to select specific data dates for each section, ensuring that the displayed data aligns accurately with the reporting requirements. This flexibility allows reports to reflect data from various time periods, such as the current date, last month end, last quarter end, or other predefined options, depending on the reporting needs.

Locale: Users can select different locales for each section, enabling content to follow different writing styles or formatting rules based on regional requirements.

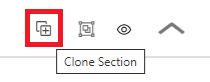
Clone Section: Users can duplicate a section, allowing it to repeat within the document. This is particularly useful when Smart Pages in the section need to display the same structure but with variations in content or formatting.
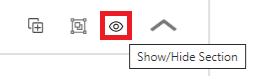
Hide Section: This feature lets users omit specific sections from the final output, enabling tailored document versions for different audiences.
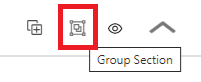
Group Sections: Grouping sections ensures they repeat consistently, similar to the behavior seen with multi-product outputs. This is helpful for generating consolidated reports while maintaining clarity in section organization.
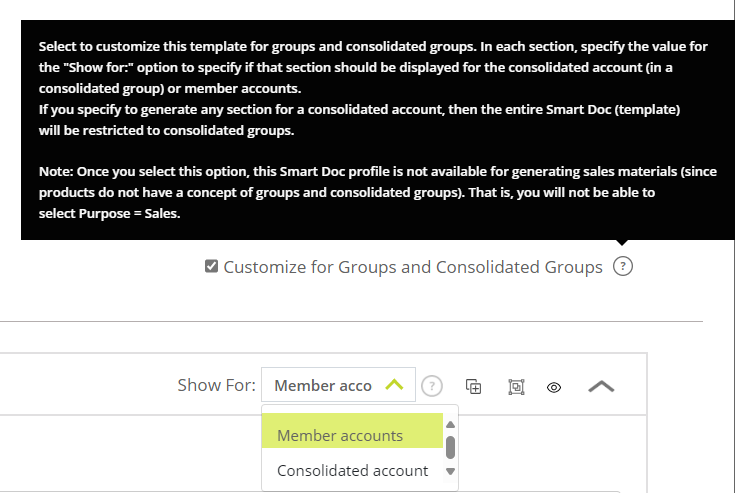
Customization for Groups and Consolidated Groups in Smart Doc Settings
In the Smart Doc Settings tab, users can further customize document generation by customizing sections for Groups and Consolidated Groups. The Customize for Groups and Consolidated Groups option allows users to specify whether each section of the Smart Doc should display for Consolidated Groups or Member Accounts. Once enabled, this setting restricts the Smart Doc to work exclusively with groups and consolidated accounts, meaning it cannot be used for generating sales materials (as sales outputs do not support groups or consolidated group structures). This ensures that the Smart Doc profile is restricted to account-based reporting needs, providing clarity and precision in its application.
Generating a Smart Doc or Other Content #
- Access the Generation Screen
- Open the Output Center or the relevant module in Assette.
- Set the Purpose:
- Select Clients to generate a report intended for a client or Sales
- Choose the Intended Use:
- Select the appropriate option, such as “Client Reporting,” to ensure any conditional content is correctly applied.
- Select the As of Date:
- Pick the date corresponding to the reporting period, such as the most recent quarter-end.
- Internal Use Only:
- Leave this unchecked since the report is intended for an external client. ( Check this If the intention is to not to share, but to generate an output only )
- Specify the Recipient:
- Enter the recipient code obtained from the Input Center or CRM, if Internal Use Only has been selected, this can be left blank
- Select an Account or Product
- Choose the specific account or product from the available list that the report will be based on.
- Generate the Report:
- with the generation process, and Assette will produce a report customized based on the provided settings.