The Data Object Library has been replaced by the Data Object Editor. Please see Introduction to the Data Object Editor for more information.
Data Objects in the Authoring Center provides read-only access to the library of Data Objects available to you. You can view the list of available Data Objects under each data category, view their Data Columns and Data Settings available for them and also preview the Data Object with raw data for the selected data columns and data settings.
1. View Data Objects
- Go to Authoring Center-> Data Objects
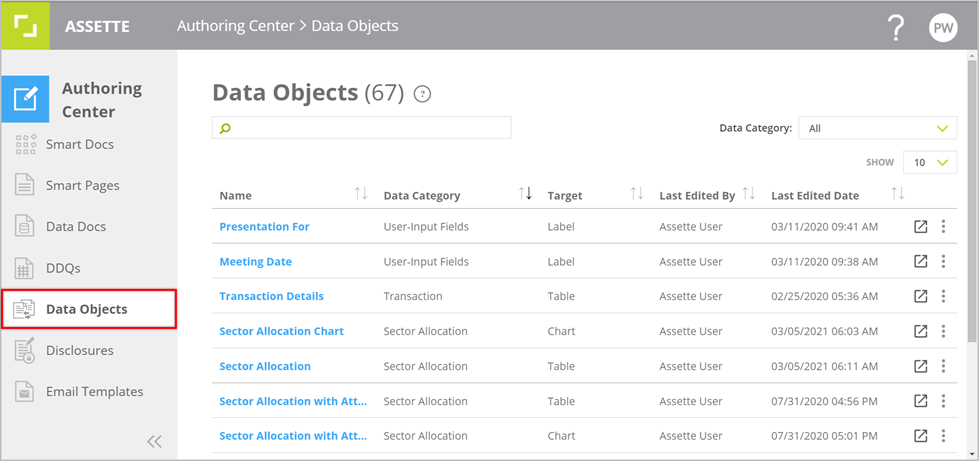
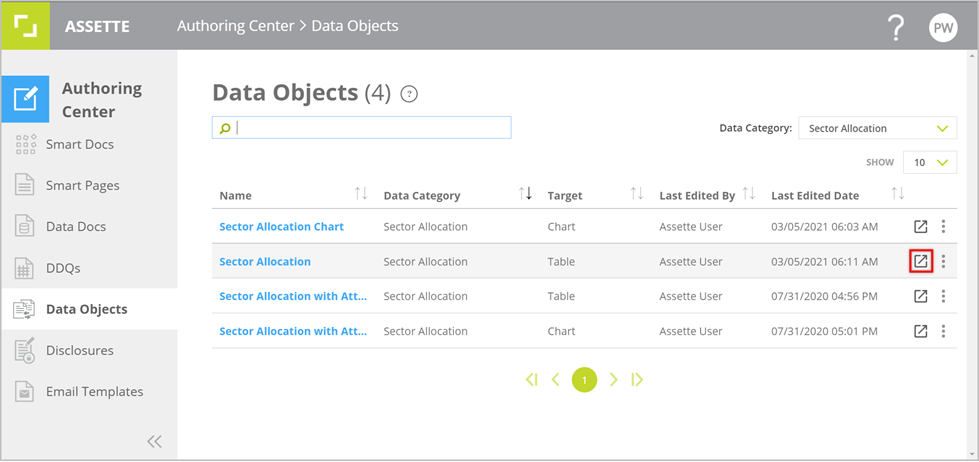
- All the Data Objects available to you are listed in the grid with their related details; Data Category, Target (Table/Chart/Label), Edited By and Edited Date (the latest modification of the Data Object via Assette’s DataService).
- The number of Data Objects available is listed by the main heading, Data Objects at the top of the page.
- You can filter the list by Data Category from the given drop-down list.
You can also search by Name, Data Category, Target, Last Edited By and Last Edited Date.
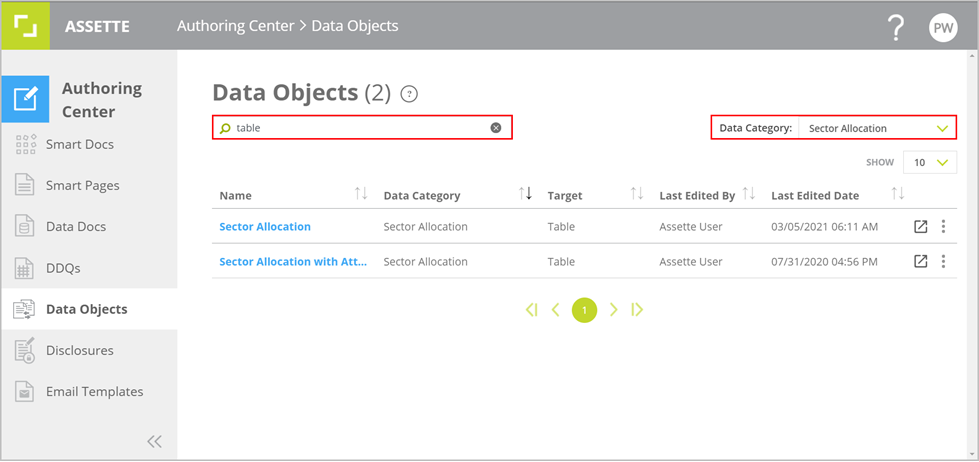
- The list in the grid is dynamically filtered to match with either the selected filters or searched keywords.
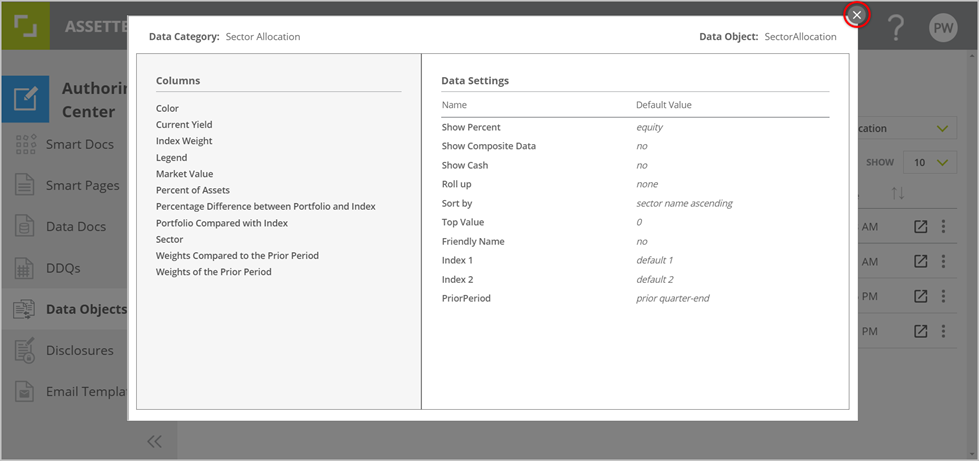
To remove the searched keyword, click on the “X” icon inside the search box. - Click on the name of a Data Object to view its columns and default data settings.
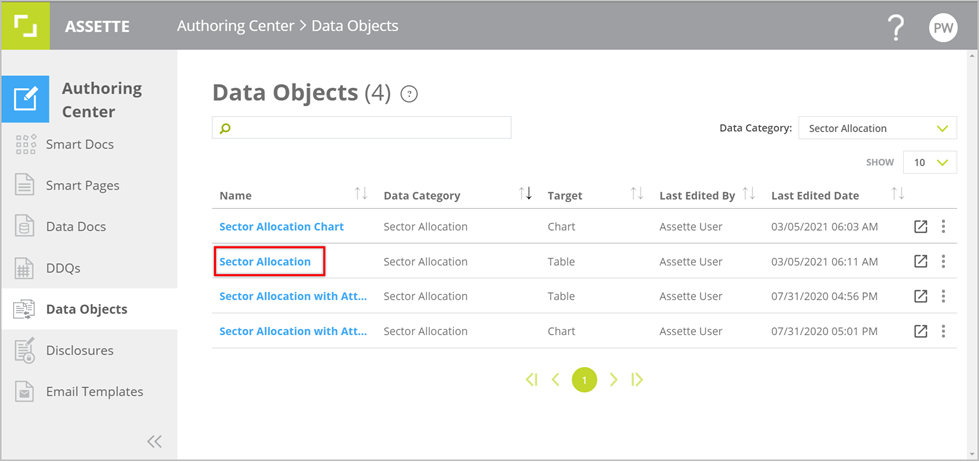
- Click on the “X” at the top right corner of the panel to exit the view.
2. Preview with Data
- To preview the Data Object with raw data, click on the “Preview” icon towards the end of the relevant row.
- You will then be navigated to the Preview Data Objects page where you can configure the preview.
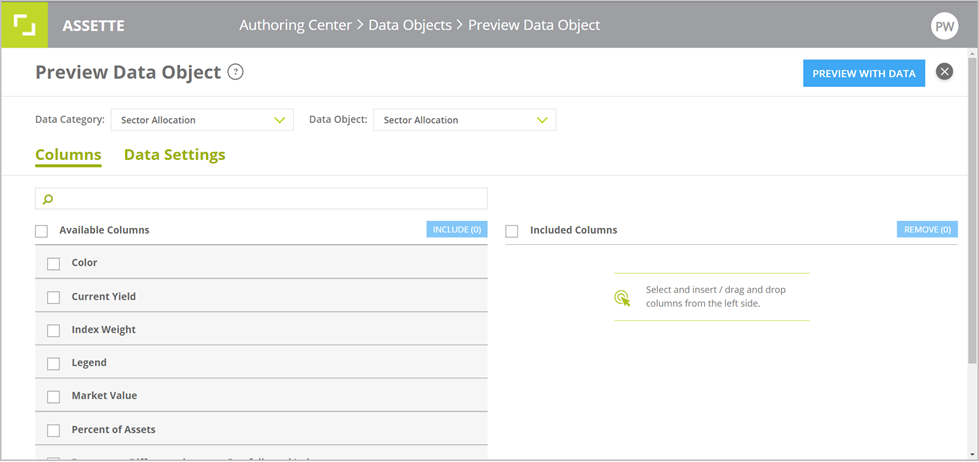
- The Data Category and Data Object are pre-selected based on your selection from the previous page. You can change your selection if needed using the drop-downs and proceed.
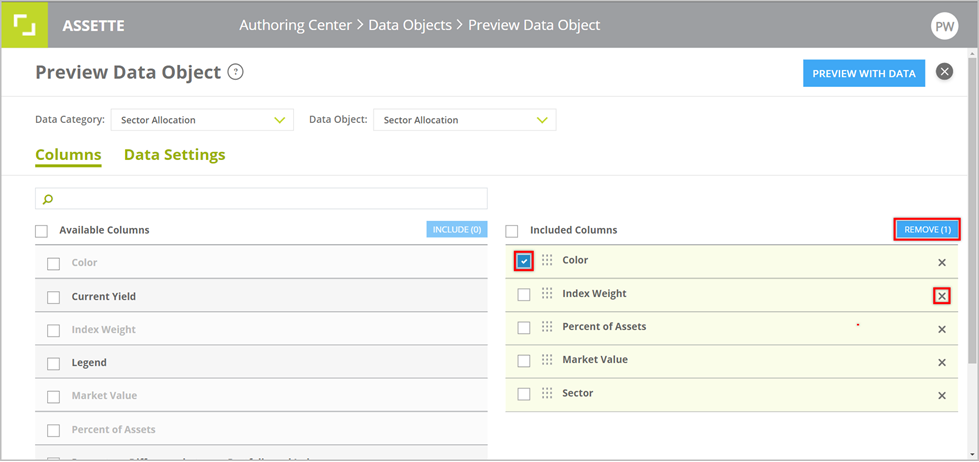
- Then select the columns that need to be previewed with data.
Note: Not all Data Objects have columns to be selected. e.g. Data Objects of target Label. (As of Date, Inception Date etc.) - You can drag and drop the columns from the left pane to the right or check the boxes next to the names of the the required columns and then click INCLUDE.
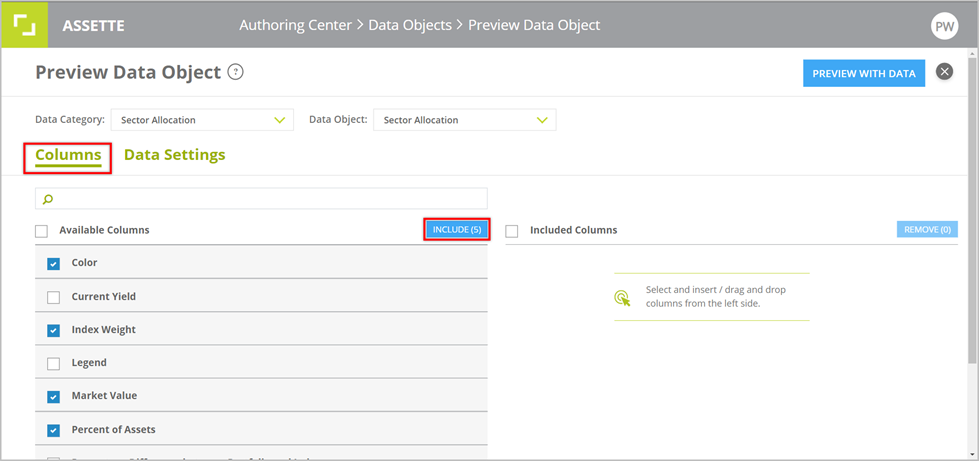
- To remove an added column click on the “X” on the right side or check the box next to the column name and click REMOVE to remove multiple columns at once.
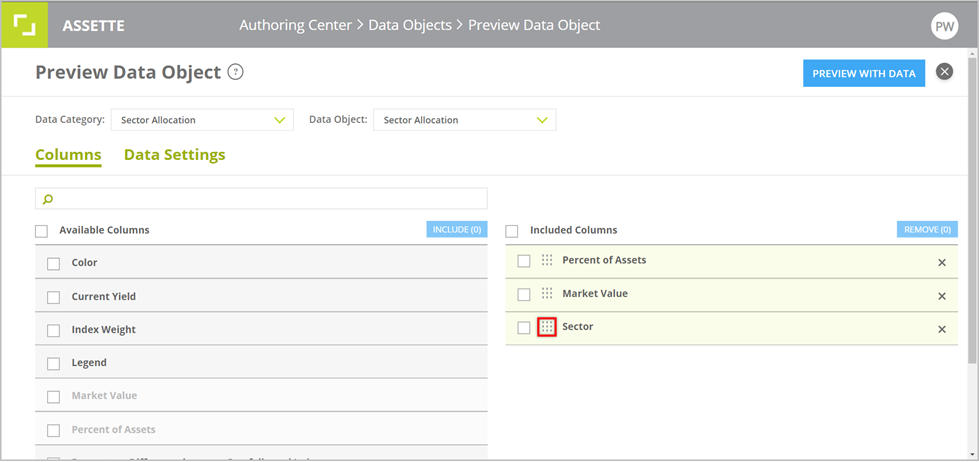
- You can drag and drop the columns to reorder them. This is the order in which the columns will be arranged in the preview. Click and hold down on the nine-dot square icon of the column and drag to the place where needed and drop.
- From the Data Settings pane, you can modify the available data settings of the selected Data Object as required.
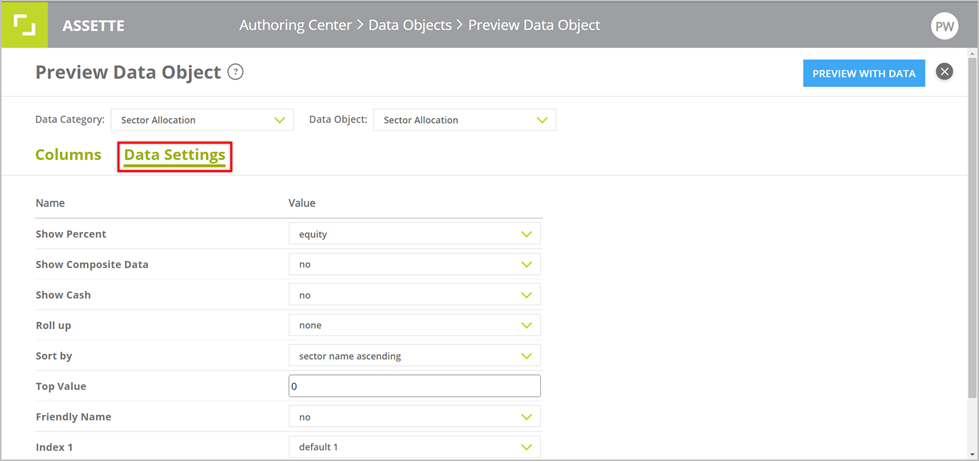
- The icon beside certain values under Data Settings indicates the value to be entered from the Generation overlay.
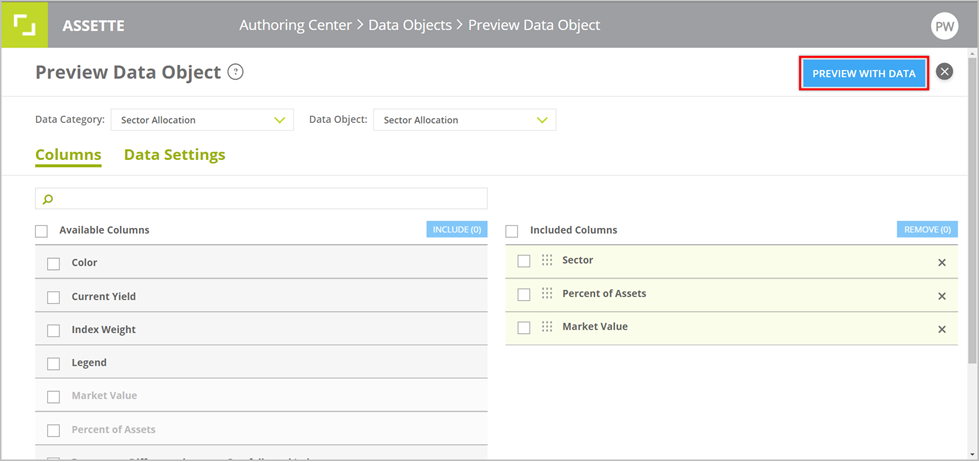
- Once you have set the columns and data settings as required click on the PREVIEW WITH DATA button at the top right corner of the page.
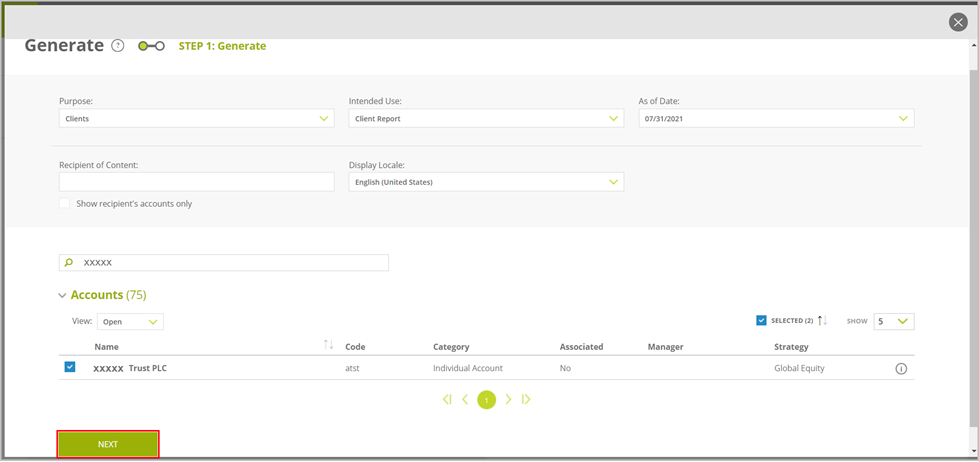
- The Generation overlay will then be launched on the same window. Enter the generation parameters and click NEXT after selecting the account(s)/product(s) for which you need the Data Object generated.
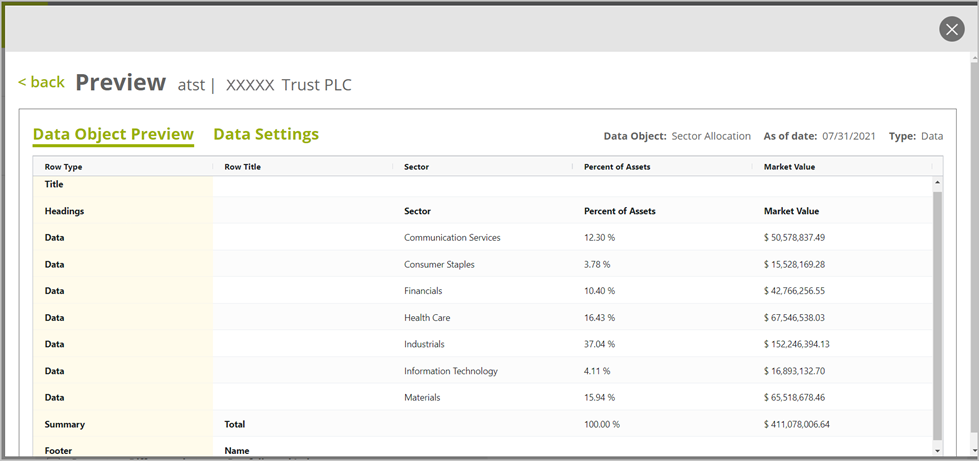
- Click VIEW after the generation process is completed.
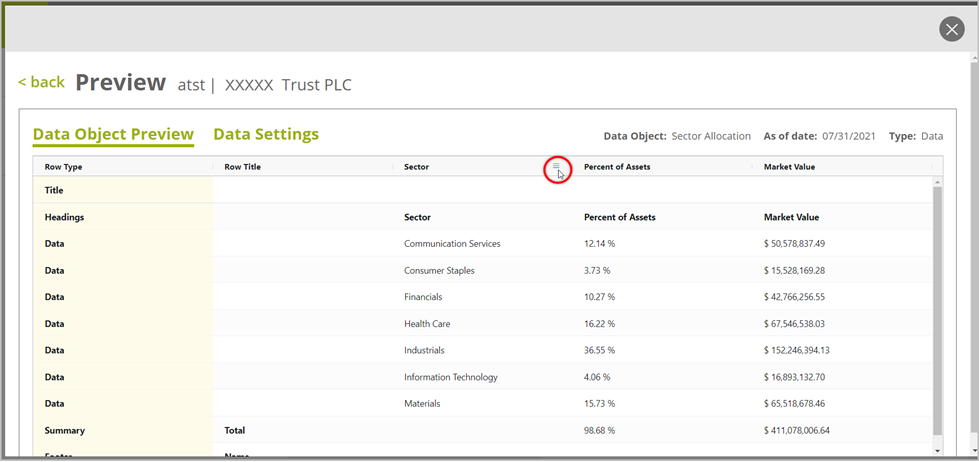
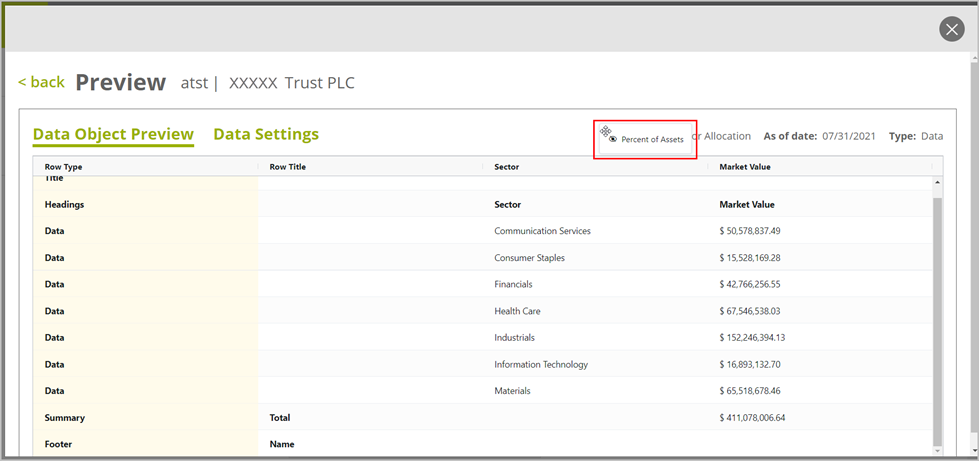
- In the preview, the raw data populated for the selected Data Object is displayed under the Data Object Preview tab.
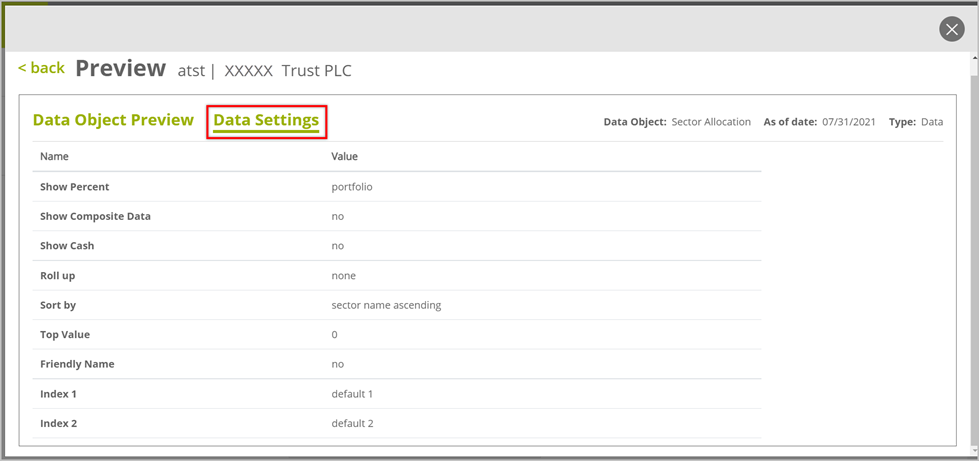
- Under the Data Settings tab you can view the settings of the populated data.
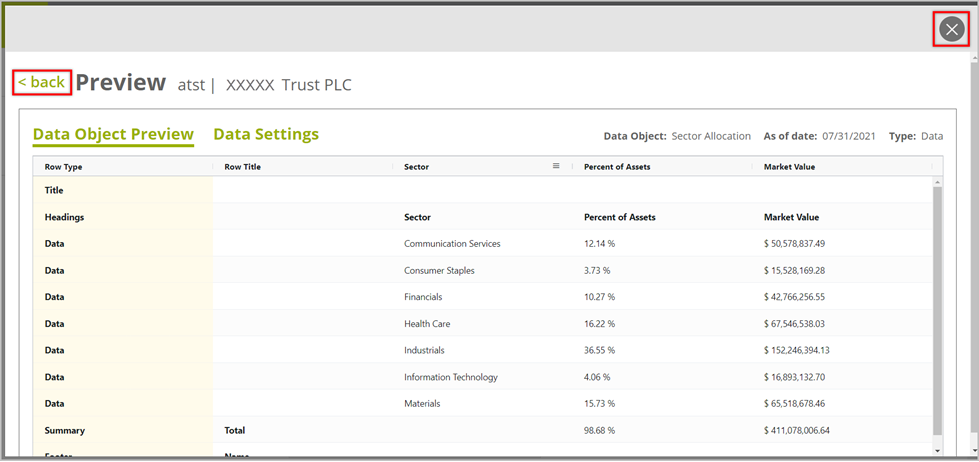
- Click on the <back button at the top left corner to go back to the the Generation Overlay to select another view or regenerate the preview for modified generation inputs.
- Click on the “X” icon to return to the Preview Data Object page to modify data columns and/or data settings.
3. Adjust Columns
- You can adjust the columns in the preview as needed to help you easily navigate through the data columns.
Adjust the column width manually
- Take the cursor towards the end of the column header and when the double-headed arrow appears click and hold down the edge and drag to the required width and release.
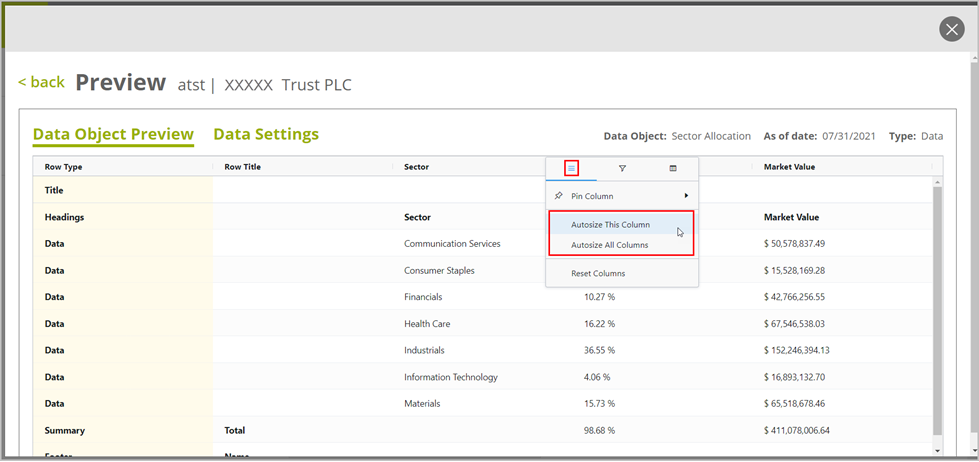
Auto adjust the column width
- Take the cursor over the column header and click on the hamburger menu icon towards the edge.
- Select Autosize This Column/Autosize All Columns option to adjust the width of the column(s) to fit all data in.
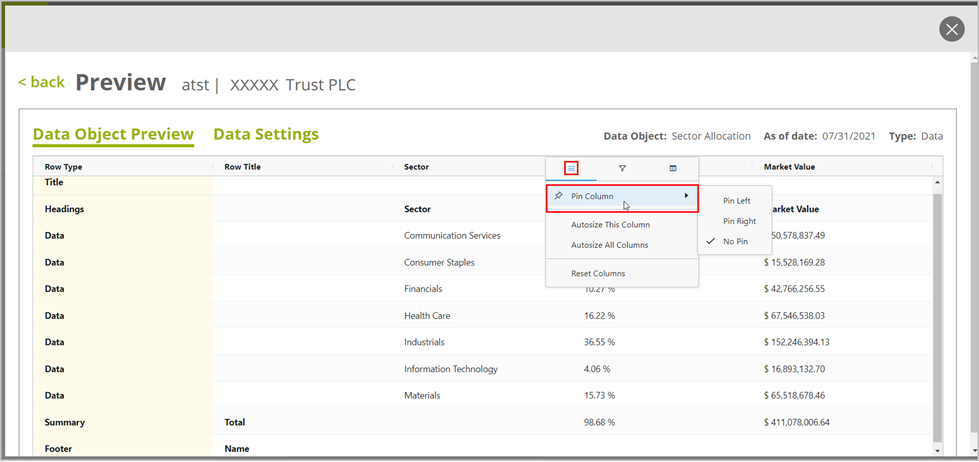
Pin columns
- To pin/freeze a column on the preview select Pin Column option from the hamburger menu at the column header.
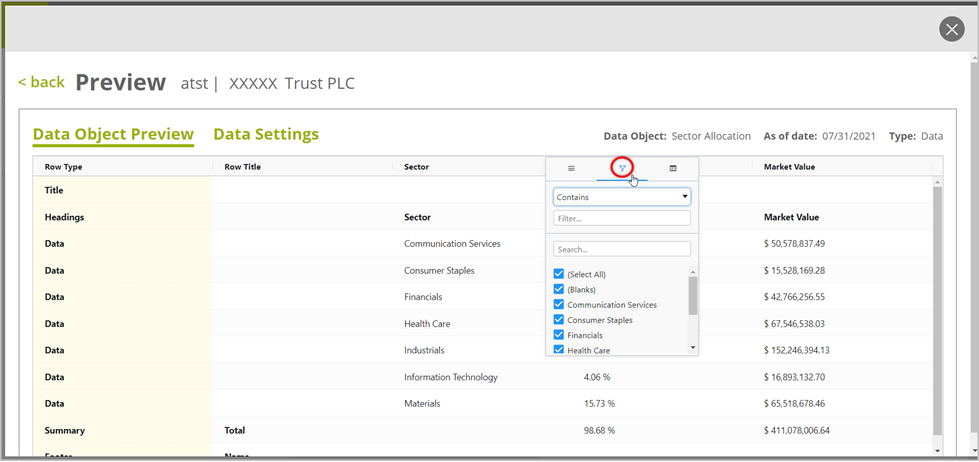
Filter column data
- Go to the hamburger menu at the column header and click on the “Filter” icon in the middle.
- You can configure what to be filtered from the given options and include/exclude data rows.
Hide/Show columns
- From the hamburger menu of the column header, click on the menu and check/uncheck the columns you want to be shown/hidden.

- You can also drag the column header and drop away from the table to quickly hide the column.
Reorder columns
- Click and hold down on the column header to drag and then drop at the required position.
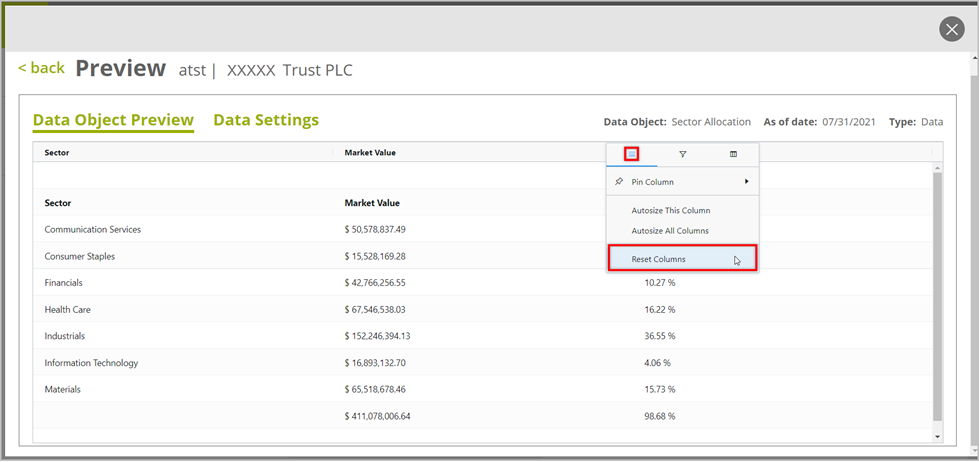
Reset columns
- Select Reset Columns option from the hamburger menu of any column header to reset all the column adjustments done and return to the original preview.