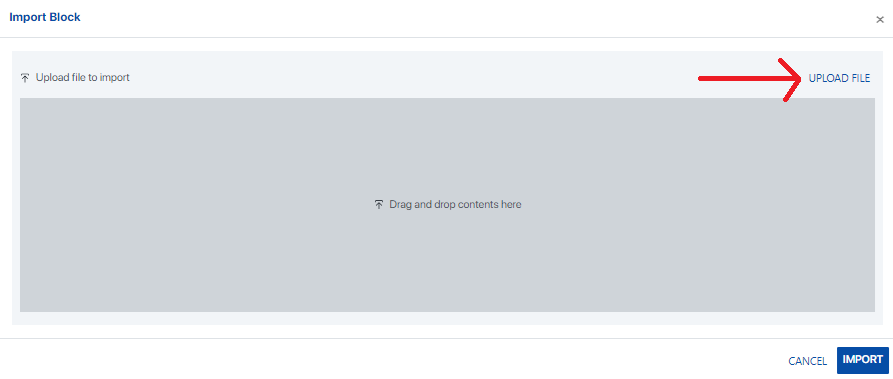
To import a Data Block, first click “Import” at the top of the screen on the right-hand side of the screen. All data related to the Data Block will be imported including name, columns, metadata, etc.
After clicking the “Import” button on the main screen, the user will be prompted to select a file. To select a file, either click “Upload File” in the upper right-hand side or drag and drop the file. Note that the imported Data Object or Block’s name is not determined by the imported file’s name, but rather the field “BlockName” in the JSON file itself (e.g., “BlockName”: “Product-List”). The imported Block or Object’s name may be changed as shown in subsequent steps under “Detail View”.
Note that multiple Data Blocks or Objects cannot be upload at a time by selecting the JSON files in the selection screen, though multiple users may concurrently upload simultaneously.
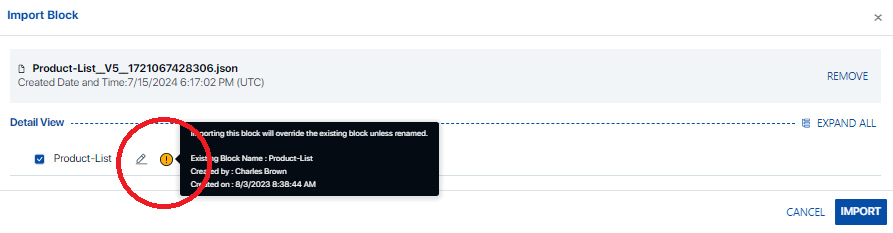
If the user attempts to upload a duplicate Data Object or Data Block, this will be indicated with a small orange-yellow icon next to the item in the Detail View.
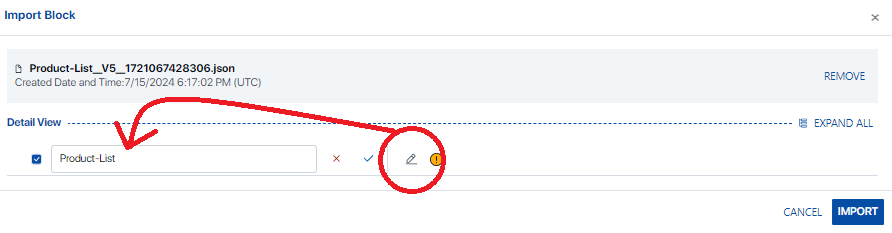
Clicking “Import” will overwrite the existing object with no additional confirmations. If you happen to accidentally overwrite a Data Object or Block, simply export the previous version of the item and re-upload using the same instructions for Importing a Data Object or Data Block. Alternatively, use the “Restore” functionality in the Version History.
Mousing over the info icon will show more details regarding the object to be overwritten.
If you are intentionally uploading a duplicate Data Block or Data Object, (i.e., you are trying to make a copy), simply re-name the item using the pencil icon, or alternatively, use the “Copy” function from the ellipses on the main screen.
After a Data Object or Data Block has been imported, the resulting item will be in draft, as indicated by the yellow hourglass icon. The most recently published data object will, however, remain as the published version until the newer version has been saved and published.

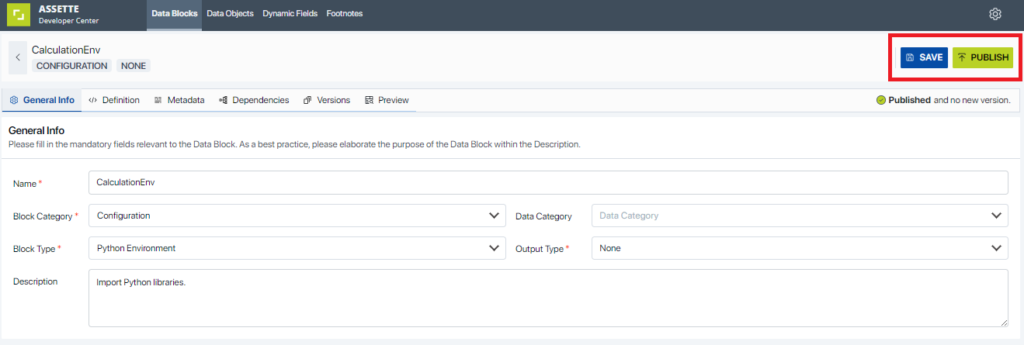
To publish an imported Data Block or Data Object, click the pencil icon on the right-hand side and then prsss the publish button in the upper right-hand side of the screen.
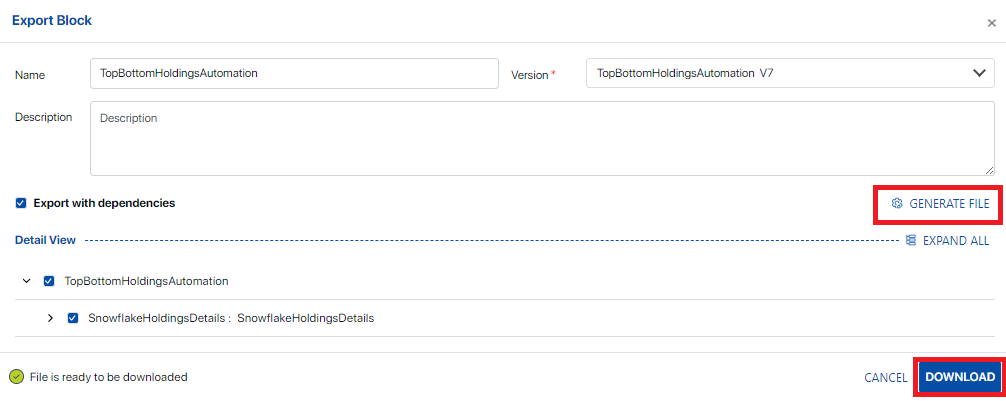
Exporting Data Blocks #
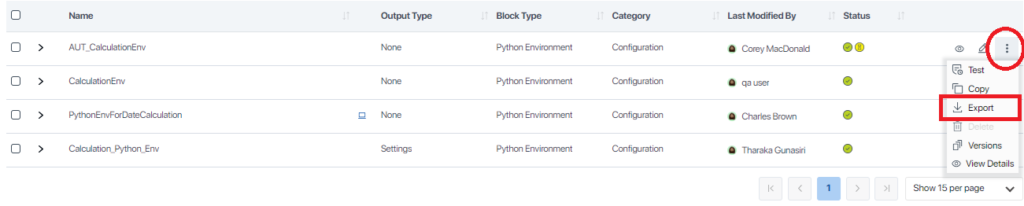
To export a Data Block, click on ellipses on the right-hand side of the screen and then click on “Export” from the drop-down menu.
After clicking “Export” users will be able to select which version of the object they want to export. When exported, the description field will always be blank, even if the exported item has a description. The description field is optional. The “Name” field is for display only and is not editable.
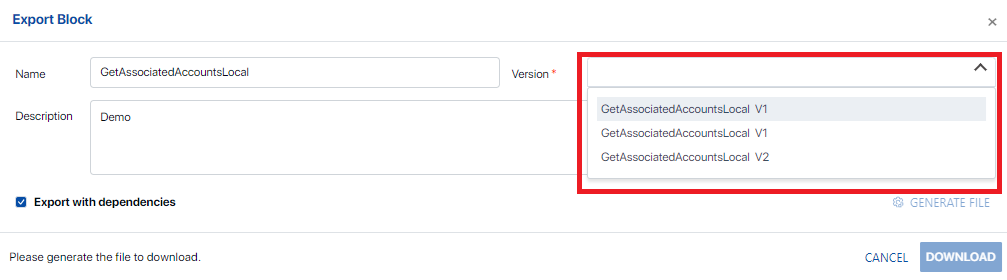
After selecting the version and optionally selecting to export with dependencies, uses need to click on “Generate File” before they are able to click on the “Download” button. The text “File is ready to be downloaded” will appear once ready to download as some Data Blocks and Data Objects may have multiple dependencies and may take up to a minute to download.