The Footnote Editor‘s “Import Variable and Columns” button allows users to easily associate and validate variables with one or more Data Objects. It is important to note that if more than one Data Object is selected that this feature will only associate the Data Object’s shared columns and Data Settings (i.e., values found on the relevant Data Object’s Columns Tab and Data Settings Tab).
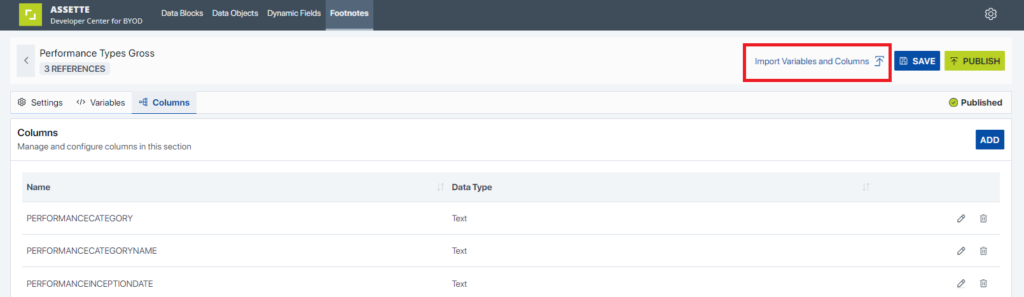
To import variables and columns, start by clicking on the editing a existing footnote (or creating a new one) and then clicking on “Import Variables and Columns” button next to the “Save” button at the top of the screen.
In the subsequent screen, select a Data Object by clicking on the blue “+” icon on the right side of the screen. The Data Object will then show up in the “Selected Objects” list. To unselect a Data Object, click on the “+” a second time. When the desired Data Objects have been selected, press “Extract”.
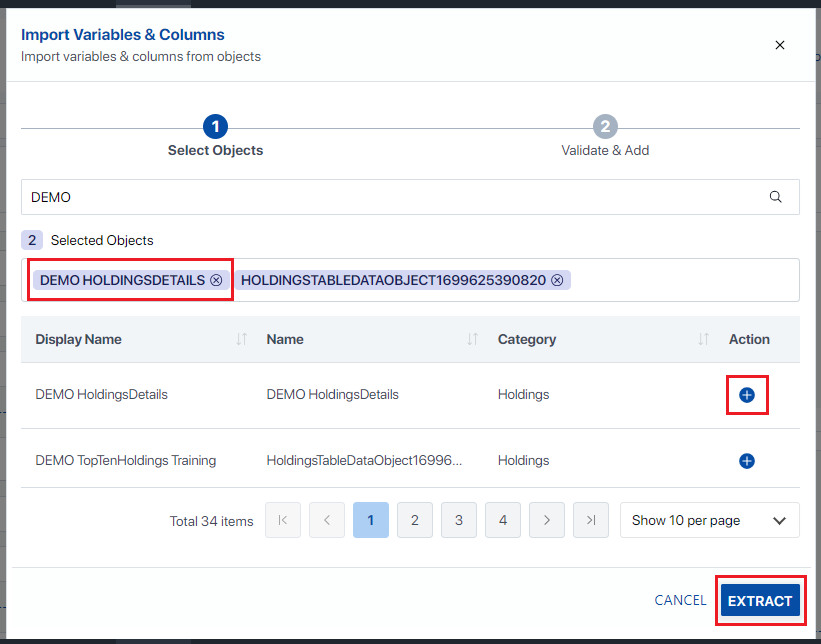
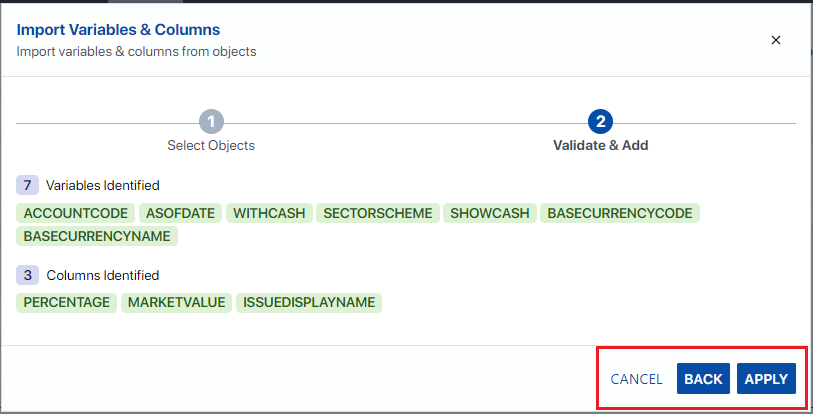
After clicking “Extract”, the user has the opportunity to review the identified variables and columns on the Validate & Add screen. If everything appears correctly, click “Apply” and the variables and columns will be automatically added to the respective Data Objects that were selected in the previous screen.
Note that selecting multiple Data Objects will return only the common variables and columns shared by the selected Data Objects. If additional variables or columns need to be added, they can be added back in the Footnote Editor screen, per usual. The variables identified on this screen can be found selected Data Object(s) Data Settings Tab while the identified columns are found on the Columns Tab.
After clicking Apply, the Variables and Columns values from the previous screen will be shown in the Variables and Columns Tab in the Footnote Editor. Note that Columns will show up on both tabs and that editing the value in one tab will update the other. At this point, users may choose to continue and update the footnote to Save and Publish as is.