This article covers how to create, edit, and delete Working Groups among other topics. See, Work Group Basics for an overview of Working Groups. Only users with the System Administrator role have unrestricted access to create, edit, and delete work groups and subgroups— see Internal User Roles & Responsibilities for more.
The Create Work Group feature in Assette’s Admin Center empowers system administrators to define new user groups for operational, organizational, or compliance purposes. Whether creating a team-based grouping, a compliance-specific unit, or a functional subgrouping of users, this interface provides a guided and validated form to simplify and secure the process.
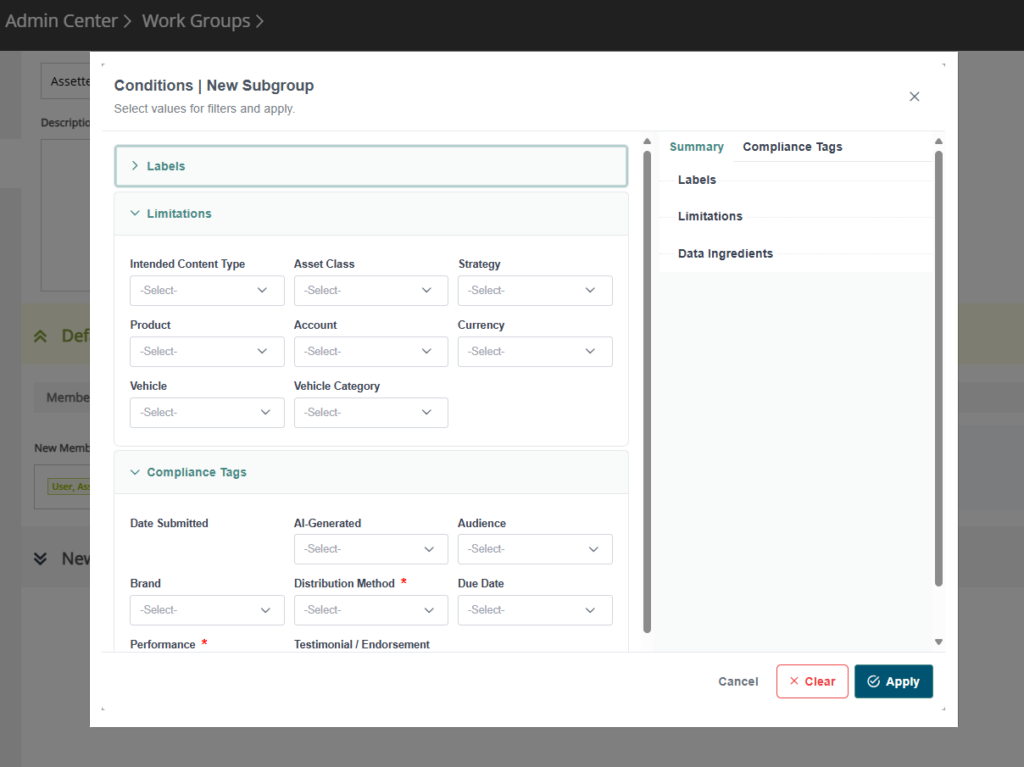
Work groups can be composed of one or more subgroups, each with specific membership and optional classification-based filtering. This modular structure helps administrators apply the right access and workflow rules to the right users, without redundancy or confusion. Real-time validations and contextual tooltips guide users as they create groups that align with internal policies and operational goals.
Creating Work Groups #
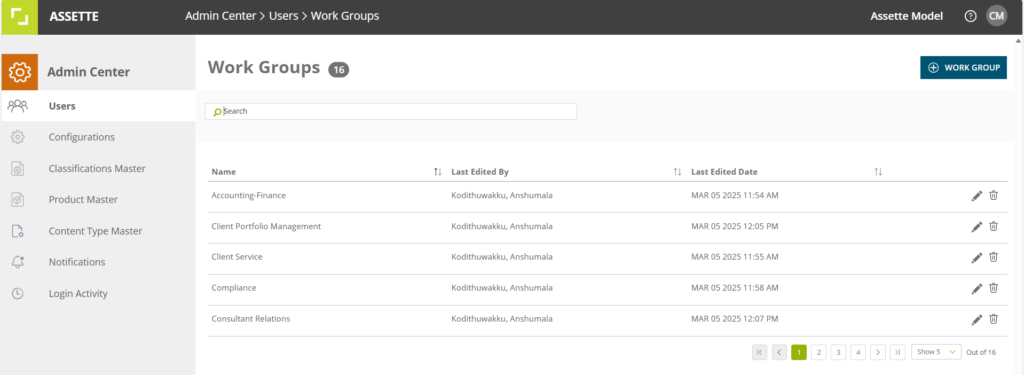
To begin creating a work group, navigate to Admin Center > Users > Work Groups. On the Work Groups dashboard, click the WORK GROUP button to open the creation form. This launches the configuration page where administrators can define the group’s name, compliance status, description, and associated subgroups.

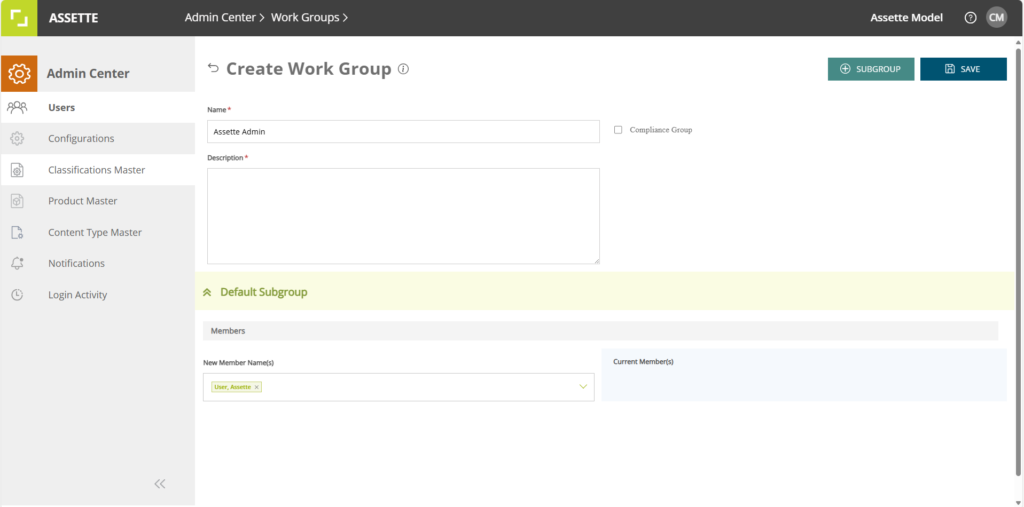
Creating a new work group starts with entering group-level details. Administrators provide a name for the work group, which must be unique and cannot be left blank. If the work group being configured is a system-defined group, the name field will be disabled and not editable. An optional checkbox is available to designate the group as a compliance group, which may apply compliance-specific logic within the system. Additionally, a description field is required to clarify the group’s purpose or scope, and this must be completed before proceeding.

Saving Working Groups #
After all required fields are populated and validated, the SAVE button becomes active. Clicking it initiates a final validation check and submits the work group for creation. If the operation completes successfully, the system displays a success modal to confirm that the new group has been created.
Validation rules are built into the form to ensure consistency and accuracy. The group name must be unique and required, as is the description. Subgroup names are required for all subgroups other than the default, and each subgroup must include at least one assigned member.
Working Group Conditions #
To get the most out of this feature, administrators are encouraged to use the conditions screen to align the group with actual roles, responsibilities, or compliance requirements can enhance clarity and efficiency. When using classification-based filters, administrators should carefully review the conditions to ensure no users are unintentionally excluded. Finally, it’s recommended to always review and confirm membership configurations before saving a new work group.