• Home
  • Visit Our Website
  • Home
  • Visit Our Website
Visit Our Website

Users

168
  • Getting Started
    • How to Log into Assette
    • The Assette Home Page
    • The Assette Navigation Bar
    • Glossary
  • Authoring Center
    • Smart Docs
      • Smart Docs
      • How to Create a Smart Doc
      • Copying and Restoring from Version History
      • Tracking Changes with Life Events
      • Smart Docs X-Ray View
      • Smart Doc Troubleshooting
      • Troubleshooting
        • Troubleshooting Smart Docs
    • Smart Pages
      • Creating & Editing Smart Pages
      • Smart Pages
      • How to Unlock a Smart Page
      • Deleting Smart Pages
      • Tracking Changes with Life Events
      • How to Insert Blank Columns and Rows
      • Changing a Smart Page’s Size
      • Supported PowerPoint Charts
      • Copying and Restoring from Version History
      • Smart Page X-Ray View
      • Smart Page Content Classifications
      • Compliance Tags
      • Assette Editors
        • PowerPoint Editor
          • How to Add New Series to a Chart
          • How to Insert Images Using the Assette Ribbon
          • Assette Ribbon
            • The “Un-Fabricate” Button
          • Troubleshooting
            • Resolving “Failed to Open” Errors in the Assette PPTX Editor
            • Installing the Assette PowerPoint Editor
            • How to Check Your Microsoft PowerPoint Version
          • Advanced Settings
            • Advanced Settings Overview
            • General Tab
            • Margin Tab
            • Zigzag Tab
    • Disclosures
      • Managing Disclosure Fragment Categories
      • Creating or Editing a Disclosure Fragment
      • Disclosures versus Footnotes
      • Disclosures
    • Fixed Content
      • Fixed Content
    • Data Docs
      • Data Docs
    • Smart Shells
      • How to Preview Smart Shells
      • Coupled Shells
      • Smart Shells
      • Tracking Changes with Life Events
      • Copying and Restoring from Version History
      • Creating Smart Shells Using the Smart Shell Library
      • Editing Smart Shells Using the Smart Shell Library
      • Creating Smart Shells via Assette’s PowerPoint Editor
      • How to Refresh Smart Shells
      • Deleting Smart Shells
      • Renaming Smart Shells
      • Smart Shells X-Ray View
      • Smart Shell Content Classifications
      • Performance History Chart
      • Smart Shells Frequently Asked Questions (FAQ)
      • Creating an “As of Date” Smart Shell
    • Brand Themes
      • Assette Dynamic Brand Theme Setup
      • Brand Themes
      • Managing Multiple Themes Within a Single Brand Theme
      • Creating a Brand Theme
      • Shell Styling
      • Dynamic Brand Themes
      • Master Slide Layouts for Dynamic Brand Themes
      • Changing a Smart Page’s Size
    • Email Templates
      • Using Variables in Assette Email Templates
      • Email Templates
    • Additional Features
      • Using Quick View in Assette
      • Automatic Extension Correction
      • X-Ray View Overview
      • The Generation Screen
    • Authoring FAQs
      • Understanding the Difference Between My Workspace and Workrooms
      • What’s the Difference between Footnotes & Coupled Shells?
  • Content Hub
    • Library
      • Saved Trays in the Assette Library
      • Content Library
      • Content Generation and Sharing with Content Library
    • My Workspace
      • Copying Content to My Workspace
      • My Workspace
    • RFPs & DDQs
      • Editing an RFP Answer
      • Uploading an RFP to the Assette
      • RFPs & DDQs
    • Workrooms
      • How to Edit Content in a Workroom
      • Copying Content to a Workroom
      • Workroom
    • Assette Viewer
      • Disabling or Removing the Assette Outlook Add-in
      • Assette Viewer Overview
      • Assette Viewer Basics
    • Content Center
      • How to Add a New Organization to the Organization Master
      • Content Plan Data Model
      • Content Plans
      • Content Types
      • Using Advanced Search in the Content Library
  • Data Engine
    • Input Center
      • Input Center Overview
      • Data Files Overview
      • Recipients
      • External Content Overview
    • Data Files
      • Troubleshooting Data Files Uploads
    • Qualitative Data
      • Adding and Editing People in Qualitative Data
      • Qualitative Data
      • Ownership Data
      • Firm Overview
      • People Data
      • Master Questionnaire
    • Developer Center
      • Developer Tools Overview
  • Analytics
    • Usage Analytics
      • Content Sharing Analytics
    • Component Analytics
      • Component Analytics
      • Using X-Ray with Component Analytics
      • Templates Analytics
        • Templates Dashboard
      • Section Analytics
        • Sections Dashboard
      • Shell Analytics
        • Shells Dashboard
      • Data Block Analytics
        • Data Blocks Dashboard
  • Administration
    • Workbox
      • Workbox Basics
    • Content Types Master
      • Creating an Input File Content Type
      • Understanding Purpose in Content Types
      • Content Groups
      • Creating Content Types
      • Content Classes
      • Content Filename Aliases
    • Users
      • Work Group Basics
      • Internal Users
        • Internal User Roles & Responsibilities
        • Manually Creating Users in Assette
        • Reset or Unlock User’s Accounts
        • SSO Internal User Roles & Tasks
      • Work Groups
        • Creating & Editing Work Groups
        • Creating Subgroups
    • Workflows
      • Workflows Basics
      • Workflow Frequently Asked Questions (FAQ)
      • Workflow Management
        • Workflow Management Overview
        • Workflow Reassignment
      • Workflow Design
        • Client Portal User Approval Workflow
        • Editing or Deleting a Workflow
        • Creating a Workflow
        • Creating Conditional Workflows
    • Product Master
      • Composite vs. Rep Accounts
      • Product Master Overview
      • Deactivating & Deleting Products
      • Troubleshooting Product Master Errors
    • Classification Master
      • Classification Master Overview
      • How to Manage Content Classifications
      • Creating & Managing Labels
      • Labels
      • Limitations
      • Compliance Tags
      • Data Ingredients Overview
    • Configurations
      • Attribution Data Objects Configurations
  • Client Portal
    • Security Overview for the Assette Client Portal
    • Client Portal Overview
    • Creating Notifications for Client Portal Users
    • Client Portal Users
      • Client Portal User Workflow Lifecycle
      • Client Portal Frequently Asked Questions (FAQ)
      • Client Portal Session Handling
      • Log into the Assette Client Portal
      • Managing User Access in the Client Portal
      • Creating a New Portal User
      • Editing or Creating Portal Users
      • Deleting a Client Portal User
      • Monitoring and Accessing User Login Activity for Client Portal
  • Tutorials
    • When to Create a New Artefact in Assette
    • Creating a Fixed-Row Zigzag Table
  • Legacy Support
    • Assette Centers [Legacy]
    • Data Validations [Legacy]
    • Assette Roles Overview [Legacy]
    • Create & Manage Attributes [Legacy]
    • Internal Users Management [Legacy]
    • Legacy Authoring Center
      • Data Object Library [Legacy]
      • Data Docs [Legacy]
      • Smart Shells [Legacy]
      • How to Create a New Smart Page [Legacy]
      • Legacy Smart Pages
        • Creating and Editing Smart Pages [Legacy]
      • Legacy Smart Docs
        • Creating a Smart Doc [Legacy]

Developers

202
  • Getting Started
    • The Assette Navigation Bar
    • User Login & Creation
      • Add Assette Users with Azure AD
      • Developer Roles & Permissions
      • How to Create & Assign Permission Groups
      • Permission Groups Overview
    • Implementation Overview
      • Introduction to Assette Implementation
      • The Assette Implementation Approach
      • What Data is Required to Start?
      • Connecting to Source Systems with Assette
      • Essential Data Blocks
      • Fields Synchronized with Assette
  • Developer Tools
    • Tool Setup
      • Assette Development Stack
      • Developer Center Configurations
      • Prohibited Data Block Keywords and Built-ins
      • Master Data Scheduler
      • Python Data Block Libraries & Keywords
      • Troubleshooting
        • Troubleshooting AxiosError-500 Errors
        • Assette VS Code Extension Troubleshooting
      • Visual Studio Code
        • Assette Visual Studio Code Extension
        • How to Find Where a Component is Used in the VS Code Extension
        • Error and Status Messages Reference
        • Signing Into the Assette VS Code Extension
        • VS Code Frequently Asked Questions (FAQs)
        • Installing the Assette Block Editor VS Code Extension
        • Assette VS Code Extension Troubleshooting
    • Data Block Editor
      • Using Nested Functions in Data Blocks
      • Importing Python Libraries
      • Import & Export Data Blocks
      • Data Block Unit Testing in Python
      • Data Block Editor Basics
        • Introduction to the Data Block Editor
        • Calculation Operators and Precedence
        • Secret Management
        • How to Copy & Delete Data Blocks
        • Creating & Editing Data Blocks
        • How to Freeze Data Blocks
      • Data Block Keywords
        • Understanding the “response” Keyword in Assette Data Blocks
        • Understanding the ‘read’ Keyword in Assette Data Blocks
      • Data Block Editor Metadata
        • How to Update Data Block Metadata
      • Data Block Editor Troubleshooting
        • Troubleshooting API Authentication Issues
    • Data Object Editor
      • Applying Row Filtration with Data Objects
      • Locking a Data Object
      • Introduction to the Data Object Editor
      • Dynamic Row Numbering
      • Force Unlocking a Data Object
      • Editing Data Objects
      • Creating Data Objects
      • Data Object KeyError
      • How to Copy & Delete Data Objects
      • Generation Time Data Settings
      • Importing & Exporting Data Objects
      • Design View
        • Data Settings Tab
          • Data Settings Tab
        • General Info Tab
          • General Info
          • Styling Classes
        • Data Source Tab
          • Data Source Tab
        • Columns Tab
          • Columns Tab
          • Date Formats
        • Groupings Tab
          • Grouping Tab
          • Group Expressions & Group Ordering
          • Creating Group Header Rows
          • Creating Group Summary Rows
          • How to Create “Group By” Data Settings
        • Sorting Tab
          • Sorting Tab
        • Summary Tab
          • Summary Tab
        • Row Types Tab
          • Row Types Tab
        • Title & Footnotes Tab
          • Title & Footnotes Tab
        • Legend Tab
          • Legend Tab
        • Output Variables Tab
          • Output Variable Tab
        • Internal Variables Tab
          • Internal Variables
          • Internal Variable Type Assignment
        • No Data Message Tab
          • No Data Message Tab
      • Expressions
        • The “round(value, n)” Expression
        • Expressions, Operators, & Functions
        • The “Contains()” Function
        • The “HasValue()” Function
        • The “NOT” Operator
        • The “OR” Operator
        • The “<> Not Equal To” Operator
        • The “>= Greater Than or Equal To” Operator
        • The “ADD” Expression
        • The “AND” Expression
        • The “Divide” Expression
        • The “Minus” Expression
        • The “Multiply” Expression
        • The “<= Less Than or Equal to” Operator
        • The > Greater Than Operator
        • The “==” Equals Operator
        • The Grouping Operator “()”
        • The < Less Than Operator
    • Dynamic Fields
      • Dynamic Fields
    • Footnote Editor
      • Footnote X-Ray View
      • Footnote Editor
      • How to Create & Edit Footnotes
      • Import Variables & Columns
    • Tenant Manager
      • Deployment Statuses
      • Tenant Manager Overview
      • Deploy Content Using the Assette Tenant Manager
      • Review Artifacts
      • Tenant Manager Troubleshooting
      • Tenants in the Tenant Manager
      • Deployment Processing & Error Logging
  • Data Blocks
    • Data Block Basics
      • Publishing Data Blocks
      • Data Block Basics
      • Data Block Categories
      • Data Block Request Parameters
    • Account Master
      • Account Master Data Block
      • Filtering the Account Master Using Account Codes
    • Data Blocks by Category
      • Understanding Assette Data Blocks
      • System Data Blocks
        • Organization Add Data Block
        • Organization Master Data Block
        • Get Recipient Info Salesforce Transform Data Block
        • Get Recipient Info Salesforce Data Blocks
        • Get Recipients LocalDB Data Block
        • Get Recipient Info Local Data Block
        • Recipient Master Data Block
        • Attribute Type Values Local Data Block
        • Brand Theme Selector Data Block
        • Brand Theme Extract Data Block
        • System Data Blocks Overview
        • Account Master Data Block
        • Asset Classes Local Data Block
        • As of Dates Data Block
        • Countries Data Block
        • Currency Codes Data Blocks
        • Product Master Data Block
        • Sub Accounts Client Database Data Block
        • Sub Accounts Local Database Data Block
        • Sector Schemes Data Blocks
        • Sectors Data Block
        • Sub Accounts Data Block
      • Sync Data Blocks
        • Sync Data Block Overview
        • Country List Sync Data Block
        • Product Master Sync Data Block
        • Attribute Type Values Sync Data Block
      • Source Data Blocks
        • Source Product Offer Countries Data Block
        • Source Sub-Accounts Relationship Data Block
        • Source List of Attribute Type Values Data Block
        • Source Extract Accounts Details Data Block
        • Source Account Attributes Values Data Block
        • Source List of Currency Codes Data Block
        • Source Product Master Extract Data Block
      • Transform Data Blocks
        • Assette Get Valid Periods Data Block
        • System Period Information Data Block
        • Assette Get Begin & End Date Data Block
        • Source Extract Accounts Details Data Block
      • Interface Data Blocks
        • Organization Read Local Data Block
        • Sectors Local Database Data Block
        • Assette Period Code Map Data Block
        • Account Attribute Mapping Local Database Data Block
        • Account Attributes Local Database Data Block
        • Source Product Master Extract Data Block
        • Source List of Currency Codes Data Block
        • Source Account Attributes Values Data Block
        • Product Master Local Data Base Data Block
      • Configuration Data Blocks
        • Salesforce Settings Data Block
        • Configuration Data Block Overview
        • Calculation Python Environment Data Block
        • Python Data Calculation Modules Data Block
        • Python Environment for Date Calculation Data Block
        • Demo Snowflake Setting Data Block
        • Snowflake Demo Certificate Data Block
        • Calculation Environment Data Block
    • Data Blocks by Functionality
      • Get Major Minor Ticker Data Block
  • Data Objects
    • Data Objects
    • Data Object X-Ray View
    • Introduction to Data Objects
  • Integrations
    • Connecting Salesforce with Assette
    • Snowflake
      • Source Account Attributes Values Data Block
      • Snowflake Integration
    • Aprimo
      • Assette-Aprimo Integration Overview
      • Inserting Content with Aprimo
      • Aprimo Image Library Data Block
      • Aprimo Thumbnail Image Library API Data Block
      • Modifying the Aprimo API Records Data Block
      • Aprimo Data Blocks
        • Aprimo API Post Order Data Block
        • Aprimo Image Thumbnail Data Block
        • Aprimo API Single Record Data Block
        • Aprimo API Records Data Block
        • Aprimo API Order Status
        • Image Content Data Block
  • Developer FAQ
    • Batch Generation Architecture
    • How to Add a New Product to the Product Master
    • How to Add New Attributes to the Attribute Master
    • Data Blocks Frequently Asked Questions (FAQ)
    • Data Object Frequently Asked Questions (FAQ)
    • Tenant Manager Frequently Asked Questions (FAQ)
    • TLS Email Encryption via SendGrid
    • Data Block Cheat Sheet
    • Why Can’t I Edit a Data Object?
    • How Do Unit Tests Work in Assette?
    • Enable Assette Add-In in Case of Failure
    • How Do I Log into Snowflake?
    • Period Codes
    • Developer Tools FAQs
      • Removing Blank or NULL Columns
      • How to Display Different Values in the Account Code Dropdown in the Data Object Editor Preview
      • When and Why You See an Impact Change Message in the Developer Center
  • Tutorials
    • Creating a Correlation Matrix Table
    • Data Block Tutorials
      • Structuring Data for Time-Series Charts in PowerPoint
      • How to Cache Data Using Data Blocks
      • Creating a Certificate Data Block
      • Making Public API Calls Using Assette Data Blocks
      • Using Data Blocks to Make API Calls
    • Data Object Tutorials
      • Creating Dynamic Column Headings
implementation

Implementation

18
  • Getting Started
    • Welcome to the Assette Implementation Guide
  • Planning Your Implementation
    • Assette 101
    • The Three Layer Model
    • What to Expect from Implementation
  • Platform Layers
    • The Data Engine
    • Authoring Center
    • Content Hub
  • Assemble Your Implementation Team
    • Technical Environment & Tenant Setup
    • Building Your Implementation Dream Team
    • Scaling Your Implementation Across Strategies & Modules
  • Working With Data
    • Content Inputs
    • Prepare and Shape Your Data
    • Real-Word Examples
  • Implementation Process & Support
    • How ACE Training Works
    • Implementation Steps
    • Analyze Backward, Build Forward
    • Assette Support & Roles
    • ACE Syllabus
  • Home
  • Docs
  • Users
  • Authoring Center
  • Smart Pages
  • Creating & Editing Smart Pages

Creating & Editing Smart Pages

7 min read

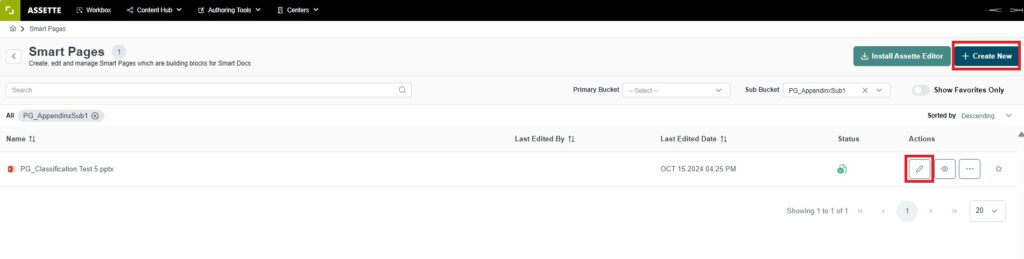
In Assette’s Authoring Center, users can create new Smart Pages by selecting the Create New option. Upon doing so, the Assette Editor Launcher will prompt the user to open PowerPoint with the Assette Editor plugin. It is important to close any other open PowerPoint documents before proceeding. This ensures that users are working in a clean, dedicated environment for authoring their Smart Pages.

Existing Smart Pages can be edited through the Edit option. This allows users to modify previously created pages, making updates or adjustments as needed without starting from scratch. The editing process is seamless, with the Assette Editor available in PowerPoint for making these adjustments.

Screenshot 2024 10 18 123054

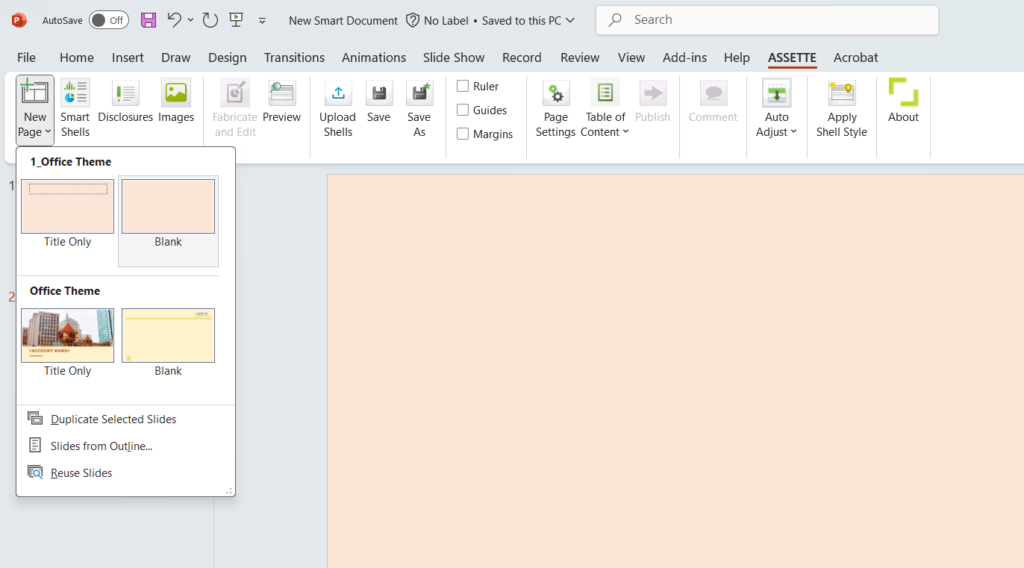
The Assette Editor is an add-on developed to facilitate the fabrication of Smart Pages. Once installed, it appears as a tab in the PowerPoint ribbon. This tab provides all the necessary tools for working with Smart Pages, allowing users to fabricate tables, charts, and more. Users can save their work in Draft mode for continued editing or choose to publish the completed page, making it available for generating output with data.

image 74

The New Page option in the Assette menu allows users to easily add a new slide to their document.

image 75

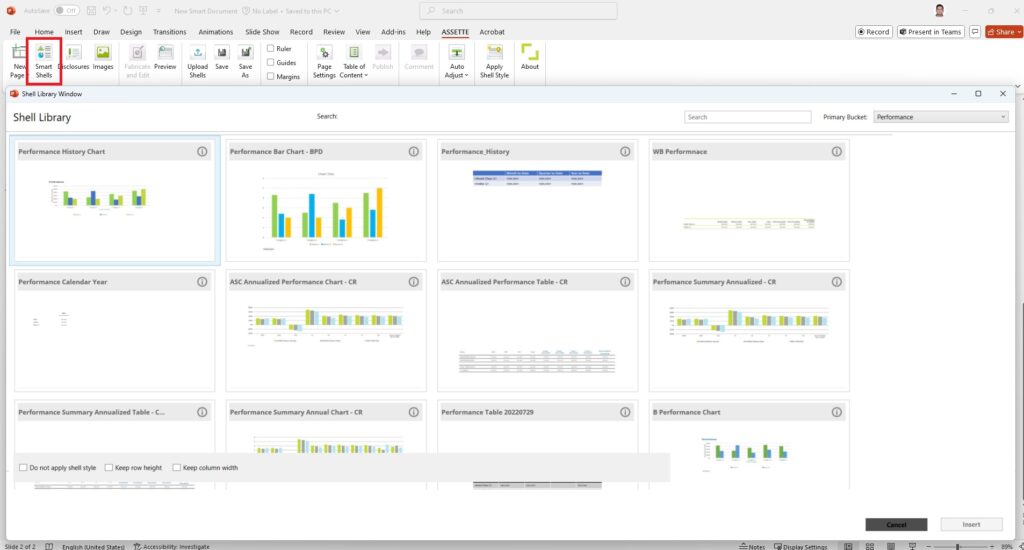
The Smart Shells option in the Assette menu gives users access to the Smart Shell Library, where pre-fabricated tables, charts, and labels are stored. This allows users to quickly download and insert these pre-designed elements onto their Smart Page, saving time and ensuring consistency across documents. By reusing previously fabricated shells, users can maintain a cohesive design without needing to create every element from scratch.

Screenshot 2024 10 18 125659

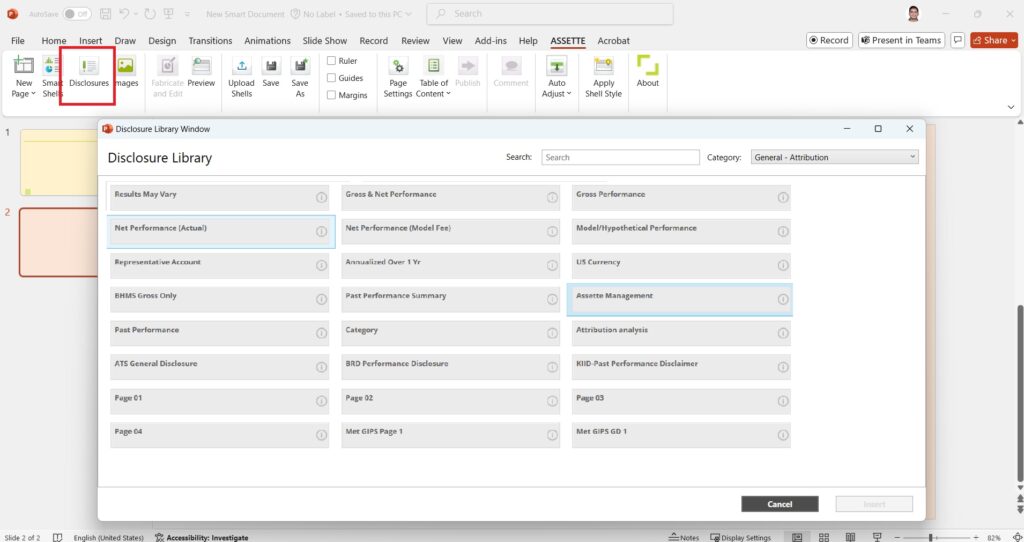
The Disclosures option in the Assette menu allows users to download disclosures directly from the Disclosure Library. This makes it easy to insert standard disclosures into documents, ensuring compliance and consistency without the need to manually recreate them. Users can select the appropriate disclosure for their Smart Page, saving time while maintaining accuracy and adhering to regulatory or legal requirements.

Screenshot 2024 10 18 130121

The Image option enables authors to seamlessly integrate images into their Smart Pages by pulling them directly from their organization’s Digital Asset Management (DAM) system, such as Aprimo. This allows for easy access to approved images, ensuring that branding and visual consistency are maintained across documents. It also streamlines the process of embedding high-quality images, eliminating the need for manual uploads and enhancing the overall efficiency of the content creation process.

image 78

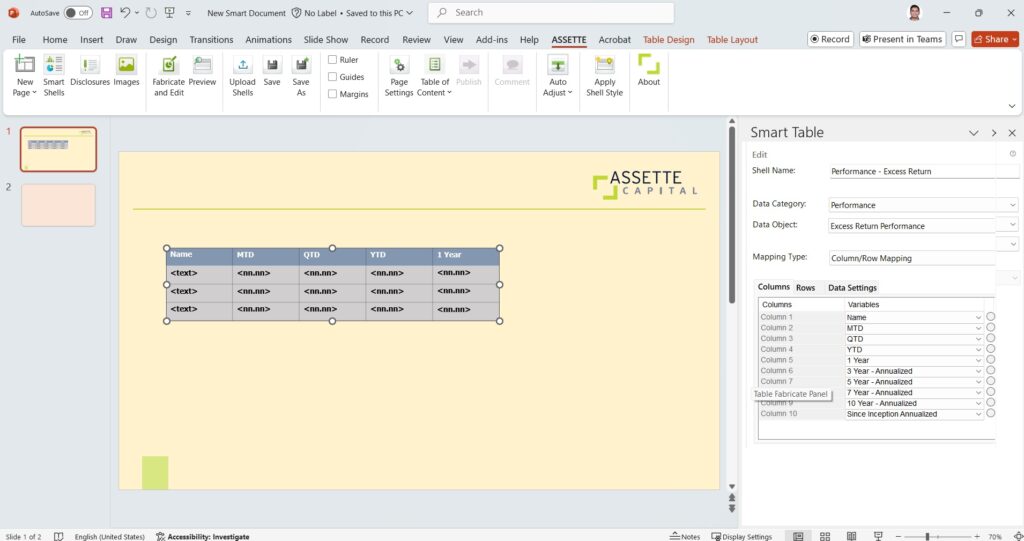
The Fabricate and Edit option in the Assette menu allows users to modify and customize Smart Shells, such as tables, charts, and labels, within their Smart Pages. By selecting this option, the user can open the Fabricate Panel on the right side of PowerPoint, where they can configure various settings for the selected element, such as mapping rows, columns, and cells to data objects, adjusting design settings, and tagging variables.

This option enables precise control over how data is displayed, making it possible to fine-tune the layout and structure of elements in accordance with specific data requirements. It streamlines the process of customizing document components, allowing users to create highly tailored, data-driven content directly within PowerPoint.

To fabricate a table, users first insert a table using the basic PowerPoint functionality. After drawing the table, they can click on Fabricate and Edit under the Assette tab. The Fabricate Panel will appear on the right side of the screen, where users can assign a Shell Name, select the Data Category, and map attributes for columns, rows, or individual cells. Once all settings are applied, users can preview the tagged variables, commit the changes, and customize the table using PowerPoint’s formatting options. For more visuals on fabricating a table refer Creating Smart Shells Using The Smart Shell Library | Assette Support

Screenshot 2024 10 18 131540

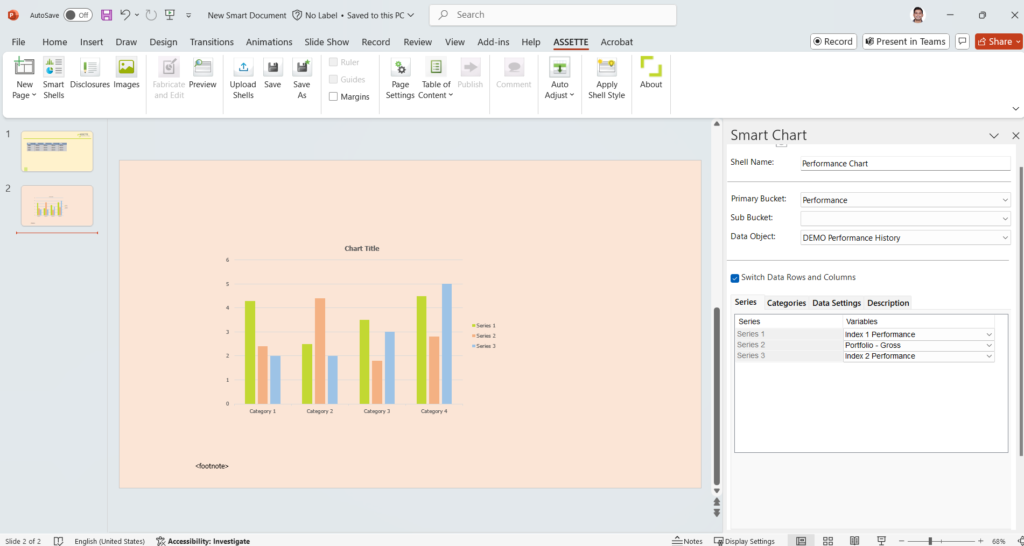
The process for fabricating a chart is similar to that of a table. Users begin by inserting a chart, selecting the type of chart they need (e.g., pie chart, bar chart). Afterward, they click Fabricate and Edit in the Assette tab to open the Fabricate Panel. Here, users can configure the data settings, series, and categories relevant to the chart. Like with tables, they must commit their changes for them to be saved and applied. Charts can be designed with custom colors and formats using PowerPoint’s native tools. For more visuals on fabricating a chart refer Creating Smart Shells Using The Smart Shell Library.

image 79

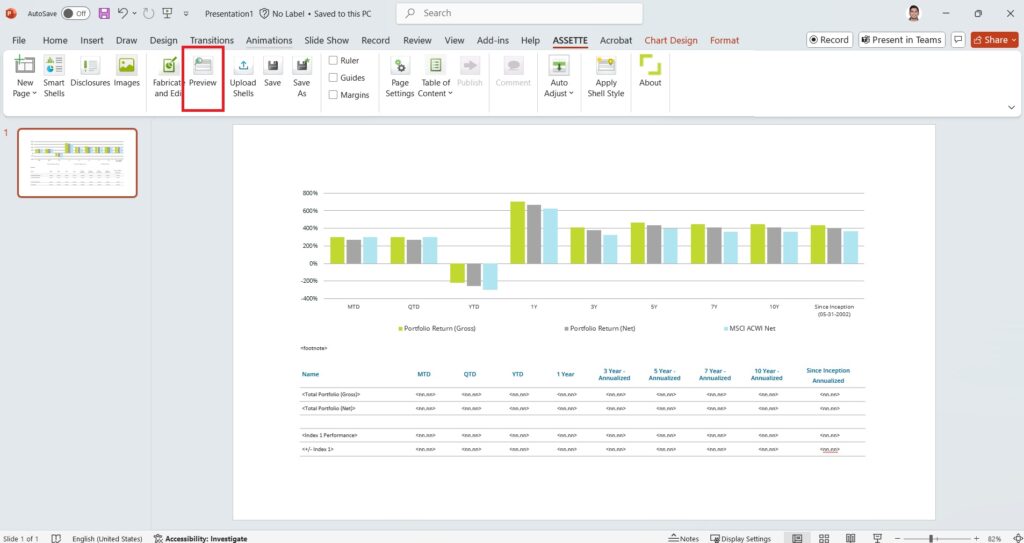
Once a Smart Page is fabricated, users can preview it with real data to ensure that all variables are correctly mapped. By selecting Preview Template from the Assette tab, the page is generated with user data and opened in a separate browser tab for review. This helps users confirm that the content is correctly aligned before publishing. Multiple slides can be previewed by selecting them in PowerPoint while holding the CTRL key as well.

Screenshot 2024 10 18 132208

The Upload Shell option in the Assette menu allows users to upload a Smart Shell (such as a table or chart) that was fabricated directly within the Smart Page, rather than sourced from the Smart Shell Library. This feature makes it possible to add newly created or customized shells to the library, enabling future reuse by other users. By uploading these new variants of Smart Shells, users can reduce the need for repetitive fabrication efforts, ensuring that once a shell is designed, it can be easily accessed and reused across different projects, improving efficiency and consistency.

Screenshot 2024 10 18 162647

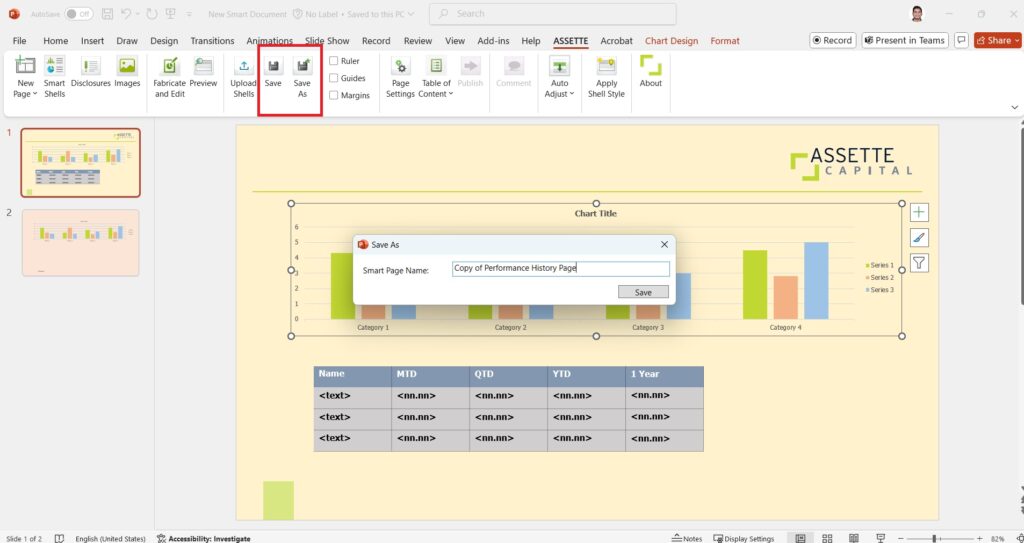
The Save and Save As options in the Assette menu function exactly as they sound. The Save option allows the user to save the current draft of the Smart Page to the Smart Page Library, preserving their progress for later editing or publishing. On the other hand, the Save As option allows the user to save a copy of the draft under a new name, enabling them to create multiple versions of the Smart Page or experiment with different designs without overwriting the original draft. This ensures flexibility in managing and organizing different iterations of the Smart Page.

Screenshot 2024 10 18 163132

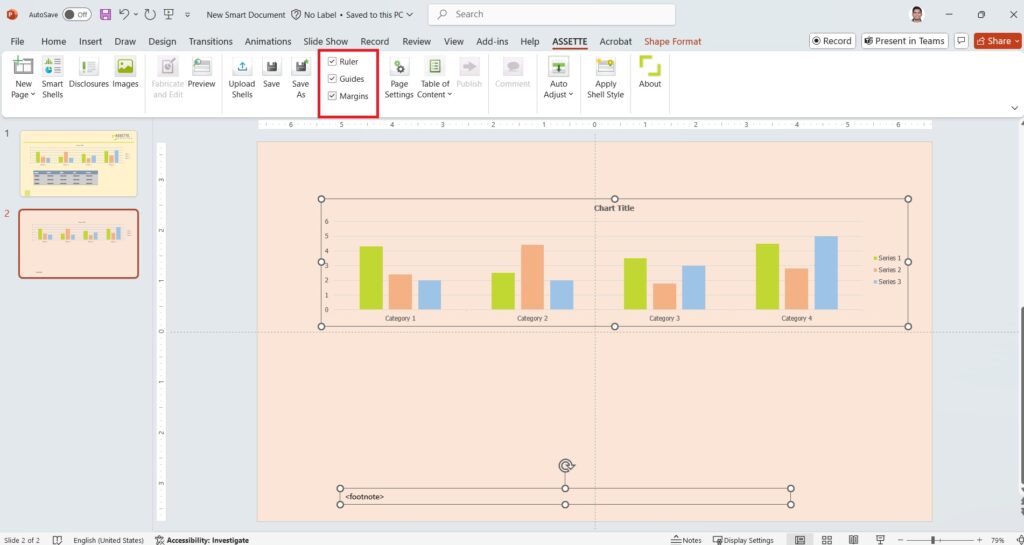
The Ruler, Guides, and Margins option in the Assette menu works similarly to these tools in PowerPoint. The Ruler helps users align objects with precision, displaying horizontal and vertical rulers that allow for exact placement of tables, charts, or other elements. Guides provide visual lines on the slide that assist with aligning elements to specific points on the slide, ensuring consistent spacing and layout. Margins set the boundary lines within which content should be placed, helping to maintain a clean and professional structure by preventing elements from overlapping or extending too close to the edges of the slide. These tools are essential for ensuring that the layout remains organized and visually appealing.

Screenshot 2024 10 18 163331

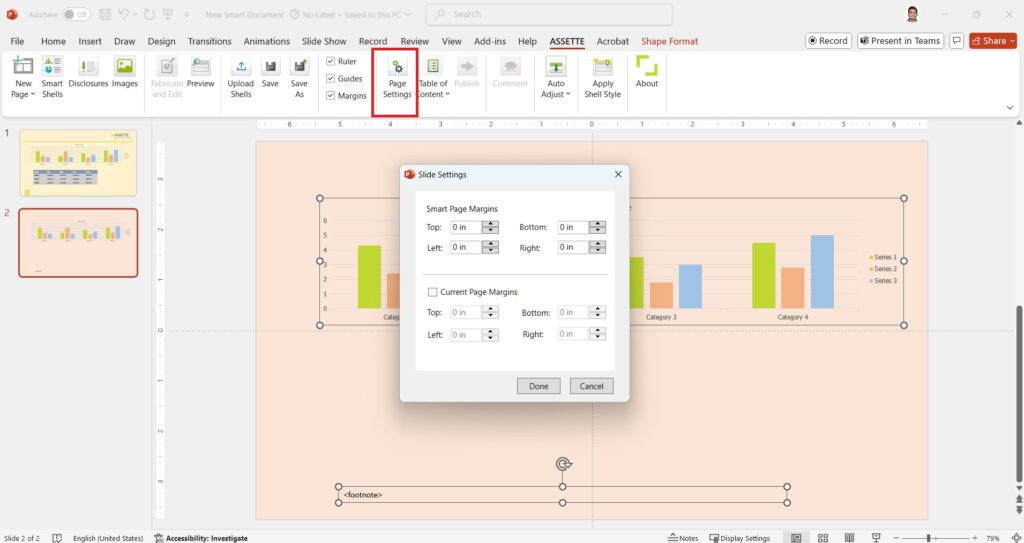
The Page Settings option in the Assette menu allows users to manually set the margins for Smart Pages, adjusting the top, bottom, left, and right margins. These settings can be applied either to all slides within the Smart Page for consistent layout or to the current slide only for individual customization. This flexibility ensures that users can control the spacing and alignment of content on their slides, optimizing the visual layout and ensuring that no important elements are cut off or too close to the edges.

Screenshot 2024 10 18 163655

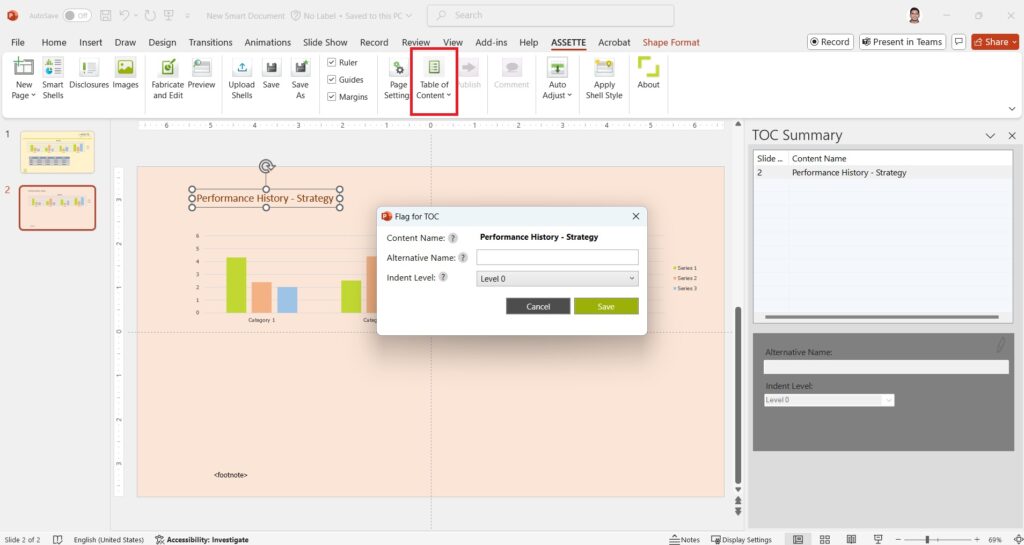
The Table of Contents option in the Assette menu allows users to flag specific text, such as titles within a Smart Page. These flagged titles can be tagged with their original name or assigned an alternative name, which will then appear in the dynamic Table of Contents when the output is generated. This feature makes it easier to organize and navigate the document when published. Additionally, there is a summary option available, allowing users to view all the flagged titles within the Smart Page for quick reference and management of the document’s structure.

Screenshot 2024 10 18 164242


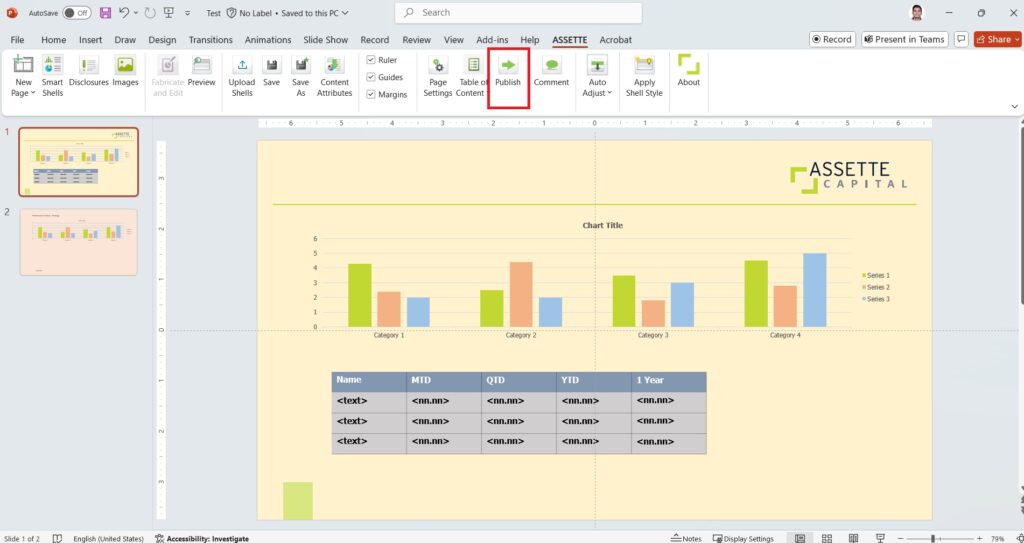
The Publish option in the Assette menu sends the Smart Page to the designated workflow approval process. During this process, the assigned team or individuals review and verify the changes made to the Smart Page. Once approved, the Smart Page becomes available for use in the next phase, known as the Smart Doc. However, if no workflow is configured, the Smart Page will be immediately published without requiring approval, making it instantly available for use. This ensures a streamlined process, either with or without approval steps, depending on the setup.

Screenshot 2024 10 18 164726

The Comments feature in the Assette menu allows authors to leave notes or explanations related to the Smart Page, which will be visible to the approver during the workflow approval process. This is particularly useful when authors need to justify changes or provide additional context for updates they’ve made, ensuring that the approver understands the reasoning behind certain modifications. By using this feature, the review process becomes more transparent and efficient, as the approver has all the necessary information to make informed decisions.

Screenshot 2024 10 18 165209
image 80

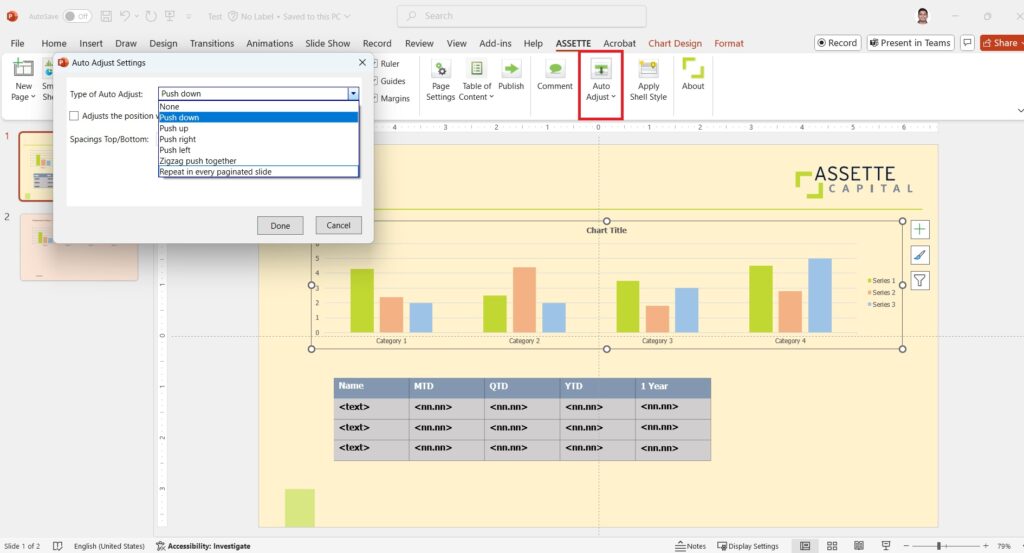
The Auto Adjust option in the Assette menu allows users to control how items on a slide behave when they overlap. There are several adjustment settings available:

  • None: No adjustment is made, and items will overlap as placed.
  • Push Down: The overlapping item pushes the content below it downward.
  • Push Up: The content is pushed upward when overlap occurs.
  • Push Right: Items are moved to the right when overlap is detected.
  • Push Left: Items shift to the left to avoid overlapping.
  • ZigZag Push Together: Items adjust in a zigzag pattern to fit together without overlapping.
  • Repeat in Every Paginated Slide: This setting repeats the behavior across all slides that are part of a paginated sequence.

These options help in dynamically managing content layout, ensuring that items maintain their positioning and legibility without manual adjustments.

Screenshot 2024 10 18 165511

In summary, Smart Pages are a key part of Assette, helping you build professional, data-rich slides for reports and presentations. From integrating tables and charts using the Smart Shell Library or creating them on the fly, to features like Table of Contents, Auto Adjust, and Fabricate and Edit, Smart Pages give you control over every detail of your document. The ability to customize, save, and publish pages with ease—along with tools to collaborate and approve content through workflows—makes Smart Pages a powerful tool for creating polished, client-ready documents quickly and consistently.

Smart Pages
Still stuck? How can we help?

How can we help?

Updated on April 1, 2025
Stay up to date on Assette news and updates with our Newsletter:
  • Platform
  • Modules
  • AssetteAI
  • Who We Are
  • Who We Work With
  • Platform
  • Modules
  • AssetteAI
  • Who We Are
  • Who We Work With
  • Platform
  • Modules
  • AssetteAI
  • Who We Are
  • Who We Work With
  • Platform
  • Modules
  • AssetteAI
  • Who We Are
  • Who We Work With
  • Blog
  • News
  • Events
  • Contact
  • Blog
  • News
  • Events
  • Contact
  • Blog
  • News
  • Events
  • Contact
  • Blog
  • News
  • Events
  • Contact

4 Faneuil Hall, 4th Floor
Boston, MA
02109 USA
Tel: +1.617.723.6161

Book a Demo
X-twitter Linkedin Youtube
  • Privacy Policy
  • © 2025 Assette. All Rights Reserved
  • Powered By Artrivo (PVT) Ltd.