This article makes reference to legacy content and may not be available for all clients. This article is no longer being updated or maintained. Please contact the Assette Client Service Team if you have any questions about this content.
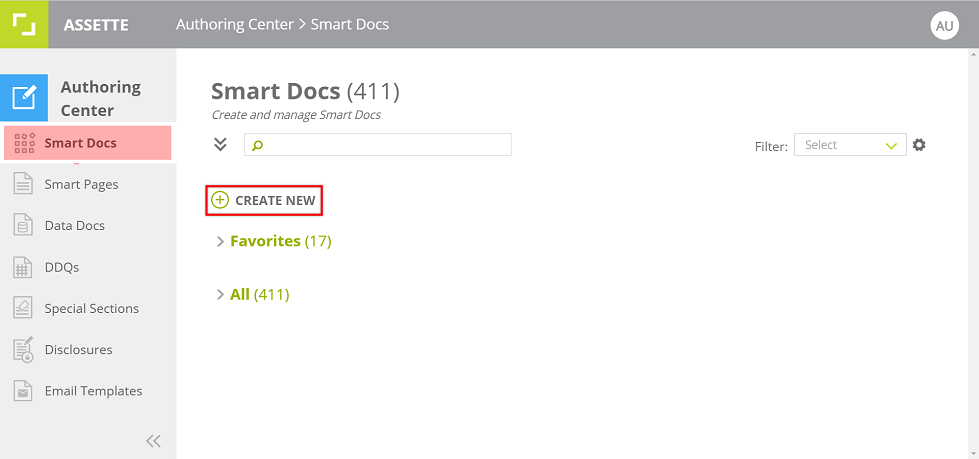
Click on CREATE NEW in the Smart Docs main page to create a new Smart Doc.
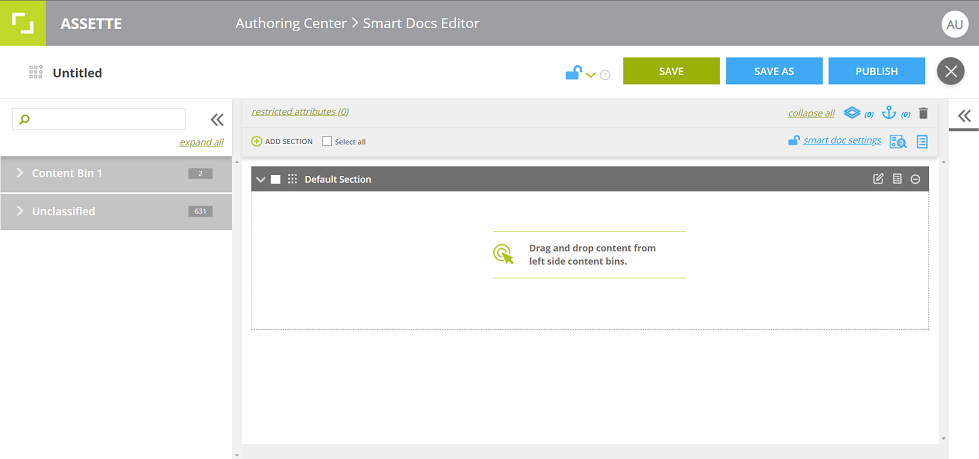
The Smart Docs Editor will then be opened on a separate tab in the browser.
Add Smart Pages
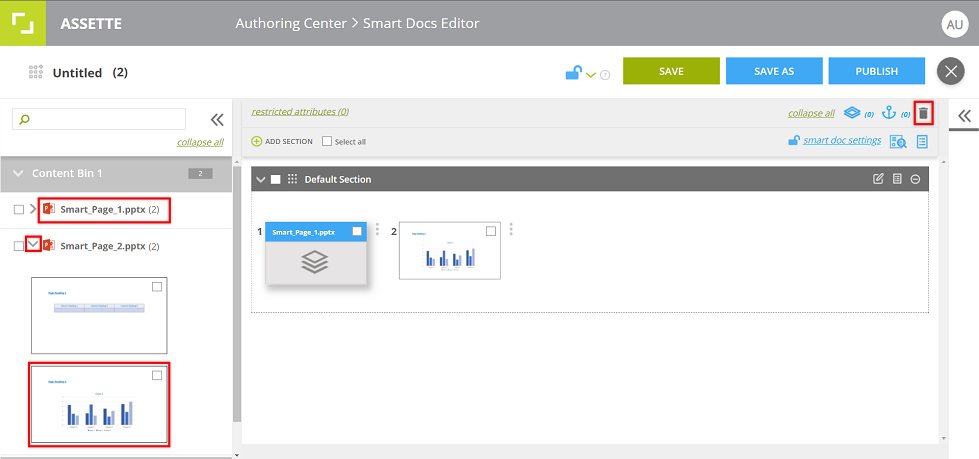
- Drag and drop Smart Page(s) from the Content Bins in the left side-panel.
- You can see a preview of each slide of the Smart Page by expanding the item in the bin.
- A slide(s) from a Smart Page can also be dragged and dropped into a section.
- To remove a Smart Page or a slide from a section, drag and drop it into the Content Bin panel.
- You can also click on the Remove icon in the top right corner to remove a selected item(s) in a section.
3. Add New Section
- Click on ADD SECTION.
- Enter a unique name for the section and then click ADD.
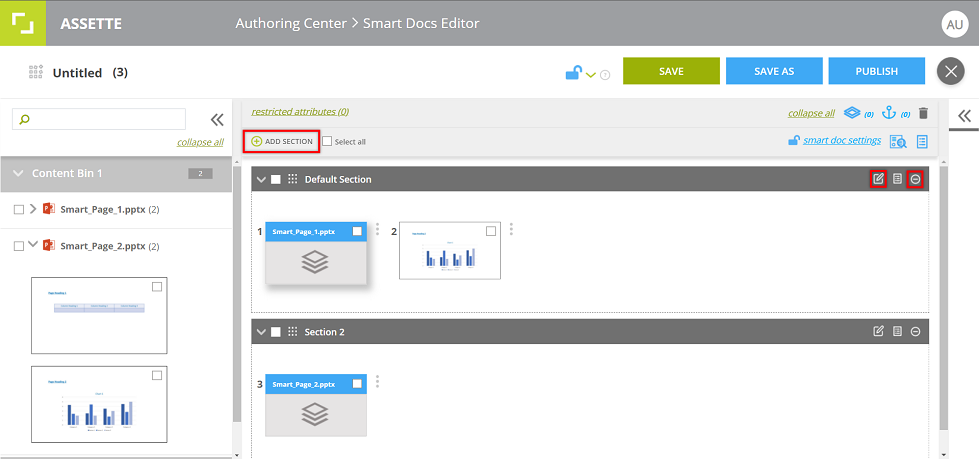
- Drag and drop the content items within a section or in between sections to re-order them as needed.
- To rename, click on the Edit icon in the top bar of the section panel.
- To remove a section, click on the Remove icon in the top bar of the section panel.
4. Save and Publish
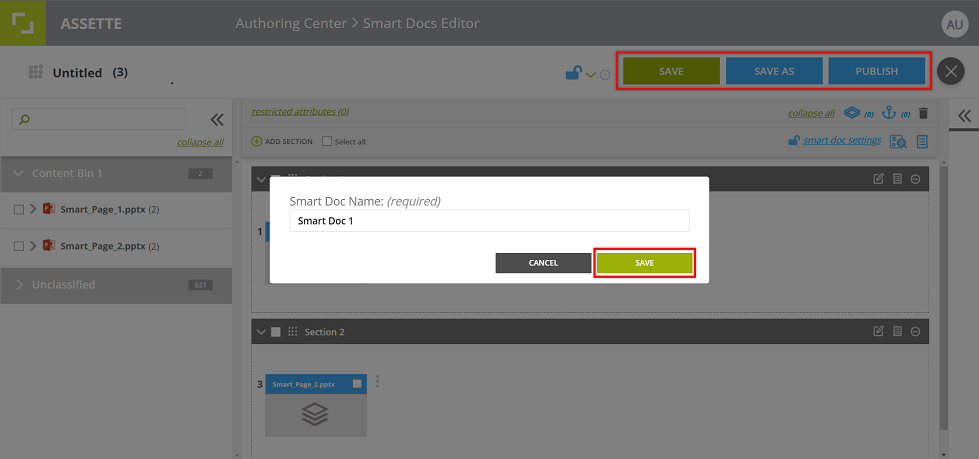
- Click on the SAVE button in the top and enter a unique name for the Smart Doc to save it as a Draft.
- To publish the Smart Doc, click on Publish and the Smart Doc will be saved as a Published document.
- You can edit a saved Smart Doc by clicking on the Edit icon in the Smart Docs main page. Then, the Smart Docs Editor will be opened on a separate tab in the browser.
- The edited Smart Doc can also be saved as a new Smart Doc under a different name by clicking on SAVE AS and entering a unique name.
5. Group and Anchor Smart Pages
- A set of selected Smart Pages/slides can be grouped by clicking on the Group icon in the top right corner of the editing panel.
- Once grouped, the items within the group cannot be selected separately.
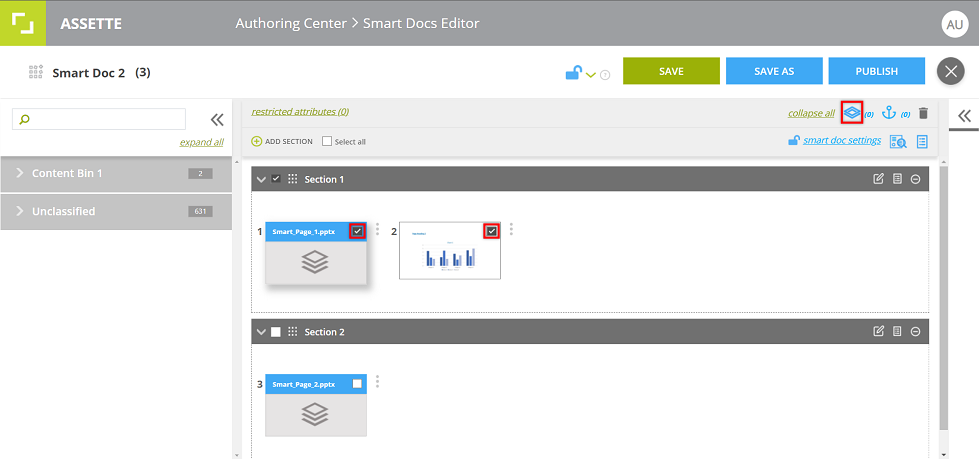
- A group can be moved, anchored or removed as a single content item.
- To un-group, select the group and then click on the Ungroup icon.

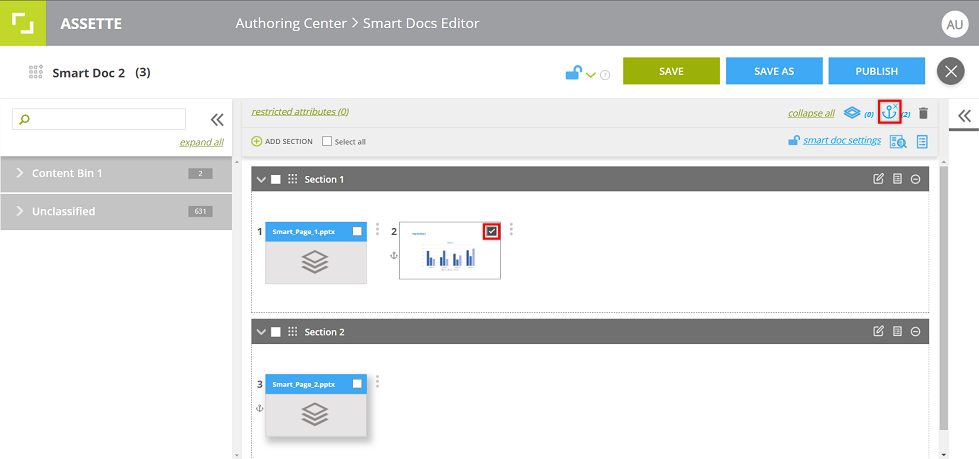
- You can anchor a Smart Page(s) by selecting the item and then clicking on the Anchor icon by the side of the Group icon.
- An anchored item cannot be removed from the Smart Doc.

- A group can also be anchored in the similar way.
- To un-anchor, select the item and click the Un-anchor icon in the top.
6. Data and Display Settings
- Data and display settings of a Smart Shell within a Smart Page can be altered from the Smart Doc Editor.
Note: These settings can be altered unless they are locked from the Assette Editor; where the Smart Page was originally fabricated.
You can lock these settings from the Smart Doc Editor as well to prevent them from been altered in the Output Center.
- Click on the Smart Page/Slide in a section.
The right side panel will then display the Data Settings and Display Settings under separate tabs. - After altering the settings click on COMMIT to save the changes made under each tab.
- You can also access the TOC Settings from the same panel.
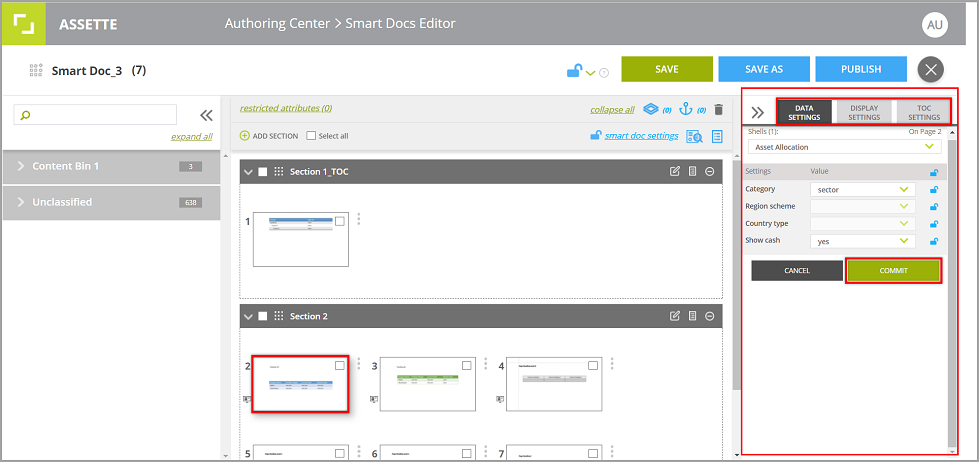
Table of Contents Settings
- To view the table of contents (TOC) of the Smart Doc click on the
 icon at the top right corner of the editing panel.
 - The TOC Settings panel will be displayed by the right edge of the window.
- You can access the TOC Settings of a single section by clicking on the icon in the top bar of the relevant section panel or by selecting the section from the drop-down menu in the TOC Settings panel.
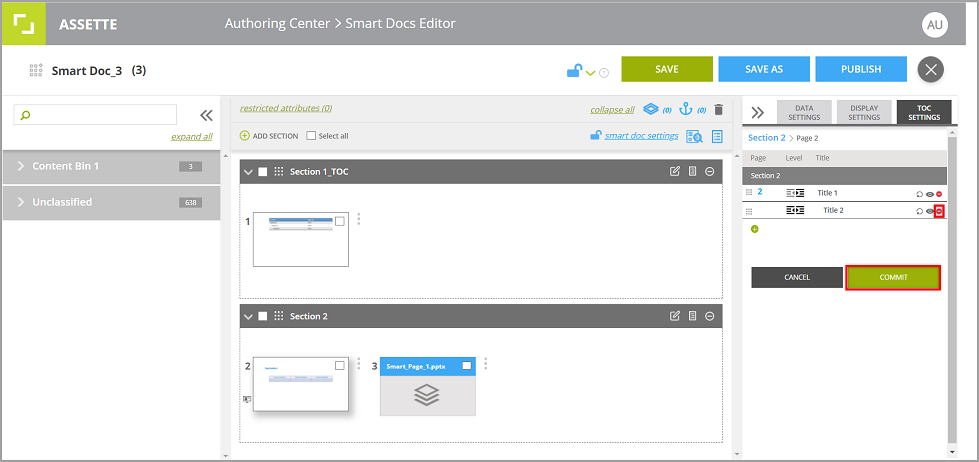
- Under TOC Settings, you can change the indentation of the title , hide/show the title and allow/disallow the repetition of the titles of repeated sections .
- To edit/rename a title, double click on the title and edit or enter a new title.
- Click COMMIT to save the new TOC settings.

The internal titles displayed under the TOC are the ones added to the TOC from the Assette Editor.
- To add a title of a Smart Page/Slide for the TOC from the Smart Doc Editor, click on the Smart Page/Slide and go to TOC Settings panel.
- Then click on the icon and double click to enter a title.
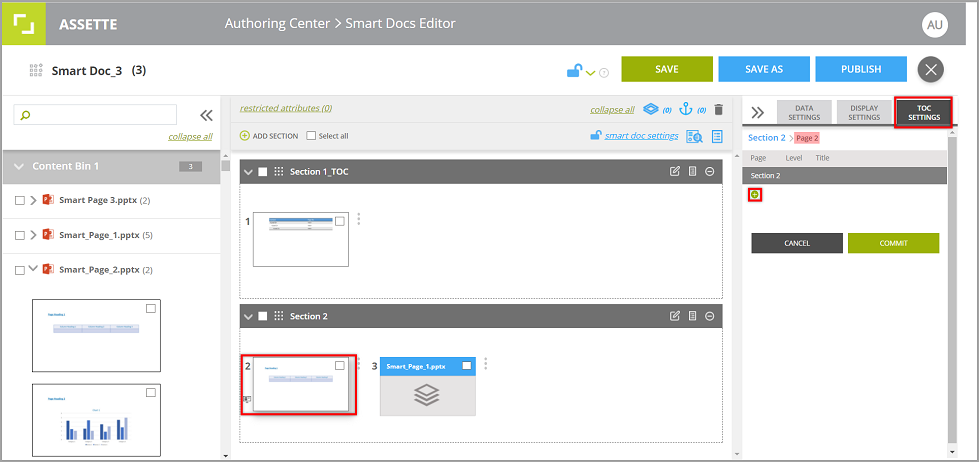
- You can add multiple titles under the same Smart Page/Slide and change their settings.
- To remove an added title from the TOC, click on the icon.
Note: You cannot remove an internal title (title added from the Assette Editor) but, can edit or hide it.
- Make sure to click COMMIT to save the changes.
8. Restricted Attributes
- In the Smart Docs Editor, when you add a Smart Page that has restricted attributes tagged to it, the restrictions will be applied to the Smart Doc as well. (Refer to Smart Page Attributes)
- The Content Bins will also be filtered based on the applied restricted attributes preventing the Smart Pages with conflicting attributes from being added to the Smart Doc.
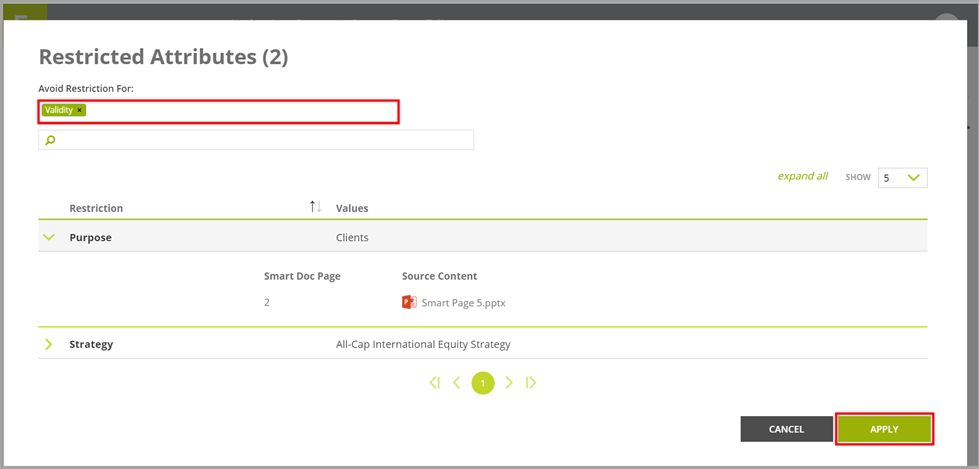
- Click on the restricted attributes at the top left corner of the Smart Doc work space to view the restricted attributes applied to the document based on the Smart Pages/slides added to the Smart Doc.
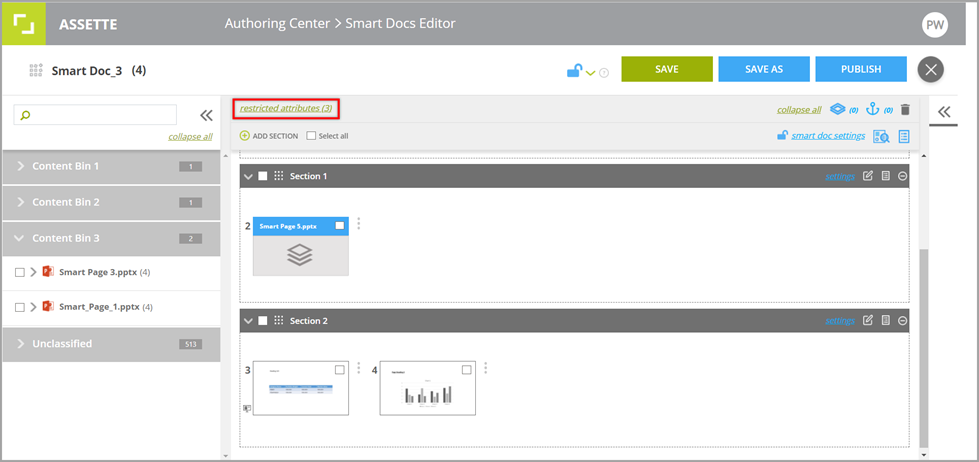
- Expand the restricted item in the grid to view the pages in the Smart Doc the restrictions are tagged to and their source content.
- You can specify the restricted attributes that should be disregarded in the Smart Doc from the Avoid Restriction For drop-down menu in the top of the Restricted Attributes overlay and click APPLY.
Smart Doc Settings
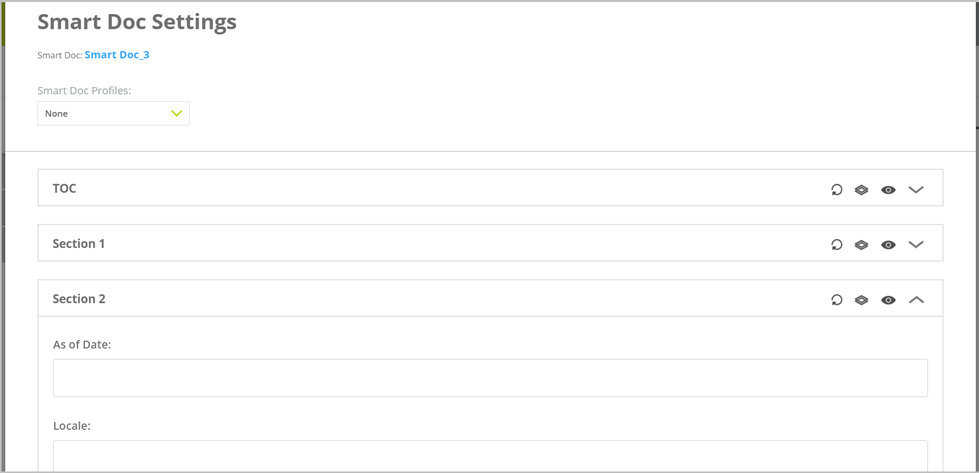
- Smart Doc Settings allow you to specify additional configurations regarding how each section in the Smart Doc should be generated.
- Smart Doc Settings include:
- As of Date – The As of Date the content within the section will be generated for relevant to the As of Date the Smart Doc is generated for in the output.
e.g. If the As of Date selected for the section is Last Month End and the As of Date selected for the Smart Doc from the generation overlay is 31/03/2021, then the content of the section will be generated for 28/02/2021.
Current Data – Same date as the As of Date tagged to the Smart Doc when generating the output. - Locale – The locale decides the date formatting of the section and other formatting specific to the selected locale.
- Repeat a section- To repeat a section(s) for different As of Dates and/or Locale(s).
- Group a section
- Show/Hide a section – You have the option to hide a section(s) from the output instead of removing the section from the Smart Doc.
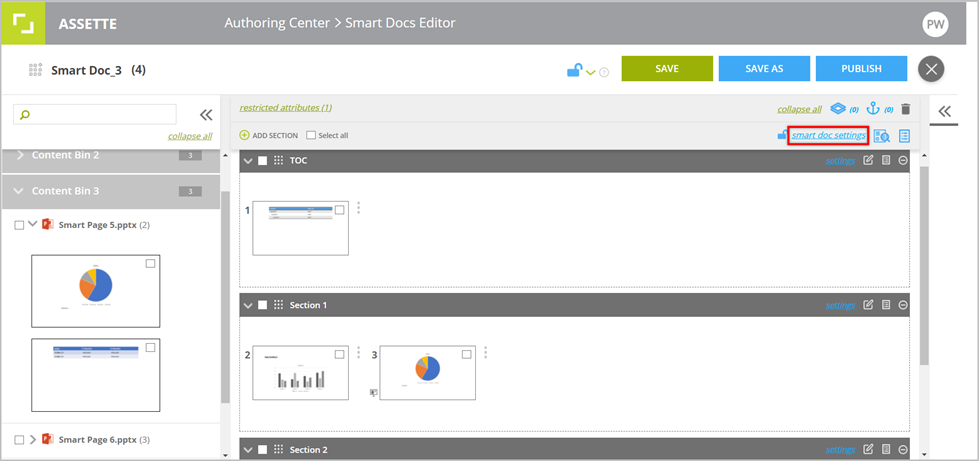
- In the Smart Docs Editor, click on smart doc settings next to icon in the top of the middle pane to open the Smart Doc Settings overlay.
- To group a section, click on the icon on the top bar of the section panel in the Smart Doc Settings overlay.
- Click on the icon to hide a section from the generated output. Click back on the icon to unhide/show.
Repeat a section
- A section(s) in a Smart Doc can be configured to be repeated for multiple As of Dates and Locale(s) as required.
- Click on the icon on the top bar of the section panel in the Smart Doc Settings overlay to create a duplicate of the section pane.
Note: This will not duplicate the section in the Smart Doc work space, but the section will be repeated in the generated output based on the configured Smart Doc settings.
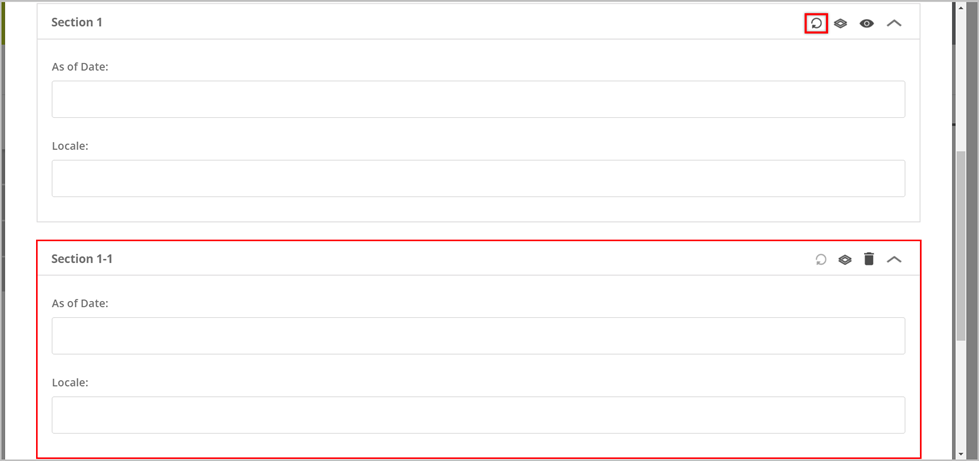
- You can then configure As of Date and/or Locale(s) the section should be repeated for.
- The As of Date selected for the section from the given drop-down list is relevant to the As of Date the Smart Doc is generated for.
- Under TOC Settings of the Smart Doc (refer to TOC Settings) you can configure whether to show or hide the titles of the repeated sections in the table of contents.
- A repeated section can be deleted by clicking on the icon on the top bar of the section.
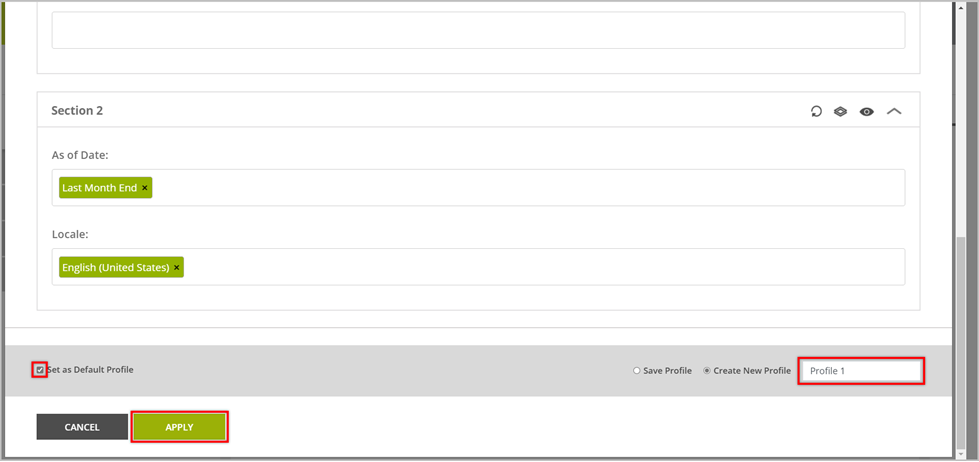
Smart Doc Profiles
- Once you have configured the Smart Doc Settings, enter a name for the new Smart Doc Settings Profile at the bottom of the overlay to save the settings and click APPLY.
- You can set the selected profile as the default profile by checking the box next to Set as Default Profile. This will utilize these Smart Doc settings when generating output unless another profile is specified.
- Once you have configured the Smart Doc Settings make sure to SAVE all the edits and PUBLISH the Smart Doc to make it available for generation in the Output Center.
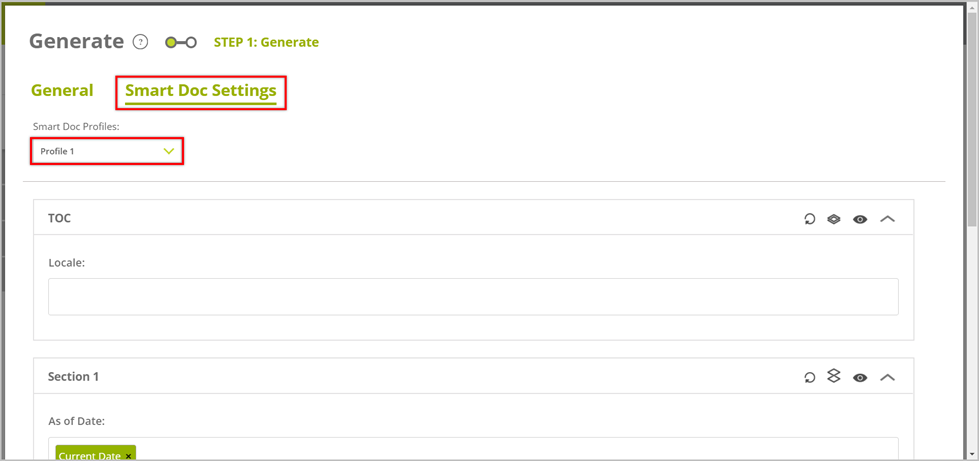
- Unless the Smart Doc Settings are locked, you can change the Smart Doc settings as required or select a previously saved Smart Docs Settings profile from the generation overlay before you generate an output.
Note: The Smart Doc settings you configure from the Generation overlay will not be saved to the Smart Doc nor to the selected Smart Doc Profile. However, the settings will be applied to the current output that is generated.
Lock Smart Doc Settings
- To lock Smart Doc Settings, click on the icon next to smart doc settings in the Smart Doc editor.
- To unlock click back on the lock icon.
- When the Smart Doc Settings are locked, you cannot modify the settings from the Output Center when customizing Smart Docs nor from the Generation overlay when generating ad-hoc output or previewing with data.
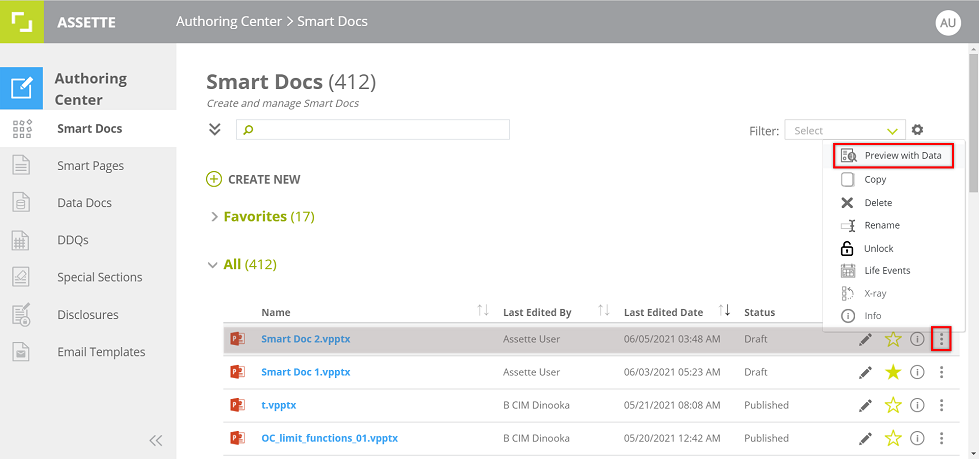
10. Preview with Data
- To preview a Smart Doc with user data, select Preview with Data from the hamburger menu in the row.
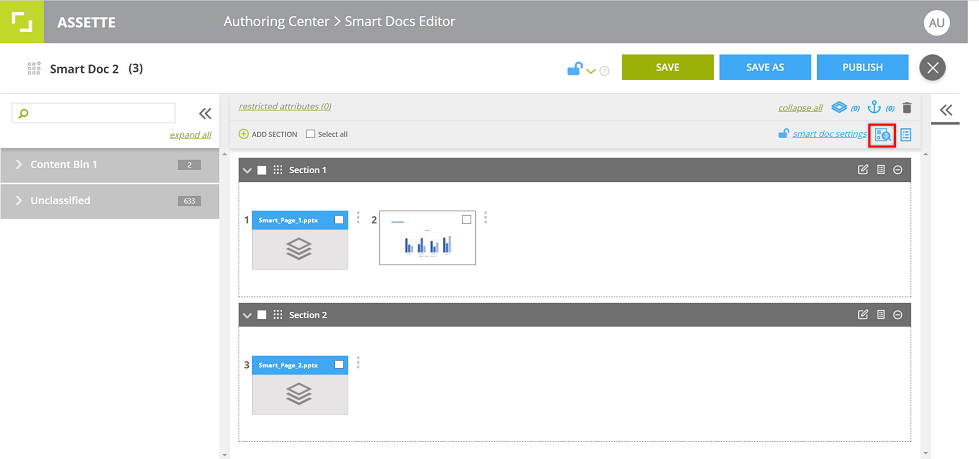
Alternatively, from the Smart Doc Editor, click on Preview with Data icon in the top right corner of the editing panel.
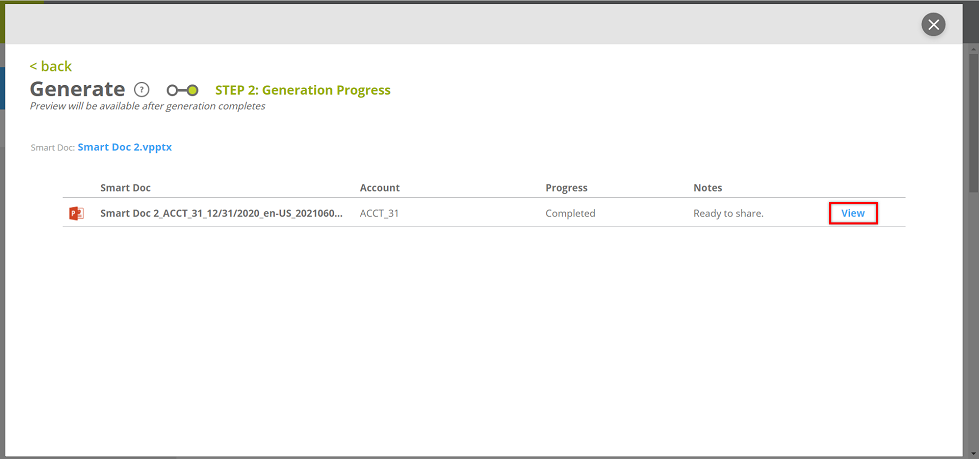
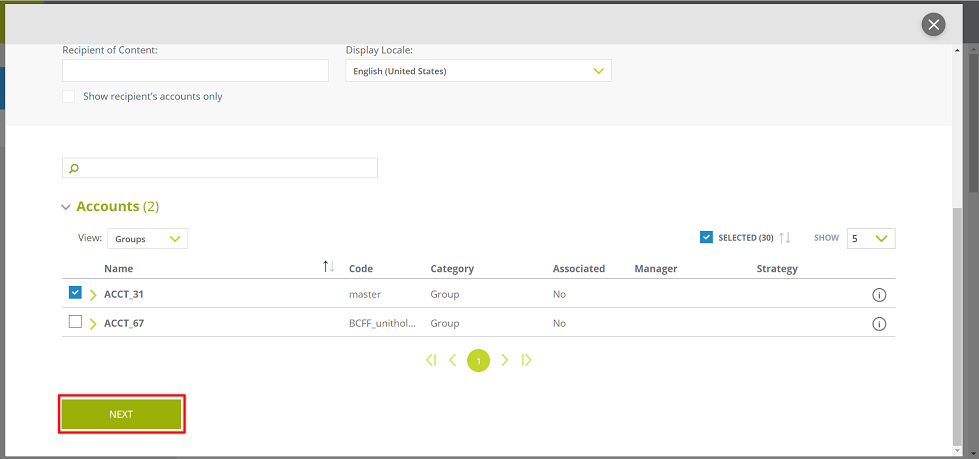
Add general details and select an account(s) for which the document will be generated. Then click NEXT.
Note: Smart Doc Settings can be altered, unless the settings have been locked from the Smart Doc Editor.
Once the document has been generated, click VIEW.