When creating a new user in the Client Portal, administrators can link the user’s account through two methods: Manual Account Association and Automatic Account Association. Manual account association allows administrators to manually assign specific accounts to users, offering precise control over which accounts the user can access—ideal for situations where highly custom access is necessary or when a Customer Relation Management System has not been integrated with Assette. On the other hand, automatic account association simplifies the process by linking users to their accounts based on pre-defined rules or data matching, making it highly efficient for onboarding users at scale. In any case, automatic and manual user management is not mutually exclusive as Assette allows administrators to cater to both on a case-by-case basis.
Once accounts are assigned, users gain access to relevant data, such as portfolio insights, performance reports, and customized data sets, all through the portal’s intuitive interface. This role-based access ensures that users only see the information pertinent to their responsibilities, allowing firms to maintain strict control over data security and confidentiality while providing the right information to the right people.
When editing or creating new Assette Portal Users, it’s essential to determine whether they require access to real-time data or if periodic updates will suffice. Users with Real-Time Data Access are those who need frequent updates, like portfolio managers or analysts, and they will be provided with daily data feeds. In contrast, Users without Real-Time Data Access may only need data on a weekly or monthly basis, suitable for users such as external stakeholders or internal team members who don’t require daily information. By segmenting users based on data needs, administrators can streamline user access, optimize system performance, and ensure that each individual receives the right level of data visibility.
Create Users Real-Time Data Access #
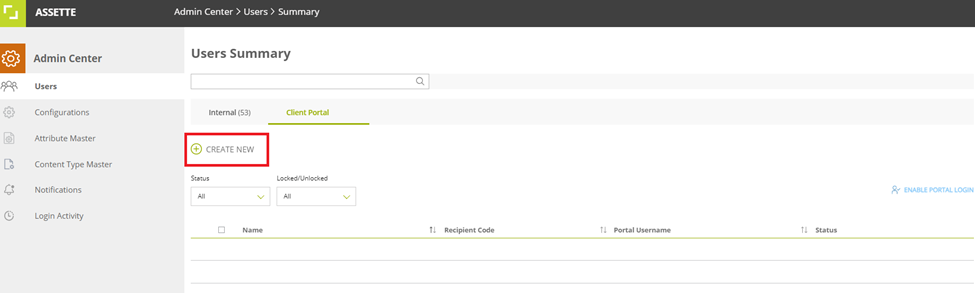
After logging into Assette, navigate to the Admin Center, this should automatically direct the user to the User screen. Click on the Client Portal tab in the middle of the screen and click the Create New button.
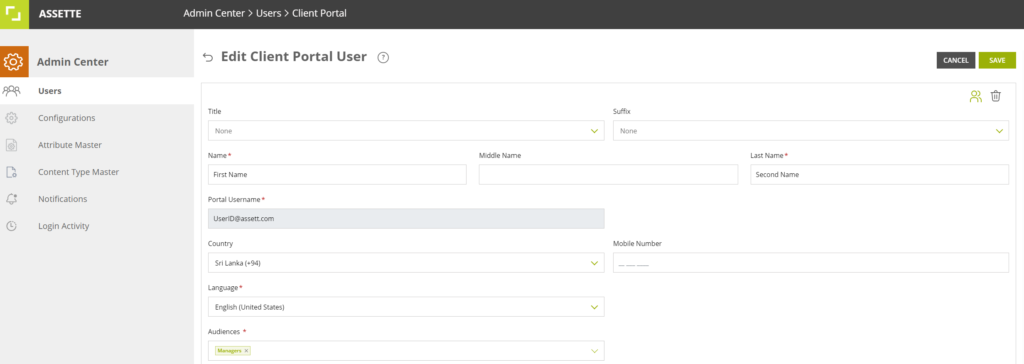
Enter the required information for the Portal User, specifically: First Name, Last Name, Portal Username, Email, and Language. Please note that both the username and email must be unique to ensure proper account creation and access.
Next, choose the appropriate access type for the user:
- For real-time data, select Users with Real-Time Data Access.
- For less frequent updates, select Users with Periodic Data Access.
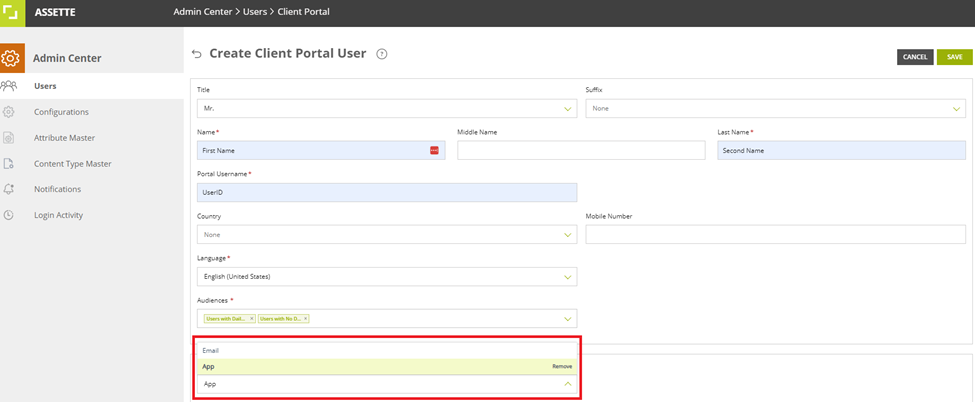
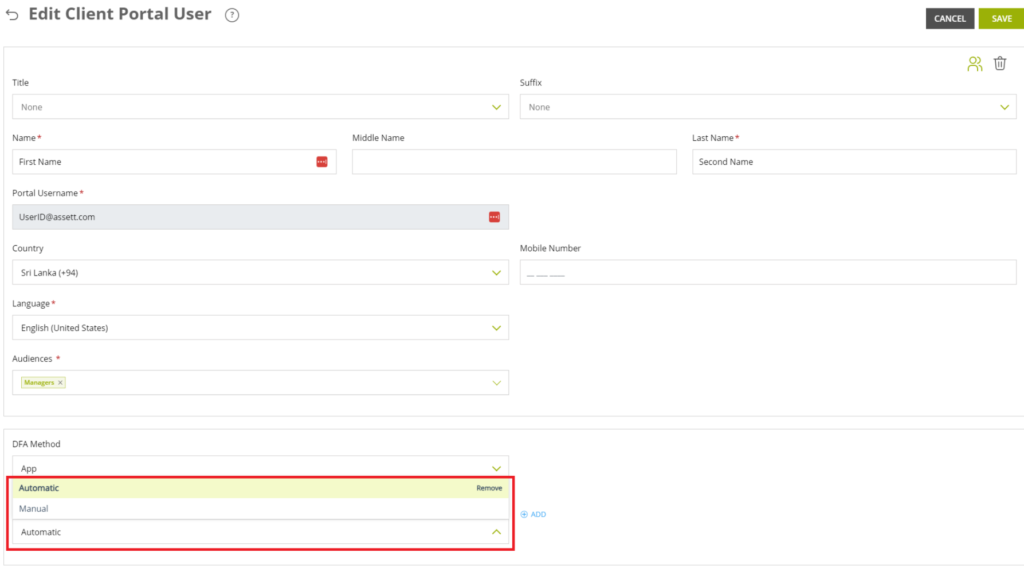
When setting up Dual Factor Authentication (DFA) during user creation, the DFA field is optional. If left as ‘None,’ it will default to the ‘App’ option, ensuring secure access through an authentication application. This behavior has been standard since the introduction of the Client Portal. When setting up Dual Factor Authentication (DFA), users can enhance their security by using a third-party app, such as Microsoft Authenticator.
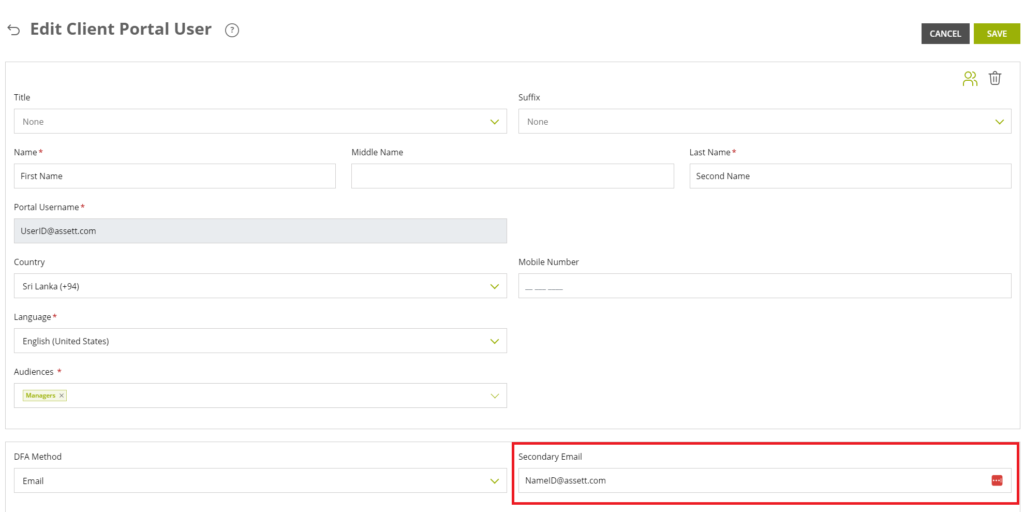
The secondary email is an optional field to keep the account setup simple but be aware that not providing a secondary email will disable self-password reset and SSO login features due to the lack of validation for a second factor. Users without a secondary email will need to request an admin for a password reset or add a secondary email later if these features are needed. Additionally, the secondary email must be different from the primary email for security purposes, with a system validation in place to prevent duplication.
Set the Permission Method to Manual, enabling manual account selection for this user.
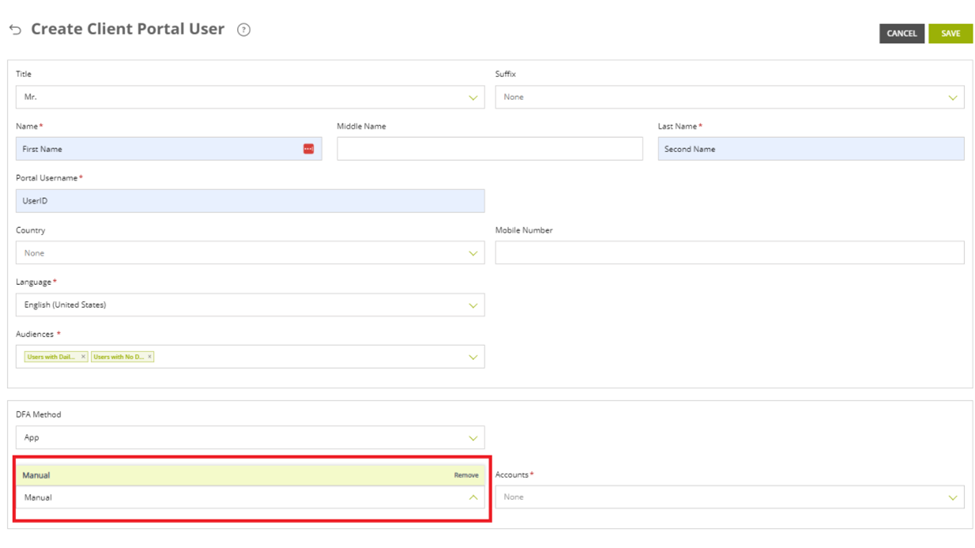
Manually search for and select the accounts to associate with the user. You can link multiple accounts if necessary.

Once the relevant accounts are selected, save the changes to finalize the user setup.
Creating Users with Specific Audiences #
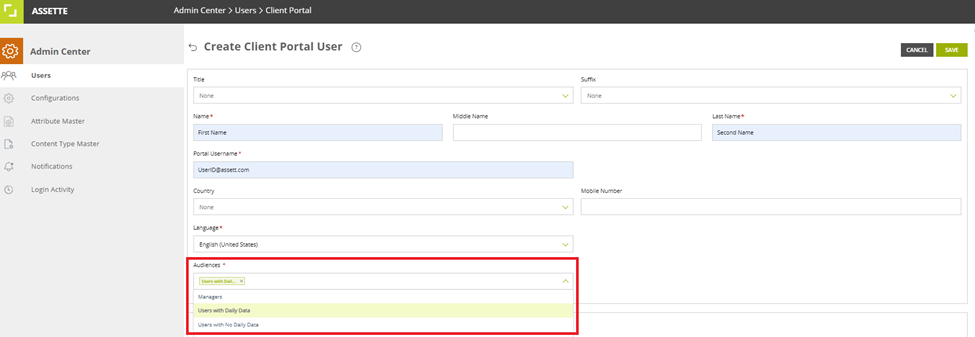
Some organizations may prefer to automate account access assignment, especially when managing large volumes of data and users. The Creating Users for Specific Audiences feature allows administrators to automatically assign accounts based on attributes tagged in the system’s data layer.
Instead of manually assigning accounts, associations are dynamically linked to audience attributes. For example, if an account is tagged under “Primary Portfolio Manager,” any changes to that tag—such as adding or removing accounts—automatically update the user’s access. This eliminates manual updates and ensures accurate, up-to-date access.
Automatic Account Association is ideal for roles needing specific account access based on responsibilities. It reduces administrative work, minimizes errors, and ensures users always have the right data, enhancing efficiency and data security. To Create a New Portal User with specific Audiences:
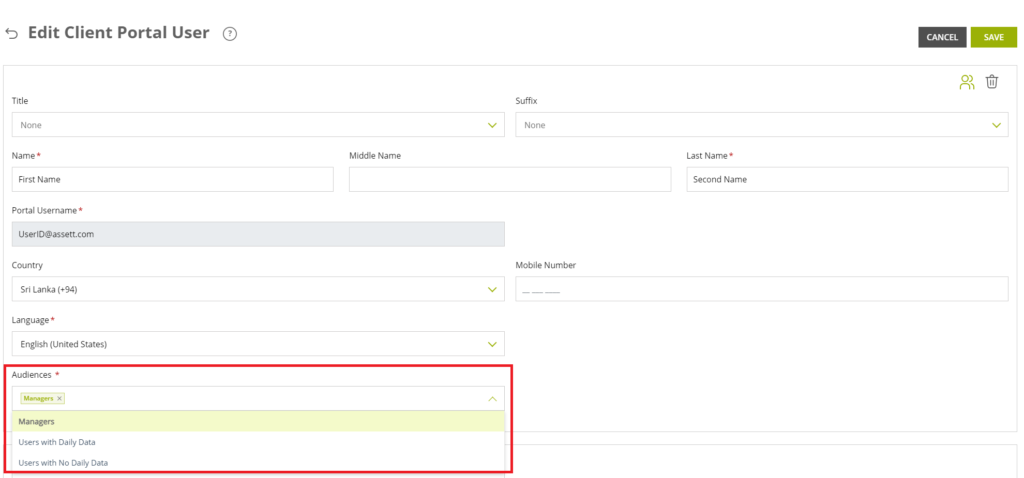
Choose the relevant audience category, such as Manager.
Set the Permission Method to Automatic.
Use the Add button to apply different attribute filters (e.g., Primary Portfolio Manager, Secondary Portfolio Manager). The system will automatically assign the appropriate accounts based on these attributes.
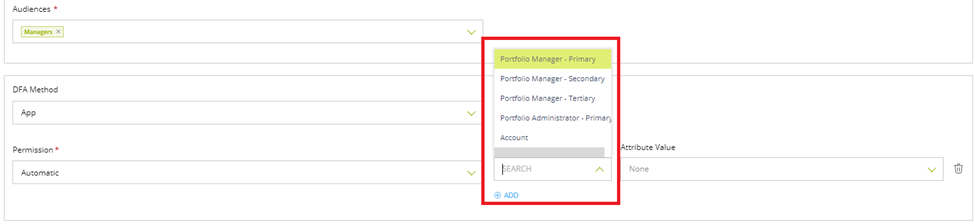

You can also apply multiple conditions using AND or OR logic to control which accounts are visible to the user, ensuring that only relevant information is accessible.
The newly added category will be linked using either an AND or OR condition, depending on how you want to filter accounts.
- For example, if you select Account Manager – Primary as the first account attribute and Account Manager – Secondary as the second attribute:
- The AND condition will show only the accounts that are common between both categories.
- The OR condition will display all the accounts from both categories, without duplicating any that appear in both.
This allows flexibility in how account visibility is assigned to users, ensuring they access the exact data needed for their role.

Deleting a Client Portal User #
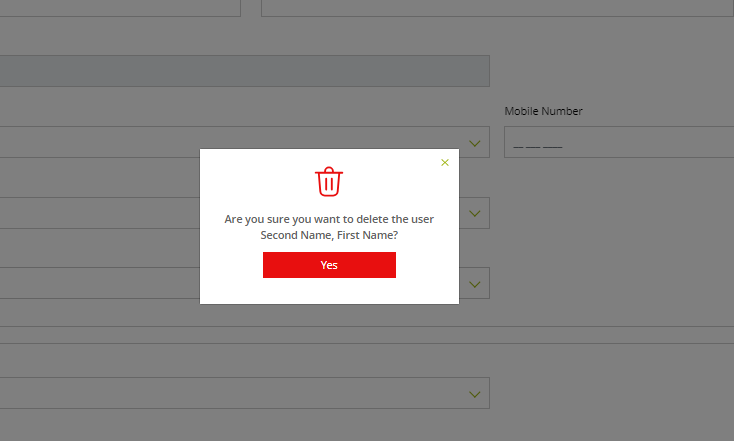
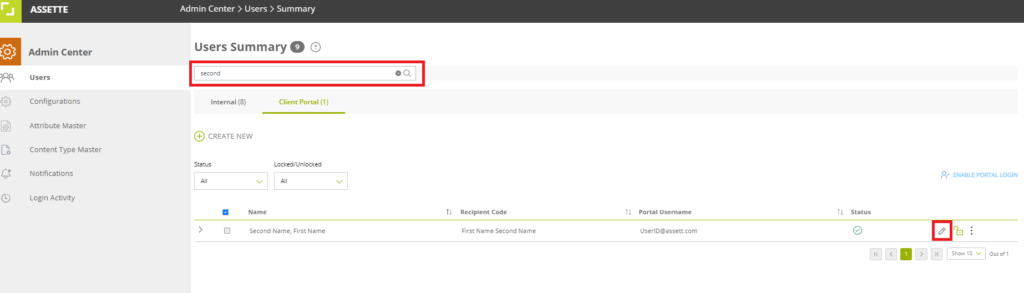
Removing outdated or inactive users is an important part of maintaining data security and access control within the Client Portal. To delete an existing Client Portal user from Assette, administrators should begin by navigating to the Admin Center and accessing the ‘User’ section, specifically the ‘Client Portal User’ tab. This section displays a list of all Client Portal users, allowing administrators to easily identify the account they wish to remove.
Once the desired user is located, click on the edit option in the right-hand corner of the user’s entry—this option provides access to additional settings for user management.
From the options presented, select ‘Delete’ from the right top corner.
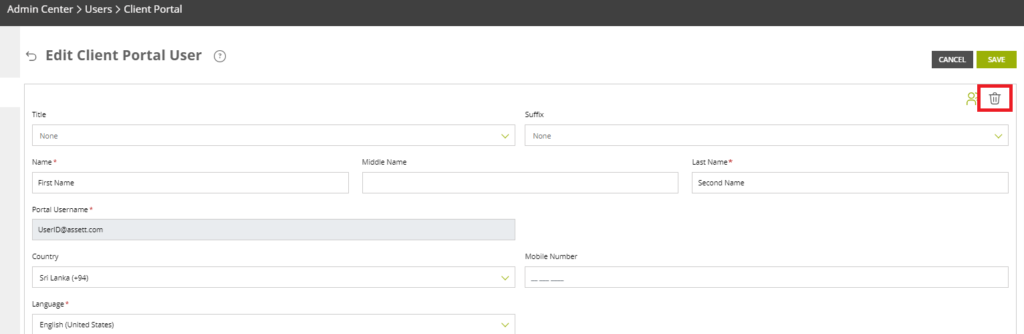
A confirmation prompt will appear, ensuring that this action is intentional. By confirming the deletion, the user’s Client Portal access will be immediately revoked, and their login credentials will be invalidated.