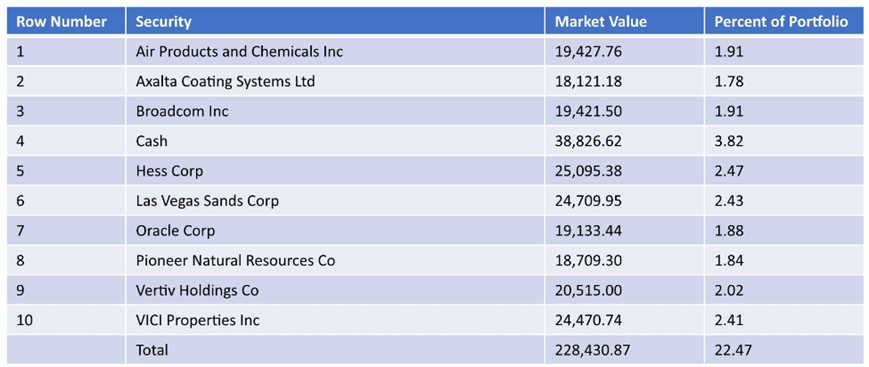
By combining row-scoped internal variables with derived columns, users can create a column containing the row number. This may be useful when the count, or rank, of items in a table is important— such when displaying a top ten holdings table. The examples below illustrate three different scenarios, showing how to configure dynamic row numbering within Smart Tables for a variety of use cases.
Scenario 1: Creating Dynamic Row Numbers #
Step 1: Create a Row Scoped Variable #
Navigate to the Internal Variable section in the design view. Click on Add Variable to create a new internal variable.

In the popup, name the variable (e.g., “RowNumber”) and set the Type to “Row Number” under the Settings tab.

Switch to the Value tab and set the Sorting Column to “None.” Ensure the sorting order is correctly applied as required.

Step 2: Create a Derived Column for the Row Number #
Navigate to the Columns section in the design view and click Add Column.
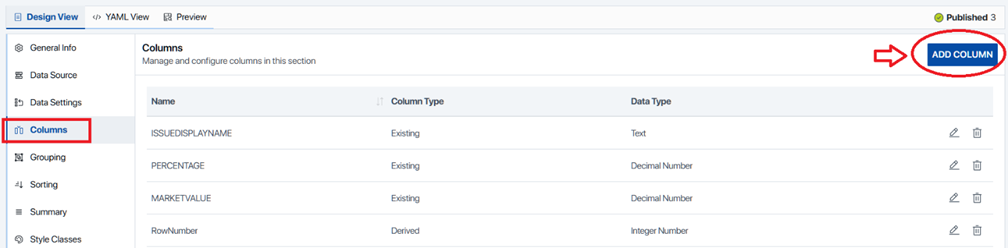
In the column settings popup:
- Name the column (e.g., “RowNumber”).
- Configure the display name and header as needed.

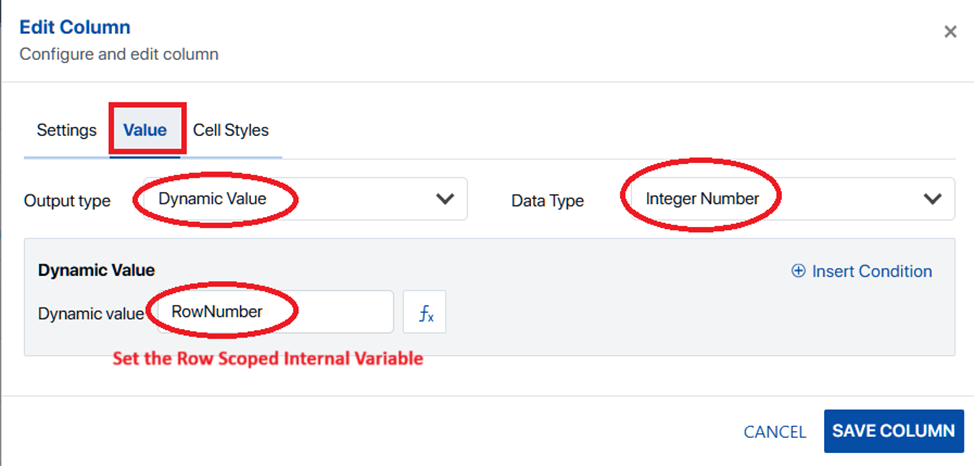
Switch to the Value tab, set the Output Type to “Dynamic Value,” and link the Dynamic Value field to the Row Scoped Internal Variable created in Step 1.
Step 3: Assign the Row Number Column in the Fabrication #
Navigate to the Fabrication view of the Smart Table.
Assign the new “RowNumber” column to the appropriate row mapping configuration.

Scenario 2: Dynamic Row and Derived Column Setup #
Step 1: Create a New Derived Column #
Navigate to the Columns section in the design view and click on Add Column.
In the column settings popup:
- Name the column appropriately (e.g., “NewSecurity”).
- Configure the Column Header Name as “Static Text” and set the Static Text value to “Security.”

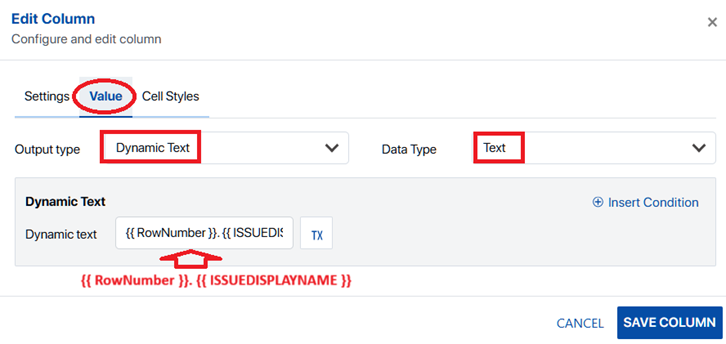
Step 2: Configure the Value for the Derived Column #
Switch to the Value tab. Set the Output Type to “Dynamic Text.”
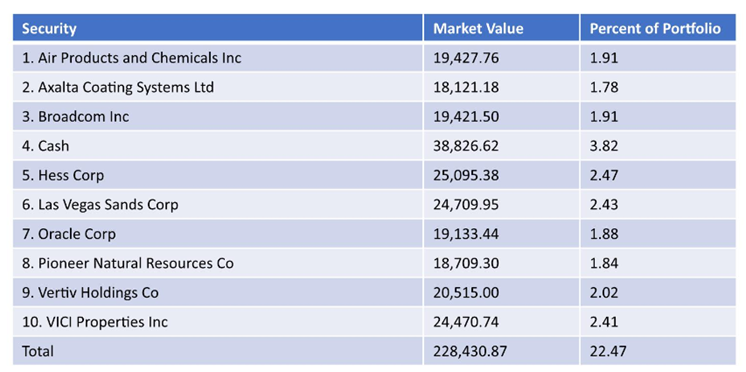
Use the Row Scoped Internal Variable (RowNumber) created in Scenario 1. Format the value as {{ RowNumber }}. {{ ISSUEDISPLAYNAME }} to combine the row number with the security name.
Step 3: Map the New Derived Column in the Fabrication #
Navigate to the Fabrication view of the Smart Table.
Assign the newly created “NewSecurity” column to the appropriate variable in the column/row mapping configuration.

Scenario 3: Dynamic Grouped Row Numbers #
Step 1: Create a Group Row Scoped Internal Variable #
Navigate to the Internal Variables section. Click Add Variable and name the variable GroupRowNumber. Set its type to Row Number under the Settings tab.

Switch to the Value tab, set the type as Group Number, and assign Grouping Level 1 as shown.

Step 2: Create a Detail Row Scoped Internal Variable #
Add another internal variable named DetailsRowNumber under the Internal Variables section. Set its type to Row Number in the Settings tab.

In the Value tab, set the type to Row Number Within Group and assign Grouping Level 1.

Step 3: Configure the Group Header Row #
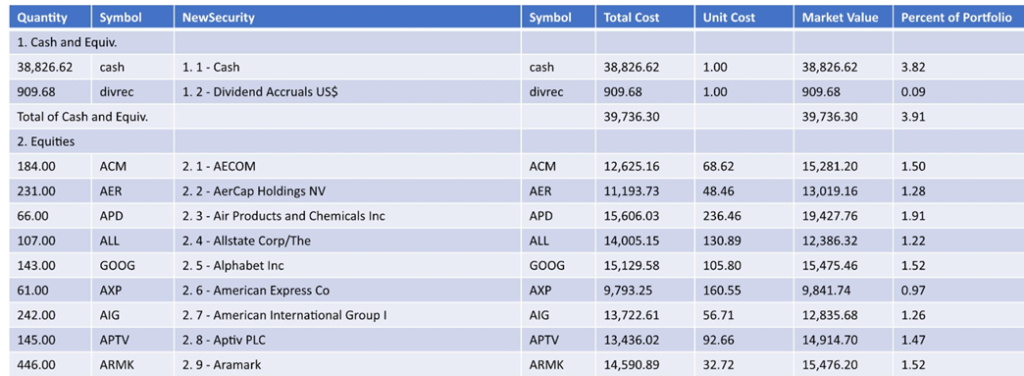
Navigate to the Grouping section in the design view. In the header configuration, set the group header row text to:{{ GroupRowNumber }}. {{ ASSETCLASSNAME }}.

Step 4: Create a New Derived Column #
In the Columns section, create a new column named NewSecurity.

In the Value tab, set the Output Type to Dynamic Text. Use the following format for the dynamic text:{{ GroupRowNumber }}. {{ DetailsRowNumber }} - {{ ISSUEDISPLAYNAME }}.

Step 5: Assign the Derived Column in the Fabrication #
- In the Fabrication view, map the newly created column
NewSecurityto the appropriate variable.
