The Assette Tenant Manager streamlines the deployment of content between different tenants, offering developers and technical users a simplified method for transferring Data Blocks, Data Objects, Smart Shells, Smart Pages, and more across environments. Below is a step-by-step guide to help you deploy content effectively using the Assette Tenant Manager.
Getting Started: Prerequisites for Deployment #
Before you start using the Assette Tenant Manager, ensure the following prerequisites are met:
- Access to Source and Target Tenants:
Both the source and target tenants (e.g., “DEMO” and “SDMO”) must be available to the user, and the user must have sufficient access permissions in each. - Tenant Manager Admin Role:
You must be assigned the “Tenant Manager Admin” role in both the source and target tenants. This role grants you the ability to perform deployments. - Familiarity with Assette Content Stack:
Understanding the Assette content types such as Data Blocks, Data Objects, Smart Shells, and Smart Pages is crucial for successful deployment. Knowing these elements will allow you to deploy artifacts with the necessary dependencies.
Access the Tenant Manager #
From the Assette home page, select the Tenant Manager option. If you are assigned the Tenant Manager Admin role, this will take you to the main screen where all previous deployments are listed.

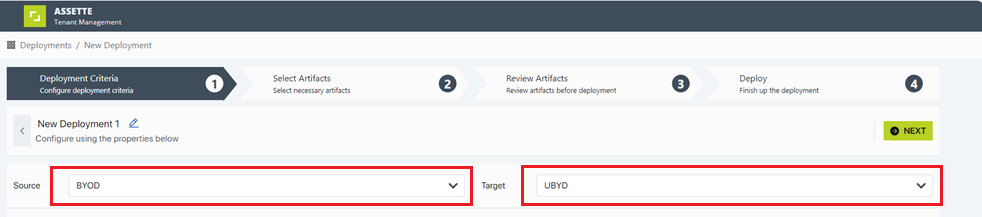
Select Source and Target Tenants #
To create a new deployment, click the “Create Deployment” button. You will be prompted to select the Source and Target tenants.
- Both tenants must reside within the same environment (e.g., both must be within
app.assette.com). - Ensure that you have access to both tenants and that your role is properly assigned.
Choose Artifacts for Deployment #
After selecting the Source and Target tenants, you will be presented with a list of available content artifacts in the source system. These may include:
- Smart Docs
- Smart Pages
- Smart Shells
- Data Objects
- Data Blocks
Select the desired artifacts to transfer to the target tenant. You can filter and search for specific artifacts using the available search fields.

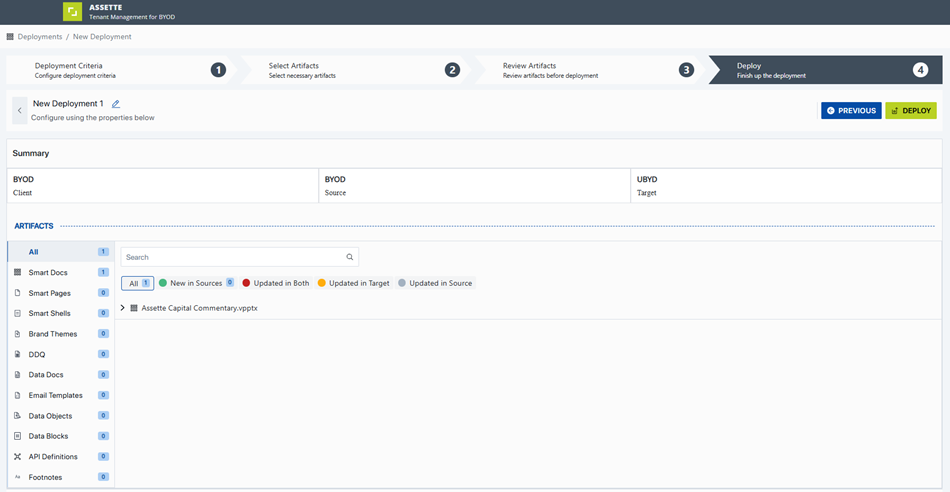
Review Dependencies #
Once you have selected your artifacts, the system will direct you to the Artifact Review screen. Here, you can review all the selected artifacts and any dependencies they may have. For example, deploying a Smart Page, its associated Smart Shells and Data Objects will automatically be included. By default, all dependent artifacts are included in the deployment.
While reviewing the deployment, users will 5 tabs indicating which items have changed in the source or target tenant.
- All: Shows all artifacts regardless of status
- New in Source: The selected item is new and only exists in the source tenant. Deploying this artefact will create a new artifact in the target
- Updated in Both: The selected artifact exists in both environments and has been modified in both environments. Deploying the selected artifact will overwrite any modification in the target tenant.
- Updated in Target: The selected artifact has been modified in the target tenant. Deploying the selected artifact will overwrite any modification in the target tenant.
- Updated in Source: The selected artifact has been modified in the source tenant. Deploying the selected artifact will update the target tenant.
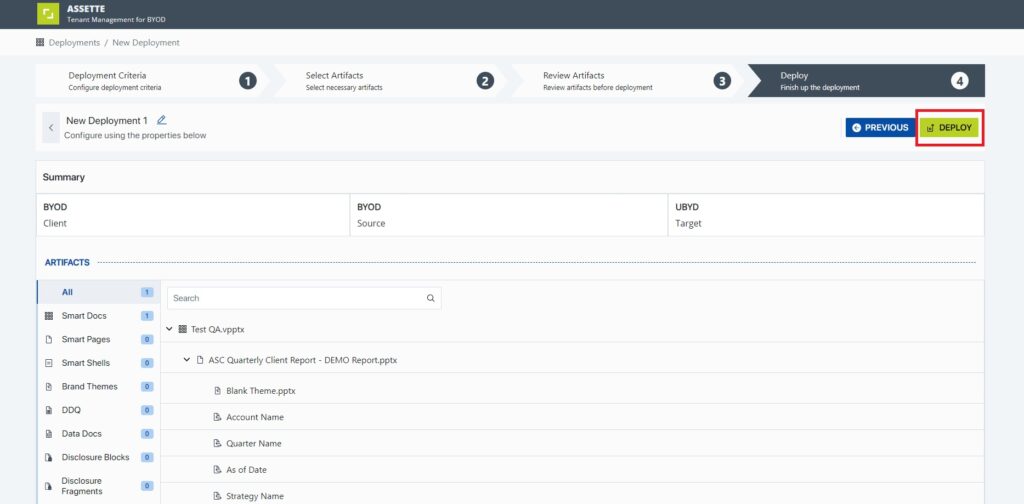
Finalize and Deploy #
After reviewing and confirming all the selected artifacts, click the “Next” button to proceed to the final deployment screen. You will be able to see the complete list of artifacts that will be deployed.
Click “Deploy” to initiate the process. A confirmation pop-up will appear. Select “Yes” to confirm the deployment, and the process will begin.
Monitor Deployment Status #
You can monitor the progress of your deployment from the main Deployment Screen. The status of the deployment will be displayed, allowing you to track whether it is in progress, completed, or failed.

Best Practices #
To ensure efficient deployments, consider the following best practices:
- Limit the Number of Artifacts:
While it’s tempting to deploy many artifacts at once, it’s best to keep deployments smaller to ensure smoother execution and easier troubleshooting. - Review Dependencies Thoroughly:
Always double-check the dependencies of your selected artifacts to avoid missing necessary components. - Use Advanced Search:
Leverage the advanced search and filter options to easily locate and manage specific artifacts during deployment.
Additional Considerations #
- Re-deploying API Definitions:
Once you have deployed the API definitions to a target tenant, re-deploying the same definitions in the future will not automatically replace any links. This is because BaseURLs might differ with each tenant and won’t to replace them again in next deployment. Always review the links after re-deploying and make necessary adjustments manually. - Dynamic Fields Not Transferred:
It’s important to note that dynamic fields are not transferred to the target tenant during deployment. If you require specific dynamic fields to be present, you may need to recreate or manually configure them in the target tenant before the deployment.