This article assumes that users have a thorough understanding of Data Blocks, Data Objects and the Generation Screen. This article also assumes that a Data Block exists and the appropriate data for a date column is available.
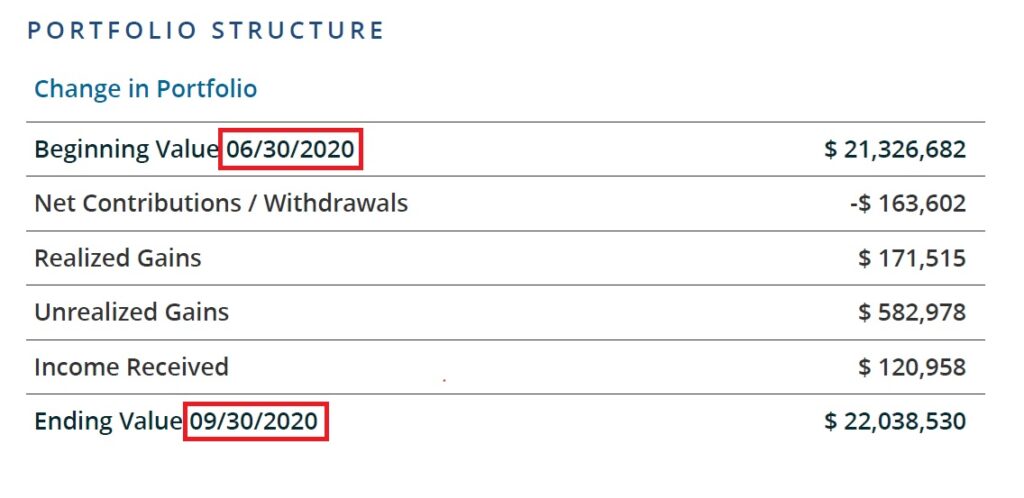
In Assette, when users create tables with dynamic text values that include dates, such as a Portfolio Activity table showing a date, these dates are displayed in a specific format. This article explains how users can modify these date formats to suit their needs. Currently, the Object Editor provides both standard and custom date formatting options.1
The Data Object Editor includes a range of predefined standard formats, in line with the .NET date format standards, ensuring locale support for accurate regional date representations. The ability to define a completely custom user format will provide even greater control over how dates are displayed within dynamic text values.
Standard Date Formats #
Standard Date Formats are dynamically driven by the Display Locale selection on the Generation Screen and automatically updated based on the selected locale. For information on how to create static date formats, please see Custom Date Formats.
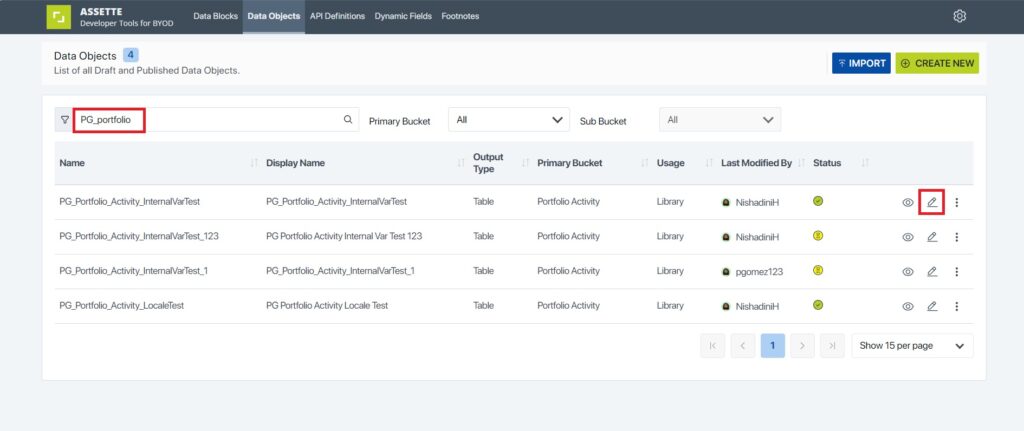
To begin, open the Developer Tools from the Assette Navigation Bar. Next, locate the Data Object to modify and select Edit. Alternatively, users may create a new Data Object— though this requires that the user add the required Data Blocks and columns to continue.
Next, select Data Settings from the Design View Tab. Click on Add Dynamic Fields at top of the screen.
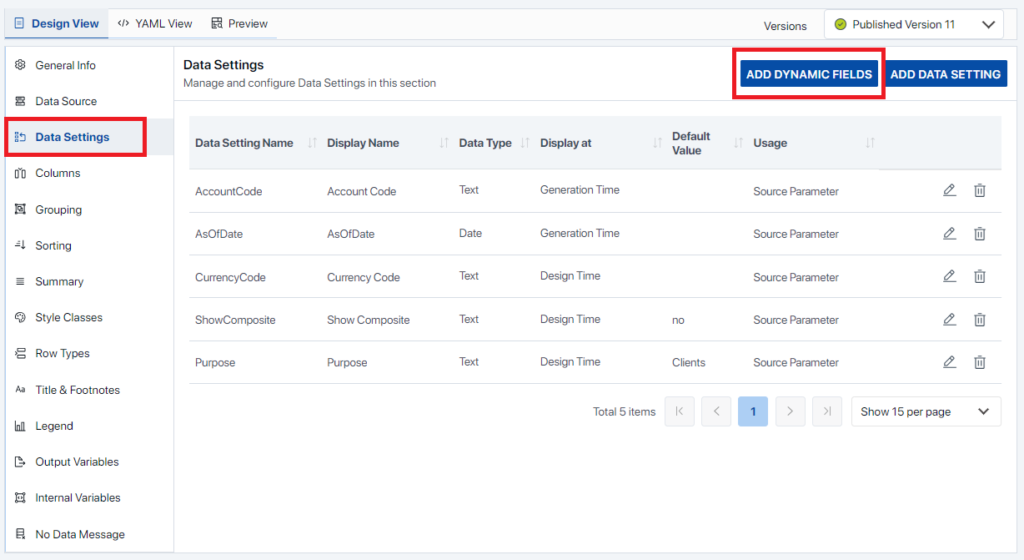
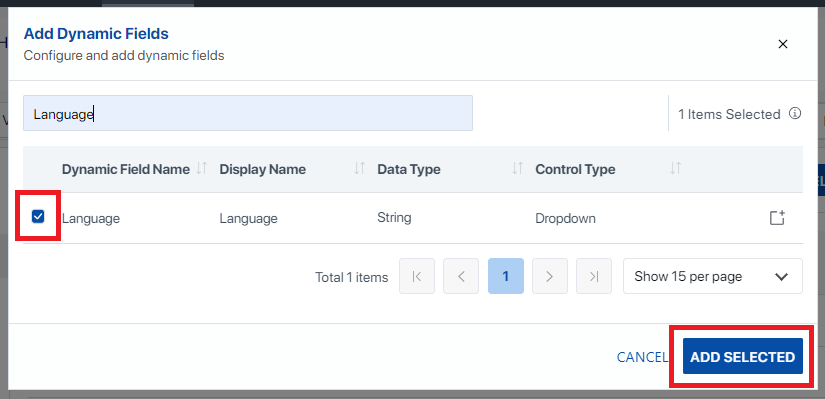
In the resulting pop-up, check the box next Language and then click on Add Selected as shown below. The Language Data Setting is a dynamic value and does not need to be changed. Note however, that skipping this step may cause issues with subsequent steps.
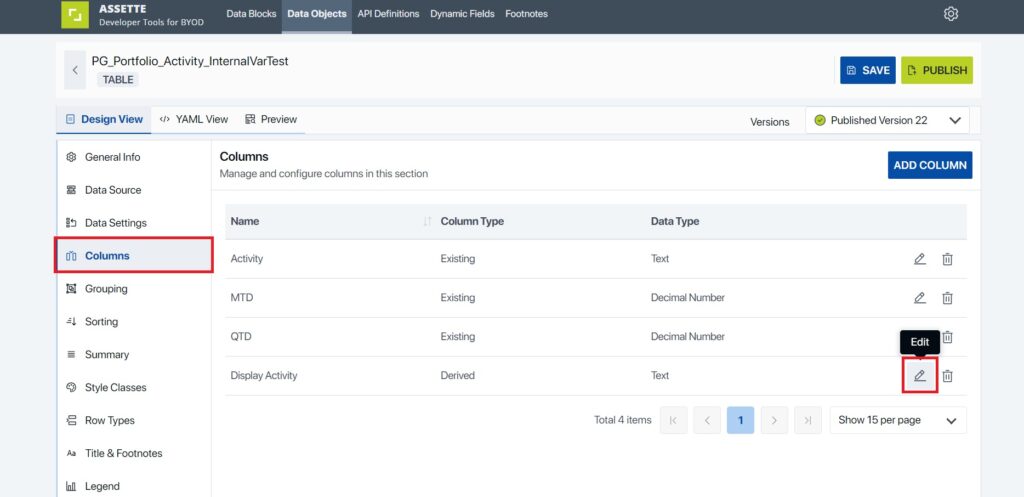
Next, switch to the Columns Tab. From here, select the column containing the dynamic date value, in this example, it’s Display Activity, and choose Edit.
This will open a popup where users should go to the Value tab. The Output Type must be set to Dynamic Text to continue. Next, press the TX icon on the right-hand side of the screen.
Note that users may see multiple values here depending on the logic of Data Object— select the TX option next to the desired date value. Each dynamic must be set up independently.

A new popup will appear, showing the placeholder for the Begin or End Date.
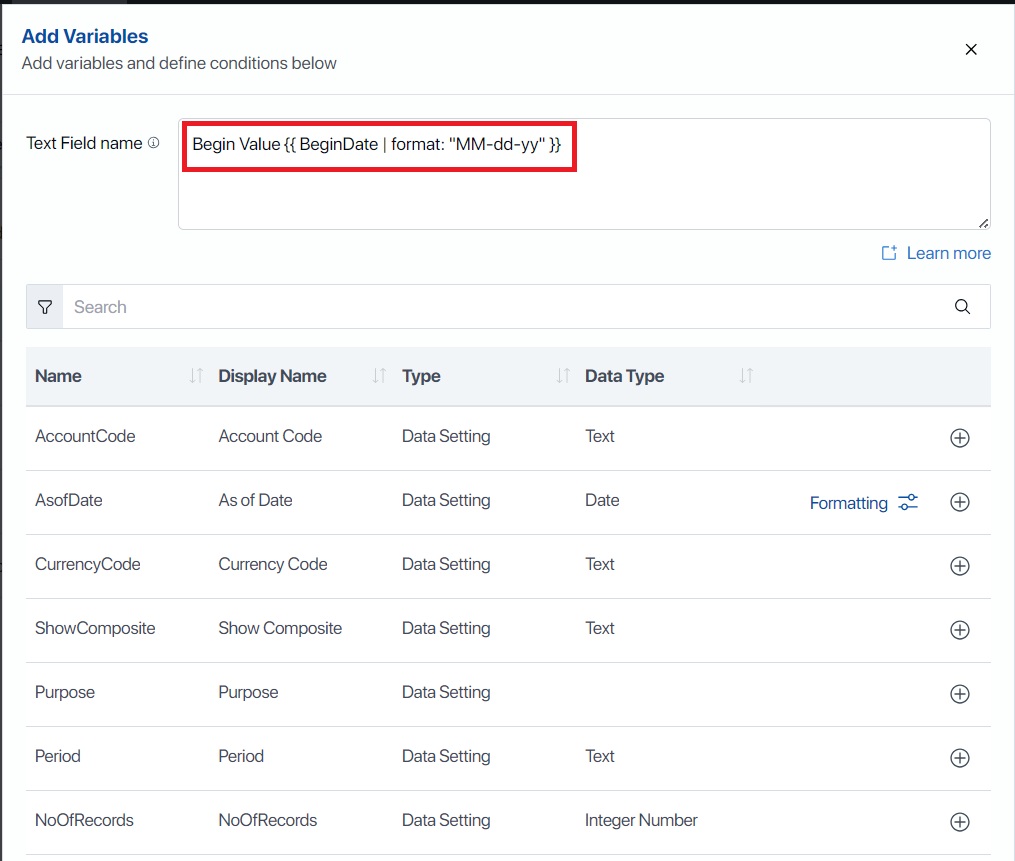
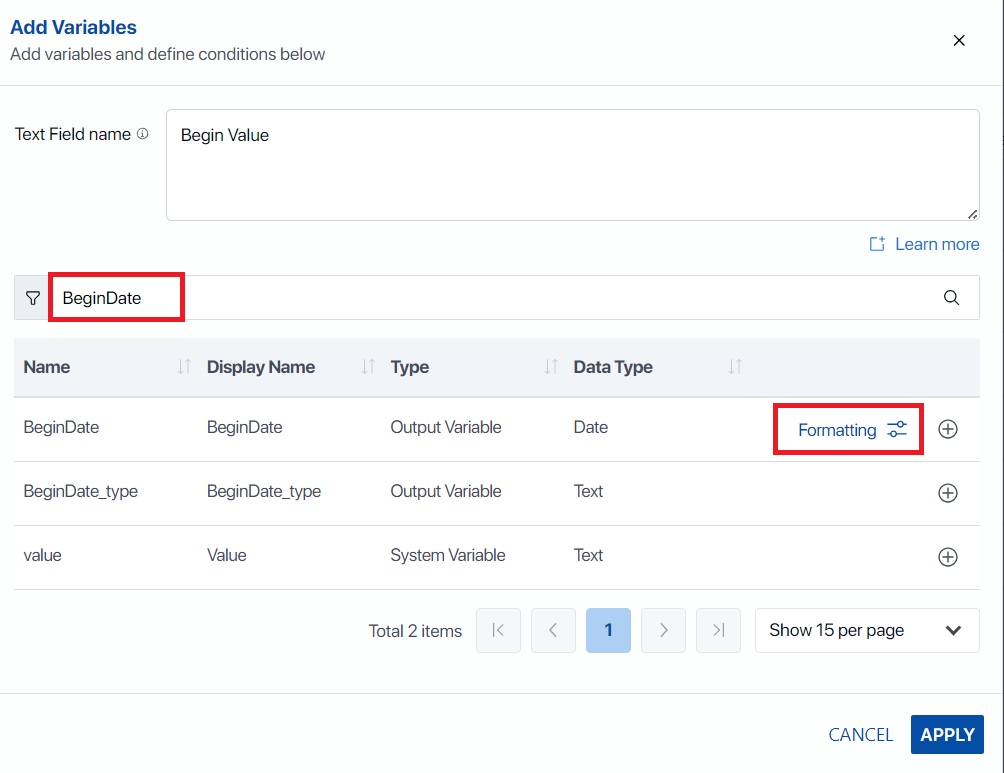
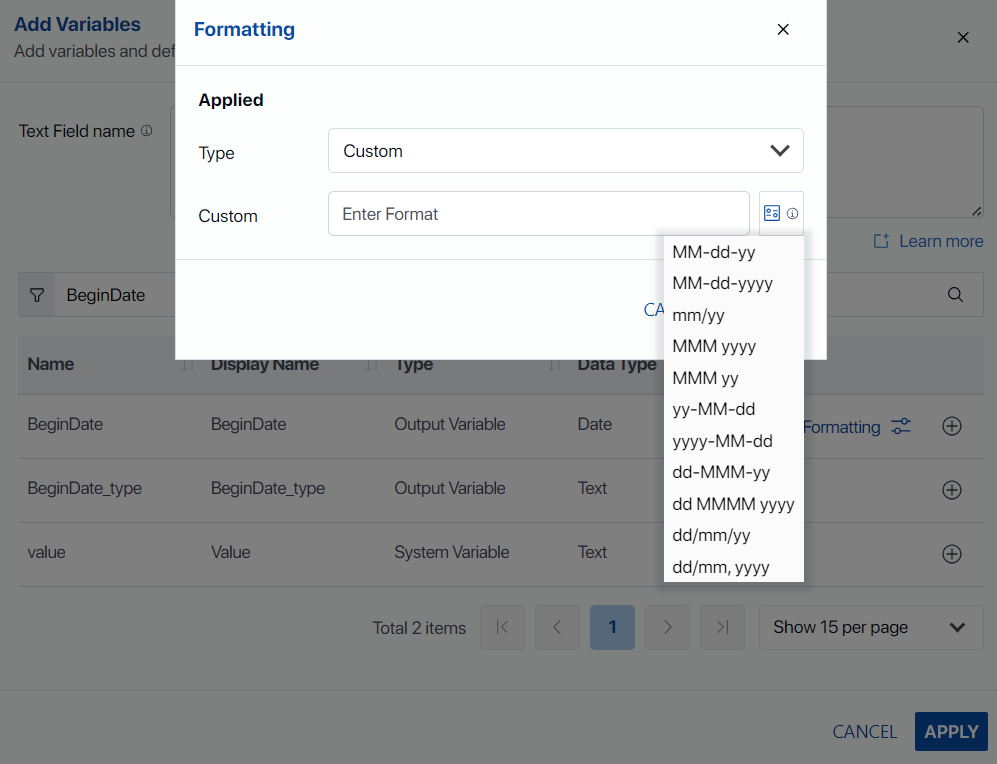
Select a column with a Date Data Type. This can be done by using the filer or simply searching for “Date”. Columns with a Formatting option, as shown below may be used. In this example, we will be using the BeginDate column. Click on Formatting to open the formatting options.
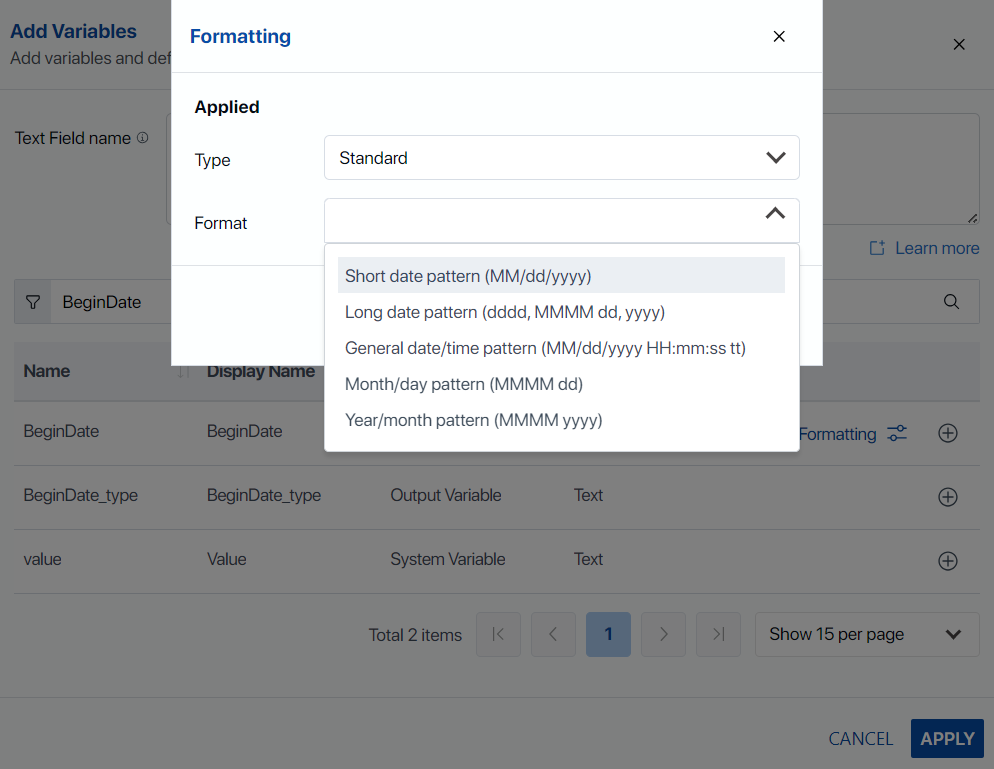
Here, users will see a list of Standard and Custom date formats. The available Standard formats are shown below.
| Format | Example |
|---|---|
| Short Date Pattern [Link] | 2009-06-15T13:45:30 -> 6/15/2009 (en-US) 2009-06-15T13:45:30 -> 15/06/2009 (fr-FR) |
| Long Date Pattern [Link] | 2009-06-15T13:45:30 -> Monday, June 15, 2009 (en-US) 2009-06-15T13:45:30 -> понедельник, 15 июня 2009 г. (ru-RU) 2009-06-15T13:45:30 -> Montag, 15. Juni 2009 (de-DE) |
| General Pattern [Link] | 2009-06-15T13:45:30 -> 6/15/2009 1:45 PM (en-US) 2009-06-15T13:45:30 -> 15/06/2009 13:45 (es-ES) 2009-06-15T13:45:30 -> 2009/6/15 13:45 (zh-CN) |
| Month/Day Pattern [Link] | 2009-06-15T13:45:30 -> June 15 (en-US) 2009-06-15T13:45:30 -> 15. juni (da-DK) 2009-06-15T13:45:30 -> 15 Juni (id-ID) |
| Year/Month Pattern [Link] | 2009-06-15T13:45:30 -> June 2009 (en-US) 2009-06-15T13:45:30 -> juni 2009 (da-DK) 2009-06-15T13:45:30 -> Juni 2009 (id-ID) |
Shown below, the user may select one of the available standard options from the drop-down menu.
To finalize the update, click the plus icon next to the column that has been formatted— in this example, BeginDate, to apply the new dynamic date format. Then as a final step, select Apply to apply the changes and close the menu.

Finally, save and publish the Data Object. Note that this example applies to this particular sample Data Object, but similar options for dynamic date formatting are available in other areas where dynamic variables can be added.
Custom Date Formats #
To access Custom Date Formats, follow the same steps as with selecting a Standard Date Formats, except instead of selecting “Standard”, select. “Custom” from the Type dropdown. Users may then either insert the elements, shown below, individually or may select from a pre-defined style.
| Element | Description |
|---|---|
| “space” | Space, used as a separator (e.g., “08 13”) |
| , | Comma, , used as a separator (e.g., “08, 2024”) |
| – | Simple dash, used as a separator (e.g., “08-13”) |
| / | backslash, used as a separator (e.g., “08/13”) |
| d | Day, with no leading zeros. (e.g., “8”) |
| dd | Day, with leading zeros (e.g., “08”) |
| dddd | Long form date (e.g., “Saturday”) |
| MM | Short form month (e.g., “08”) |
| MMMM | Long form month (e.g., “August”) |
| yy | Short form year (e.g., “23”) |
| yyyy | Long form year (e.g., “2023”) |
To finalize the update, click the plus icon next to the column that has been formatted— in this example, BeginDate, to apply the new dynamic date format. Then as a final step, select Apply to apply the changes and close the menu.